Welcome
Getting Started
How to Guides
Application vs Blocklet
Create Blocklet
Compose Blocklets
Develop Blocklet
User and Passport
Communicate with DID Wallet
Blocklet Storage
Using Blocklet Preferences
Using Blocklet Logger
Add PWA Integration to Blocklet
Build blocklet for profit [deprecated]
Bundle your blocklet
Manage Blocklet Versions
Publish your blocklet to the world
Deploy your blocklet
Read/Write blockchain in blocklet
Operation your blocklet
Reference Guides
DID Connect
blocklet.yml
blocklet.js
Blocklet SDK (Node.js)
Blocklet SDK (Browser)
Blocklet Service
Blocklet CLI
Blocklet Server CLI
Blocklet UI
Blocklet GitHub Actions
Blocklet Studio
Blocklet Manager
Security
Performance
Developer Best Practices.
Known Issues or Limitations
Setup Blocklet Server
WebHooks
OAuth Server
Access Key
MCP Servers
Conceptual Guides
Frequently Asked Questions
Customize user profile page
As Blocklet development progresses, a demand for personalized profile page is highly likely to emerge. Because of the Blocklet platform's composability, support for multi-Blocklet personalized profile page has been incorporated from the outset. The following details how to use Blocklet components to implement a customized personal profile page for the entire application.
What is the User Profile?#
This button simply links to your profile page.
Clicking this link will redirect you to https://www.arcblock.io/.well-known/service/user
This address acts as a relay, locating the application's actual profile page and redirecting to it. This mechanism allows Blocklet components to inject custom profile pages.
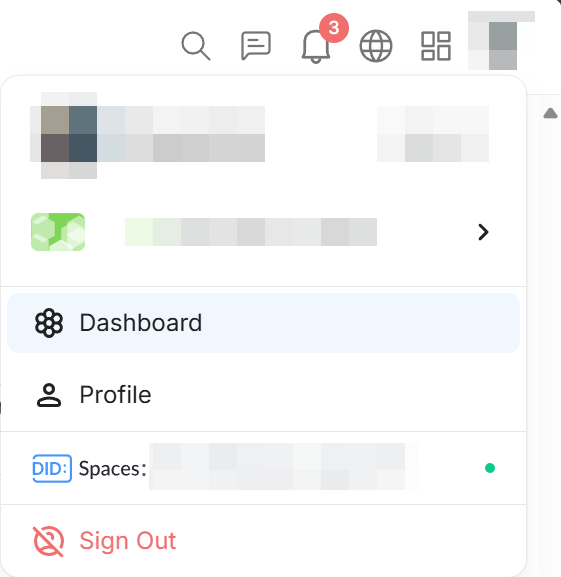
The profile page features a two-column layout. The left column, highlighted in red, serves as the menu and includes default entries for each Blocklet application: Notifications, Profile, Settings, and DID Spaces.
The first menu item, Discussions, is powered by the Discuss Kit.
The blue area to the right is the content area, the specific application providing the content displayed within it.

Integrating a Blocklet Component's Profile Page into Your Application#
Developing a customized personal center page is easy; just follow these few steps.
Using the UserCenter Component in a Custom Profile Center Page#
import { UserCenter } from '@blocklet/ui-react';

export default function CustomProfile() {
  return (
    <UserCenter currentTab={window.blocklet.prefix}>
		  {customContent}
		</UserCenter>
  );
}
The customContent property defines the content you want to customize, which will appear in the blue area shown above.
Declare menus in blocklet.yml#
Add the following to your blocklet.yml file to declare a menu in the user profile area.
navigation:
  - id: profile
    title:
      en: Profile
      zh: Profile
    link: /
    section:
      - userCenter
Configure menu order in Blocklet settings#
Open the /.well-known/service/admin/navigation page for the current application.

Select the User Center tab. The menu declared in the previous step will automatically appear there.
Drag the dot icon in front of each item to reorder the menu items. Make sure the page you want to access directly from your profile is at the top of the list.
Click the Save button
All setup is now complete