Welcome
Getting Started
How to Guides
Application vs Blocklet
Create Blocklet
Compose Blocklets
Develop Blocklet
User and Passport
Communicate with DID Wallet
Blocklet Storage
Using Blocklet Preferences
Using Blocklet Logger
Add PWA Integration to Blocklet
Build blocklet for profit [deprecated]
Bundle your blocklet
Manage Blocklet Versions
Publish your blocklet to the world
Deploy your blocklet
Read/Write blockchain in blocklet
Operation your blocklet
Reference Guides
DID Connect
blocklet.yml
blocklet.js
Blocklet SDK (Node.js)
Blocklet SDK (Browser)
Blocklet Service
Blocklet CLI
Blocklet Server CLI
Blocklet UI
Blocklet GitHub Actions
Blocklet Studio
Blocklet Manager
Security
Performance
Developer Best Practices.
Known Issues or Limitations
Setup Blocklet Server
WebHooks
OAuth Server
Access Key
MCP Servers
Conceptual Guides
Frequently Asked Questions
Communicate with DID Wallet
Establish connection with DID Wallet#
Before the Blocklet communicates with the wallet, a Websocket connection needs to be established. There are two ways for Blocklet to establish a Websocket connection with the DID Wallet:
Method 1: After the DID Wallet logs in to the Blocklet through the Auth service provided by the Blocklet Service, it automatically establishes a Weboscket connection with the Blocklet.
Method 2: After DID Wallet connects to Blocklet through Blocklet using the DID Connect service implemented by Blocklet SDK, it automatically establishes a Weboscket connection with Blocklet.
You can learn the implementation through https://github.com/blocklet/notification-demo.
Send message to DID Wallet#
After Blocklet and DID Wallet establish a Websocket connection, notifications can be sent to DID Wallet through Blocklet SDK.
Send message to specified user#
Method 1: Send a 1-to-1 message to the user. If the user is not online, the message will be temporarily stored for a week, and the user will receive the message when he is online.
Notification.sendToUser(userDid, )
Method 2: Send messages to specified users through public channels. If the user is not online, messages are not staged.
Notification.broadcast(notification, { socketDid })
For details, see Blocklet SDK
Broadcast message to all online users#
Notification.broadcast(notification, { socketDid })
Broadcast time to all online users, if the user is not online, the message will not be temporarily stored.
For details, see Blocklet SDK
Message Format#
Message are in a similar format to emails, including text, attachments, and actions.
Text: Contains title and body text#
You can also send just the body, which is a simple text message.
// Send Text

await Notification.sendToUser(userDid, {
  title: "I'm the message title",
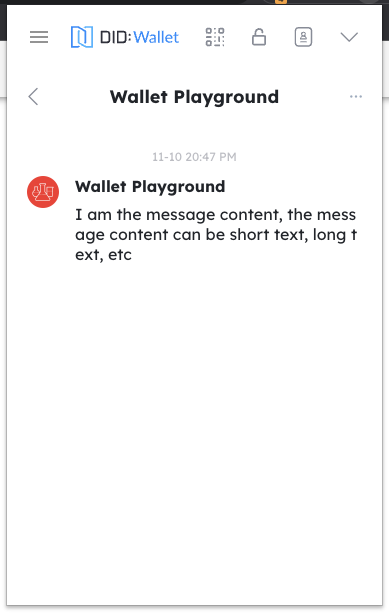
  body: 'I am the message content, the message content can be short text, long text, etc',
});
The wallet can receive notifications on the message page
Attachment: Send different types of attachments#
The types include Asset(NFT), VC, and Token
// Send Token

await Notification.sendToUser(userDid, {
  title: 'I am the title that sent the Token',
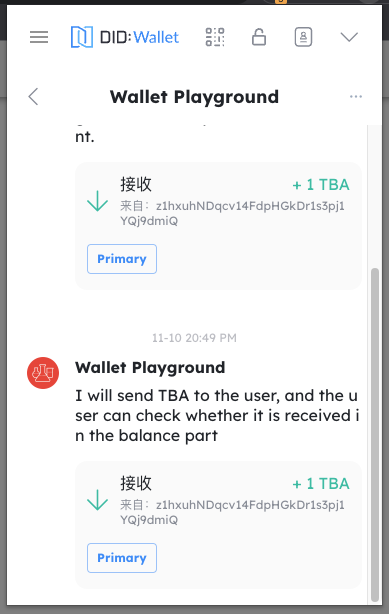
  body: 'I will send TBA to the user, and the user can check whether it is received in the balance part',
  attachments: [
    {
      type: 'token',
      data: {
        address: 'z35n6UoHSi9MED4uaQy6ozFgKPaZj2UKrurBG',
        amount: '1000000000000000000',
        symbol: 'TBA',
        senderDid: senderDid,
        chainHost: chainHost,
        decimal: 18,
      },
    },
  ],
});
The wallet can receive notifications on the message page
// Send NFT

await Notification.sendToUser(userDid, {
  title: 'I am sending the title of the NFT',
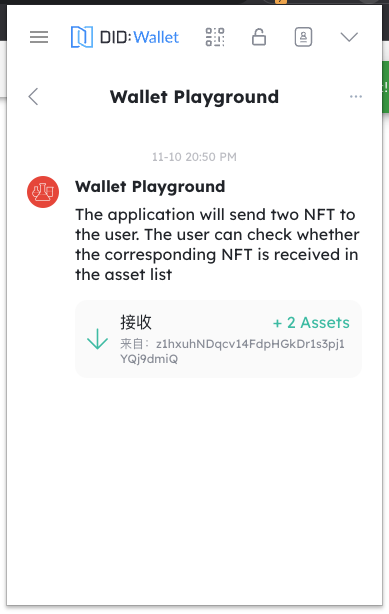
  body: 'The application will send two NFT to the user. The user can check whether the corresponding NFT is received in the asset list',
  attachments: [
    {
      type,
      data: {
        did: asset.address,
        chainHost: env.chainHost,
      },
    },
    {
      type,
      data: {
        did: asset2.address,
        chainHost: env.chainHost,
      },
    },
  ],
});
The wallet can receive notifications on the message page
// Send VC

const { create } = require('@arcblock/vc');

const vc = create({
  type: 'EmailVerificationCredential',
  issuer: {
    wallet: w,
    name: 'ArcBlock.KYC.Email',
  },
  subject: {
    id: userDid,
    emailDigest: toBase64(emailDigest),
    method: 'SHA3',
  },
});

await Notification.sendToUser(userDid, {
  title: 'I am sending the title of the VC',
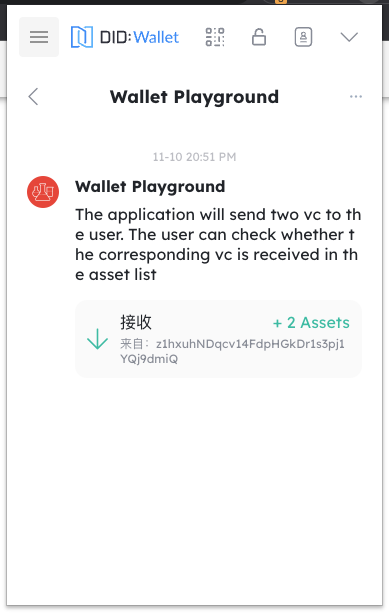
  body: 'The application will send two vc to the user. The user can check whether the corresponding vc is received in the asset list',
  attachments: [
    {
      type,
      data: {
        credential: vc,
        tag: vt.email,
      },
    },
    {
      type,
      data: {
        credential: vc,
        tag: passport.title,
      },
    },
  ],
});
The wallet can receive notifications on the message page
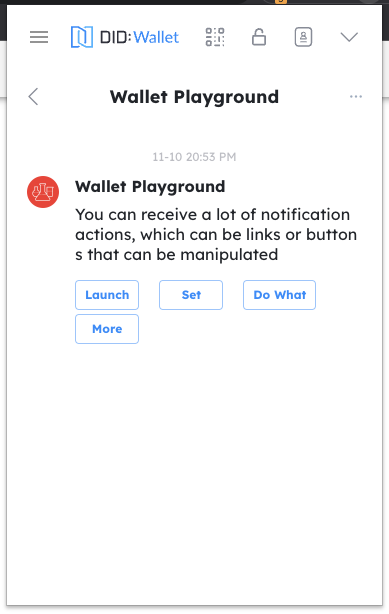
Operation: Send operation#
You can attach actions to a message (such as clicking to jump to a connection) that will be displayed as buttons in the wallet.
// Send with operations

await Notification.sendToUser(userDid, {
  title: "I'm the message title",
  body: 'You can receive a lot of notification actions, which can be links or buttons that can be manipulated',
  actions={[
    { name: 'launch', title: 'Launch', link: 'https://arcblock.io' },
    { name: 'Set', title: 'ABT', link: 'https://arcblock.io' },
    { name: 'Do What', title: 'Node', link: 'https://arcblock.io' },
    { name: 'More', title: 'More Action', link: 'https://arcblock.io' },
  ]}
});
The wallet can receive notifications on the message page
For details, see Blocklet SDK
Receive messages from DID Wallet#
Each time a connection is established with the DID Wallet, Blocklet will receive a 'hi' message from the wallet, which can be received by Blocklet through the Blocklet SDK.
After receiving this message, the Blocklet can send a separate message to the user.
For details, see Blocklet SDK