Start development
blocklet.yml
scripts:
  dev: npm run start
scripts.dev can be configured as any command
If the blocklet is purely front-end, there is no need to set scripts.dev. See blocklet.yml: Types
2. Execute blocklet dev in the project root directory
Example:
✔ Blocklet xxxxxxx@x.x.x was successfully started

ℹ You can access with the following URL

- http://xxxxxxxx-xxxxxxxxxxxxxxxxxxxxxxxxxxxxxxxxxxxx.did.abtnet.io
"blocklet dev" will first install an application in the Server, and then automatically hang the blocklet in the application and start it. If you want to hang your blocklet into other applications for development, see "Hang the Blocklet into Application Development"
To hang Blocklet into application development, add --app-did and optional --mount-point parameters to the blocklet dev command.
blocklet dev --app-did <app-did> --mount-point /xxx
Or
BLOCKLET_DEV_APP_DID=<app-did> BLOCKLET_DEV_MOUNT_POINT=/xxx blocklet dev
Or
- Configure in
.env
BLOCKLET_DEV_APP_DID=<blocklet-app-did>
BLOCKLET_DEV_MOUNT_POINT=/xxx
blocklet dev
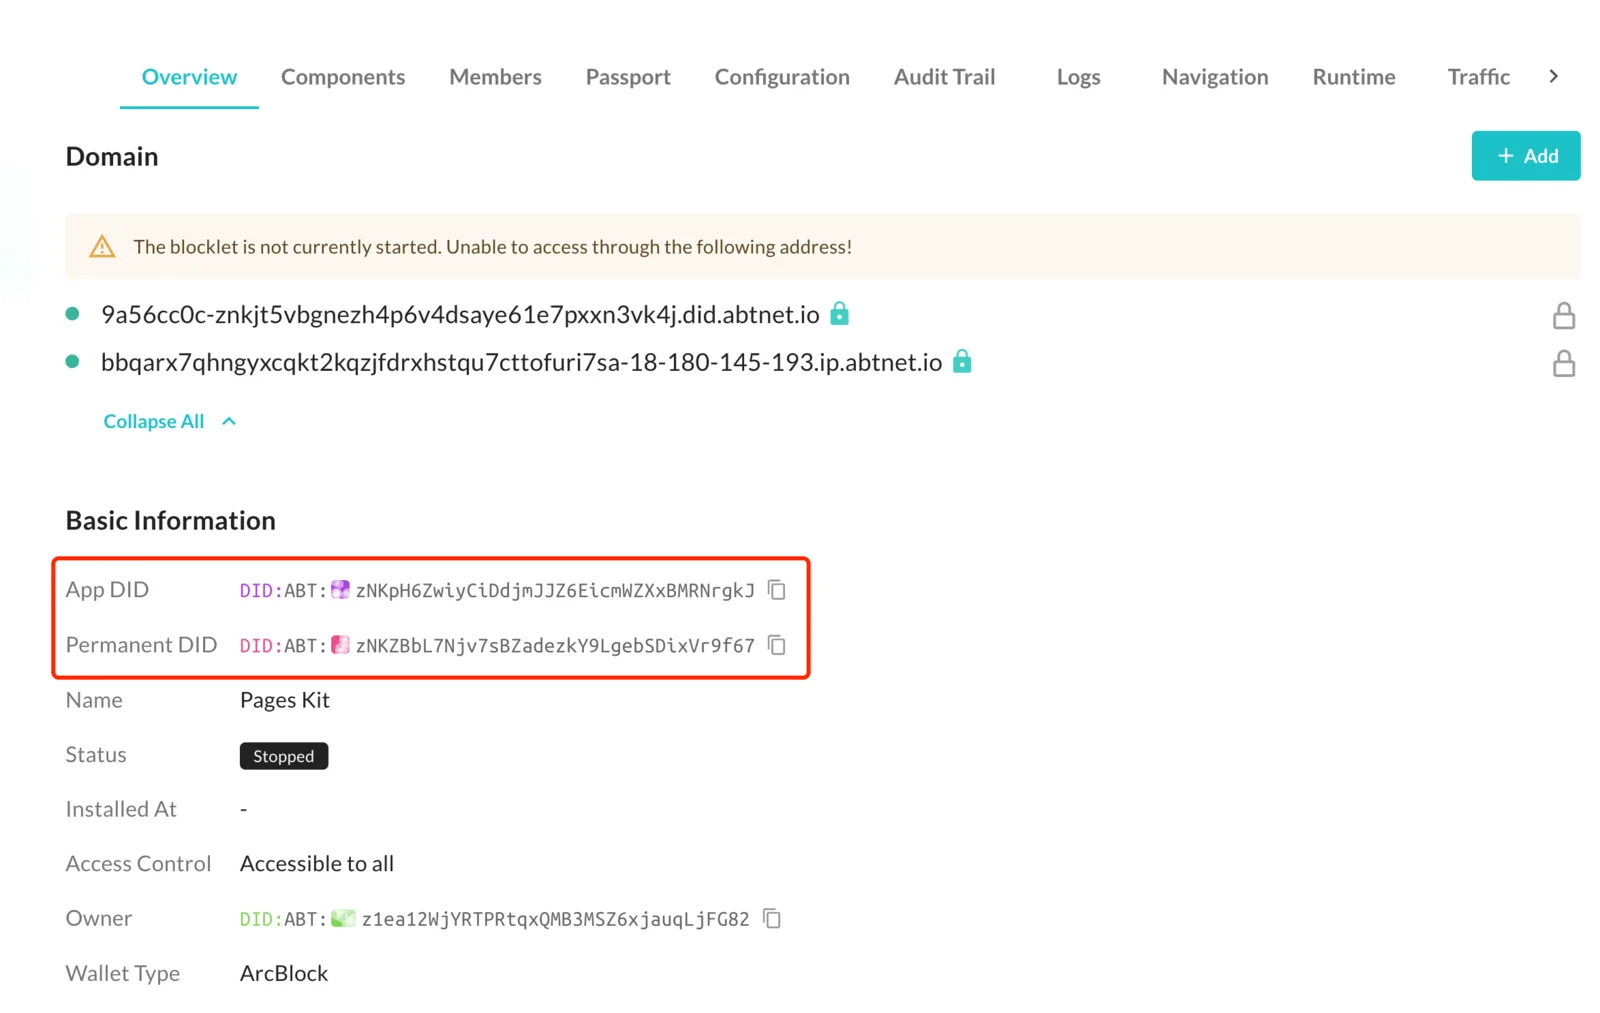
--app-did Can be viewed in the blocklet details page (either App DID or Permanent DID can be used)
/, /path, /path/to
/ or /xxx
Front-end: After introducing blocklet runtime informationwindow.blocklet.prefix
x-path-prefix in the request header.
server.use((req, res) => {
  const mountPoint = req.headers['x-path-prefix'];
});
API
Example:
- Component declaration API:
/api/foo /child- Client request
/child/api/foo - Blocklet Service forwards the request to the component and removes the prefix
/child - Component receives request
/api/foo
Redirection
We need to support redirection of the backend working properly with relative paths
const prefix = req.headers['x-path-prefix'];

res.redirect(`${prefix}path/to`);
We need to support front-end redirection working properly under relative paths
const prefix = window.blocklet.prefix;

window.location.href = `${prefix}path/to`;
Load front-end static resources
Because the front-end page of Blocklet will be loaded under a relative path (such as /child1/index.html), we need to support loading front-end static resources under a relative path.
When building the app, change the app's front-end static resource prefix to /.blocklet/proxy/<blocklet did>
PUBLIC_URL='/.blocklet/proxy/xxxxxxxxxxxxxxxxxxxxxxxxxxxxxxxxxxxx' npm run build
You usually don't need to configure it manually. When you create a Blocklet project using Create Blocklet, everything is already configured for you.
Stop development
After starting development, press CTRL + C in the terminal to stop development
Clear data
After you stop developing a blocklet, the persistent data of the blocklet will not be automatically cleared.
You can clear all data of the blocklet through blocklet dev clear
If you hang the blocklet in an application, you can clear the data through blocklet dev clear --app-did <app-did>
Get configuration
After the blocklet is started, the current running environment and configuration of the Blocklet can be obtained through the Blocklet SDK
Get the running environment: see Blocklet SDK: Environment
Get configuration: see Blocklet SDK: Config
Declare configuration
Declare the configuration in blocklet.yml:
environments:
  - name: KEY_1
    description: 'description for KEY_1'
    default: ''
    required: false
    secure: false
shared: truename: variable namedescription: variable descriptiondefault: default valuerequired: Is it required?shared: whether visible to clients and componentssecure: Environment variables withsecureset totruewill be stored encrypted and will not be visible to clients and components.
When developing a blocklet, you can also set environment variables in a .env or .env.development file in the project root directory
Note: Only environment variables declared in blocklet.yml can be set in .env or .env.development
Example:
# .env

KEY_1=value1
After blocklet is installed, users can configure environment variables in the blocklet management panel.
Get the blocklet running environment on the page
You can obtain the blocklet running environment by requesting the __blocklet__.js interface of the blocklet.
The blocklet project created through Create Blocklet provides an out-of-the-box environment. You can obtain the running environment through window.blocklet
// App DID
window.blocklet.appId

// App version
window.blocklet.version

// Application Name
window.blocklet.appName

// Application description
window.blocklet.appDescription

// Application Url
window.blocklet.appUrl

// Shared environment variables
window.blocklet.<shared env>
Blocklet Scripts
Blocklet Server provides hook functions to do some things during the execution life cycle. Currently it includes pre-install, post-install, pre-start, post-start, pre-stop, pre-uninstall, pre-config Hooks.
Run scripts in a blocklet environment
When developing blocklets, sometimes we want to execute scripts in the blocklet environment (such as creating some test data).
This can be achieved by executing blocklet exec, such as
blocklet exec mock/test.js
// mock/test.js

const { env } = require('@blocklet/sdk');
const { getWallet } = require('@blocklet/sdk');

console.log(env);
console.log(getWallet().address);
Communication between Blocklet components
Use the Blocklet SDK to communicate with other blocklets in your app
const { component } = require('@blocklet/sdk');

(async () => {
  await component.call(name, path, data);
})();
How to migrate during upgrade
When the data structure of the blocklet's persistent storage is incompatible with changes, we can use the migration script to complete automatic data migration.
Method:
Create a migration directory under the blocklet root directory
Create a migration file in the migration directory with the file name semver version, such as 1.0.1.js
Example:
There are 3 files 1.0.0.js, 1.0.1.js, 1.1.0.js in the migration directory
When the blocklet is upgraded from 1.0.0 to 1.2.0, the two migration scripts 1.0.1.js and 1.1.0.js will be executed.
Warning: The migration folder needs to be added to the files field in the blocklet.yml file as follows:
files:
  - ...
  - migration