Establish connection with DID Wallet
Before the Blocklet communicates with the wallet, a Websocket connection needs to be established. There are two ways for Blocklet to establish a Websocket connection with the DID Wallet:
Method 1: After the DID Wallet logs in to the Blocklet through the Auth service provided by the Blocklet Service, it automatically establishes a Weboscket connection with the Blocklet.
Method 2: After DID Wallet connects to Blocklet through Blocklet using the DID Connect service implemented by Blocklet SDK, it automatically establishes a Weboscket connection with Blocklet.
You can learn the implementation through https://github.com/blocklet/notification-demo.
Send message to DID Wallet
After Blocklet and DID Wallet establish a Websocket connection, notifications can be sent to DID Wallet through Blocklet SDK.
Send message to specified user
Method 1: Send a 1-to-1 message to the user. If the user is not online, the message will be temporarily stored for a week, and the user will receive the message when he is online.
Notification.sendToUser(userDid, )
Method 2: Send messages to specified users through public channels. If the user is not online, messages are not staged.
Notification.broadcast(notification, { socketDid })
For details, see Blocklet SDK
Broadcast message to all online users
Notification.broadcast(notification, { socketDid })
Broadcast time to all online users, if the user is not online, the message will not be temporarily stored.
For details, see Blocklet SDK
Message Format
Message are in a similar format to emails, including text, attachments, and actions.
Text: Contains title and body text
You can also send just the body, which is a simple text message.
// Send Text

await Notification.sendToUser(userDid, {
  title: "I'm the message title",
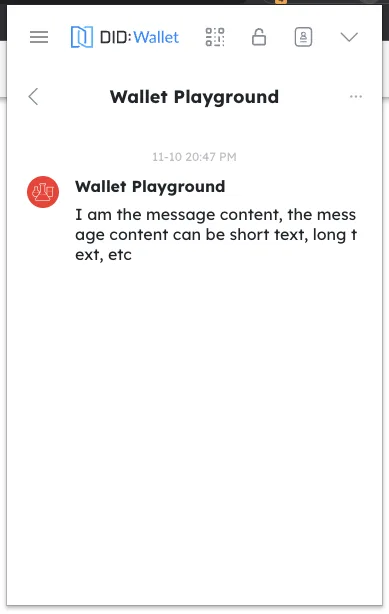
  body: 'I am the message content, the message content can be short text, long text, etc',
});
The wallet can receive notifications on the message page
Attachment: Send different types of attachments
The types include Asset(NFT), VC, and Token
// Send Token

await Notification.sendToUser(userDid, {
  title: 'I am the title that sent the Token',
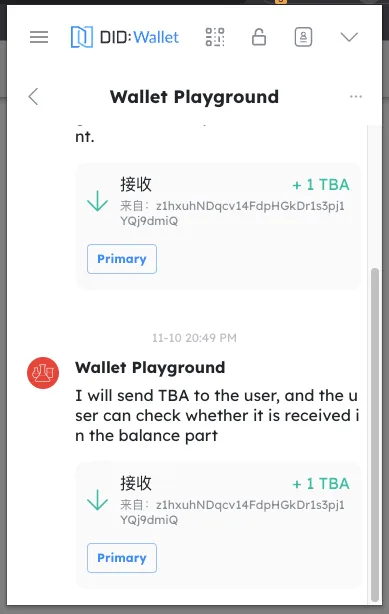
  body: 'I will send TBA to the user, and the user can check whether it is received in the balance part',
  attachments: [
    {
      type: 'token',
      data: {
        address: 'z35n6UoHSi9MED4uaQy6ozFgKPaZj2UKrurBG',
        amount: '1000000000000000000',
        symbol: 'TBA',
        senderDid: senderDid,
        chainHost: chainHost,
        decimal: 18,
      },
    },
  ],
});
The wallet can receive notifications on the message page
// Send NFT

await Notification.sendToUser(userDid, {
  title: 'I am sending the title of the NFT',
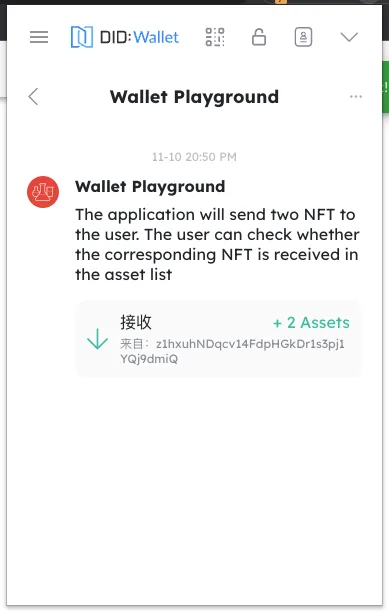
  body: 'The application will send two NFT to the user. The user can check whether the corresponding NFT is received in the asset list',
  attachments: [
    {
      type,
      data: {
        did: asset.address,
        chainHost: env.chainHost,
      },
    },
    {
      type,
      data: {
        did: asset2.address,
        chainHost: env.chainHost,
      },
    },
  ],
});
The wallet can receive notifications on the message page
// Send VC

const { create } = require('@arcblock/vc');

const vc = create({
  type: 'EmailVerificationCredential',
  issuer: {
    wallet: w,
    name: 'ArcBlock.KYC.Email',
  },
  subject: {
    id: userDid,
    emailDigest: toBase64(emailDigest),
    method: 'SHA3',
  },
});

await Notification.sendToUser(userDid, {
  title: 'I am sending the title of the VC',
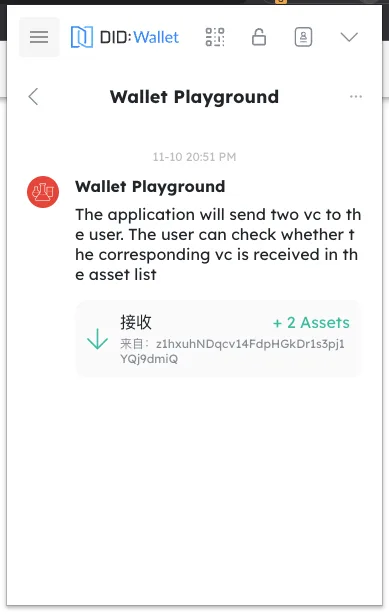
  body: 'The application will send two vc to the user. The user can check whether the corresponding vc is received in the asset list',
  attachments: [
    {
      type,
      data: {
        credential: vc,
        tag: vt.email,
      },
    },
    {
      type,
      data: {
        credential: vc,
        tag: passport.title,
      },
    },
  ],
});
The wallet can receive notifications on the message page
Operation: Send operation
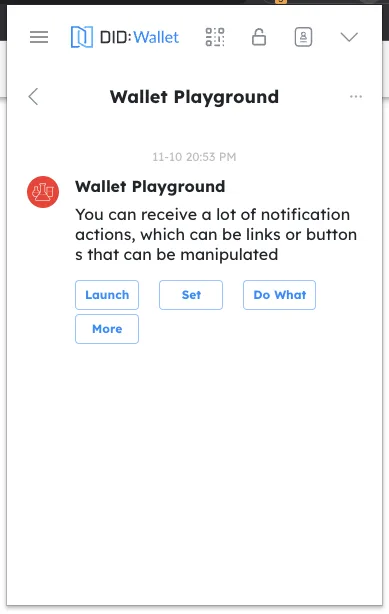
You can attach actions to a message (such as clicking to jump to a connection) that will be displayed as buttons in the wallet.
// Send with operations

await Notification.sendToUser(userDid, {
  title: "I'm the message title",
  body: 'You can receive a lot of notification actions, which can be links or buttons that can be manipulated',
  actions={[
    { name: 'launch', title: 'Launch', link: 'https://arcblock.io' },
    { name: 'Set', title: 'ABT', link: 'https://arcblock.io' },
    { name: 'Do What', title: 'Node', link: 'https://arcblock.io' },
    { name: 'More', title: 'More Action', link: 'https://arcblock.io' },
  ]}
});
The wallet can receive notifications on the message page
For details, see Blocklet SDK
Receive messages from DID Wallet
Each time a connection is established with the DID Wallet, Blocklet will receive a 'hi' message from the wallet, which can be received by Blocklet through the Blocklet SDK.
After receiving this message, the Blocklet can send a separate message to the user.
For details, see Blocklet SDK