Before you begin:
Blocklet Studio now supports creating Blocklets from Docker images. This feature allows developers to focus on their unique innovations by leveraging existing open-source functionality available through the Docker ecosystem.
In this article, I'll describe how to create a WordPress Blocklet.
Building a MySQL Blocklet
First, the WordPress Docker image relies on MySQL, so we'll begin by creating a MySQL Blocklet. Future WordPress deployments will then use this MySQL instance as a Blocklet dependency.
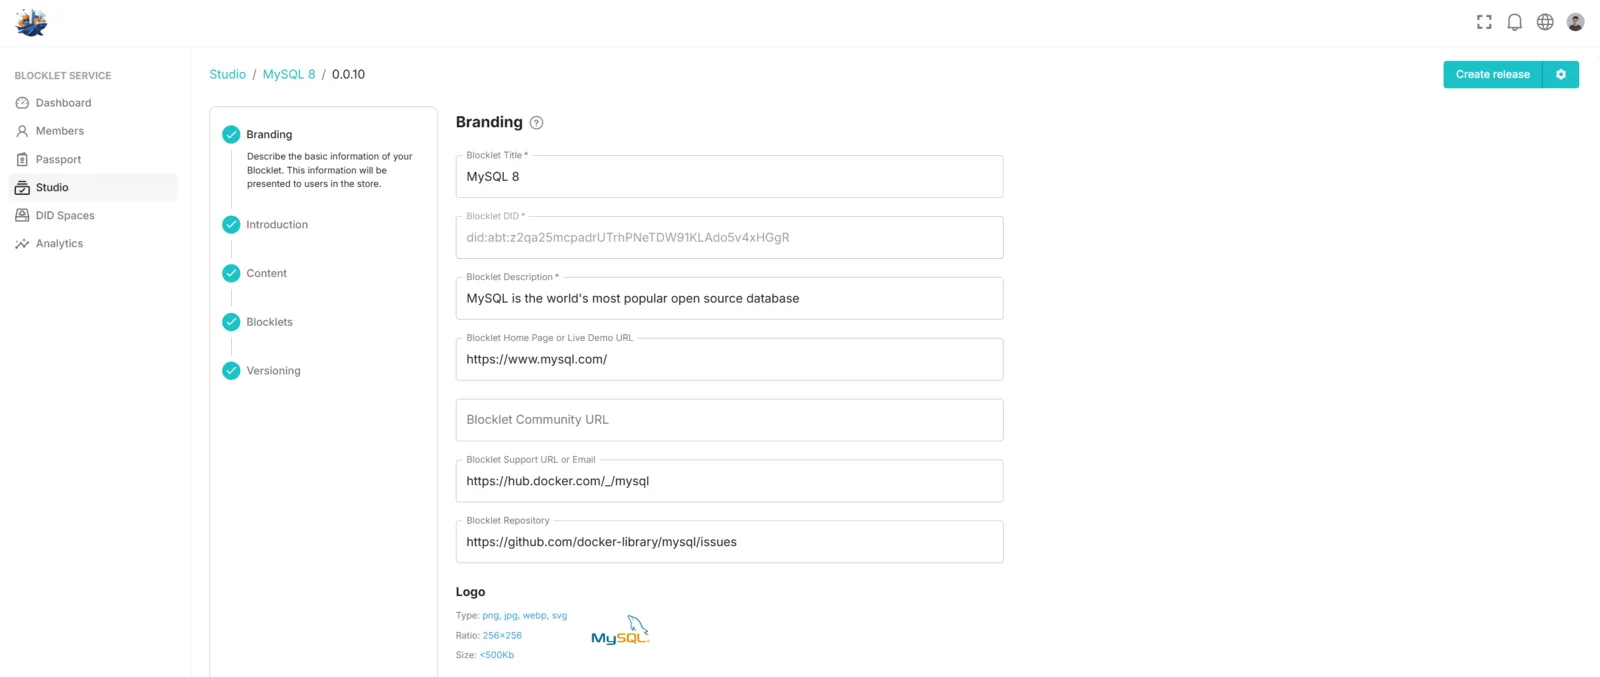
We assume you're familiar with creating a standard Blocklet using Blocklet Studio. The image below shows the basic MySQL information:
This Blocklet's DID, z2qa25mcpadrUTrhPNeTDW91KLAdo5v4xHGgR, will be used later.
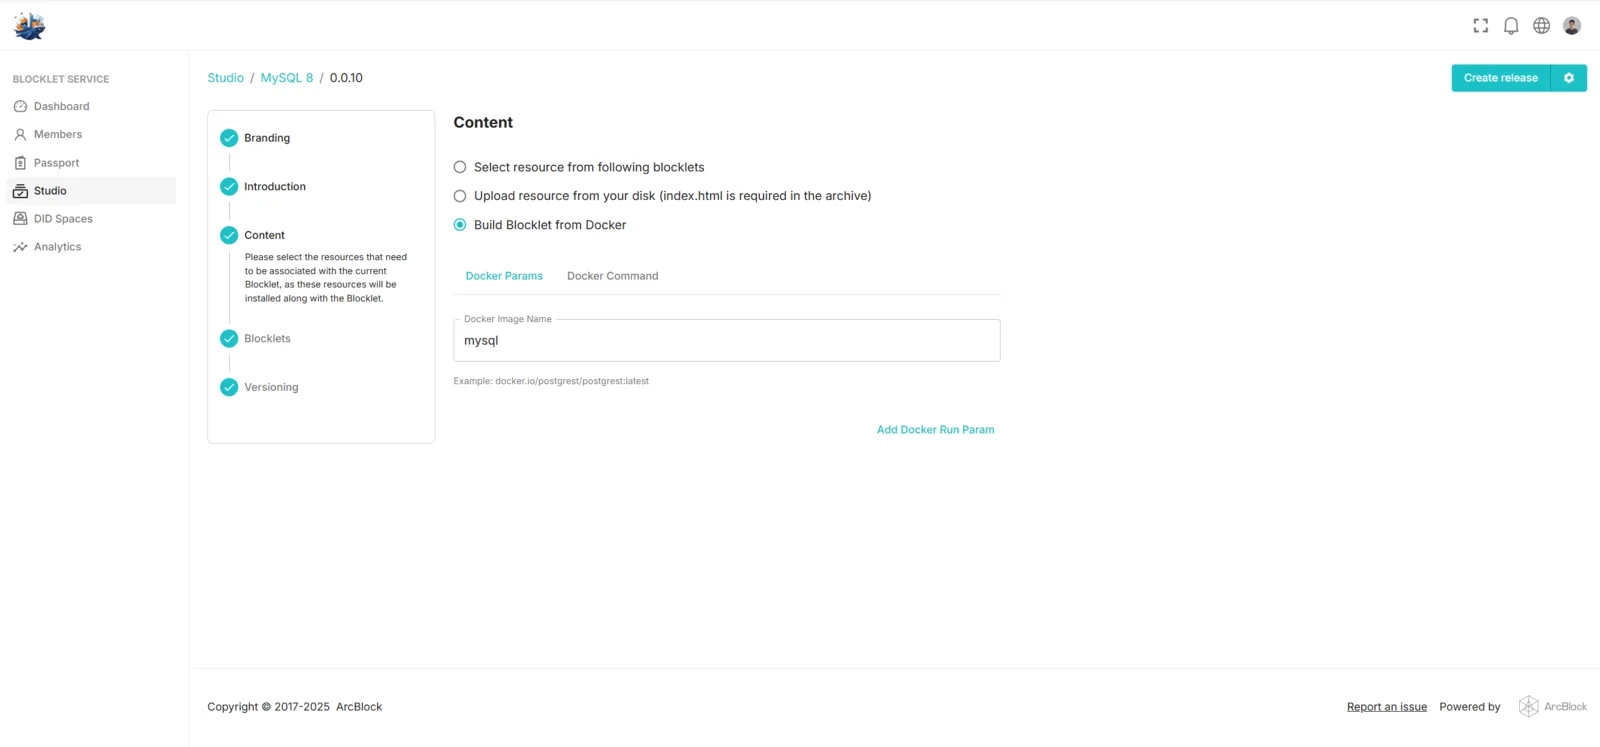
Then in the Content section, we select Build Blocklet from Docker:
Then we click Docker Command and paste the docker run command for MySQL:
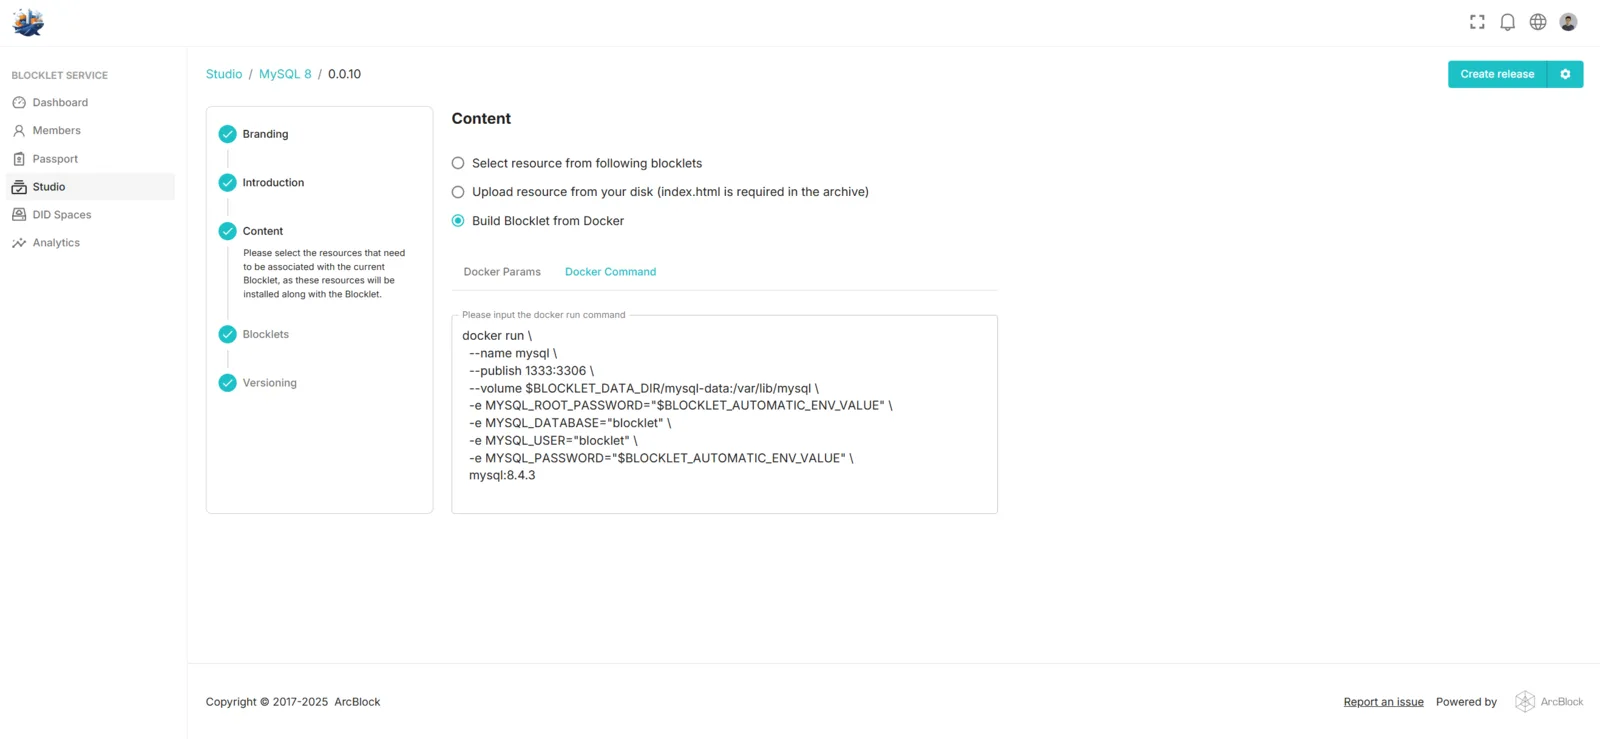
The full command shown is:
docker run \
  --name mysql
  --publish 1333:3306 \
  --volume $BLOCKLET_DATA_DIR/mysql-data:/var/lib/mysql \
  -e MYSQL_ROOT_PASSWORD="$BLOCKLET_AUTOMATIC_ENV_VALUE" \
  -e MYSQL_DATABASE="blocklet" \
  -e MYSQL_USER="blocklet" \
  -e MYSQL_PASSWORD="$BLOCKLET_AUTOMATIC_ENV_VALUE" \
  mysql:8.4.3
Returning to the Docker Params, we see the docker run command has been automatically parsed:
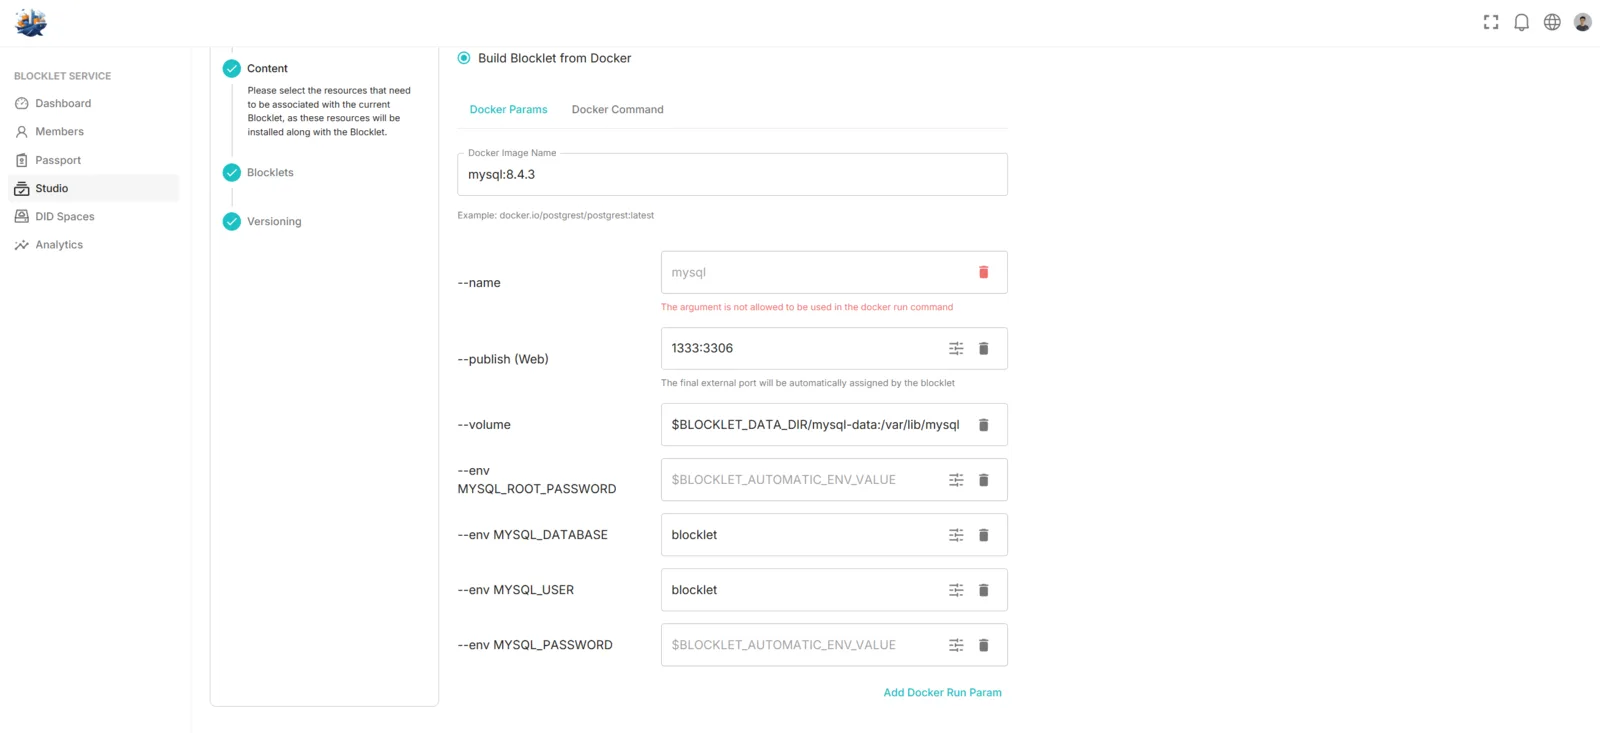
Notice the red error for the --name parameter. Blocklet Server automatically manages container names during Docker runtime to ensure network isolation and handle internal requests. Therefore, setting this parameter is not allowed. Similarly, several other Docker parameters are also restricted to prevent potential security risks to the host machine during Blocklet operation. Any disallowed Docker parameters will be flagged with a red warning after parsing.
We can publish the Blocklet without the --name flag. However, to simplify installation for users, we can configure some additional settings:
Setting 1: Change the --publish option to docker. The --publish option exposes ports within the Docker container to the host machine. Port conflicts are handled automatically by the Blocklet Server, which reassigns ports as needed. The --publish(web) option, conversely, signifies that the Blocklet Server should assign a mount point for access. Since direct access to MySQL isn't required, we change the option to docker.
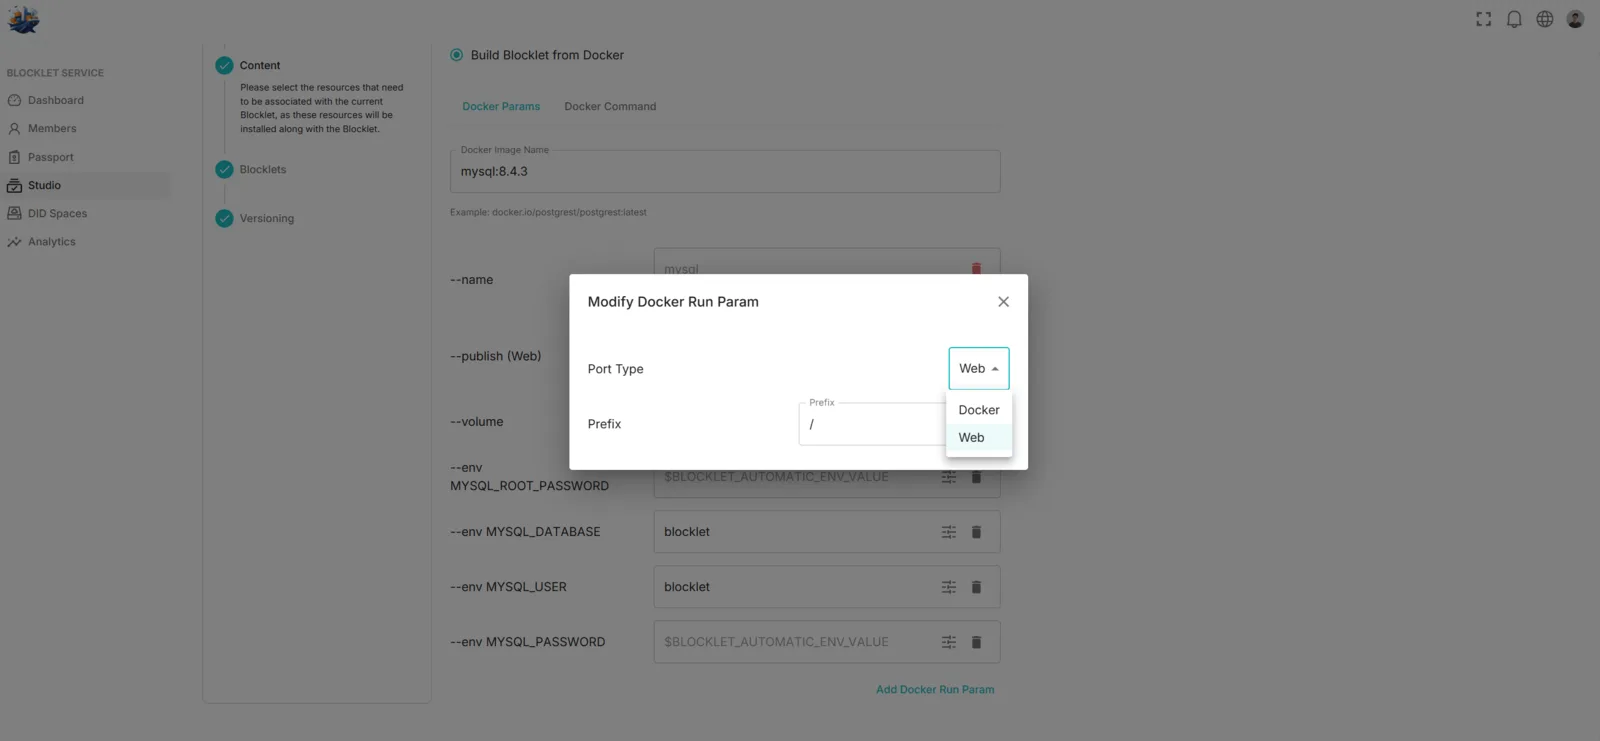
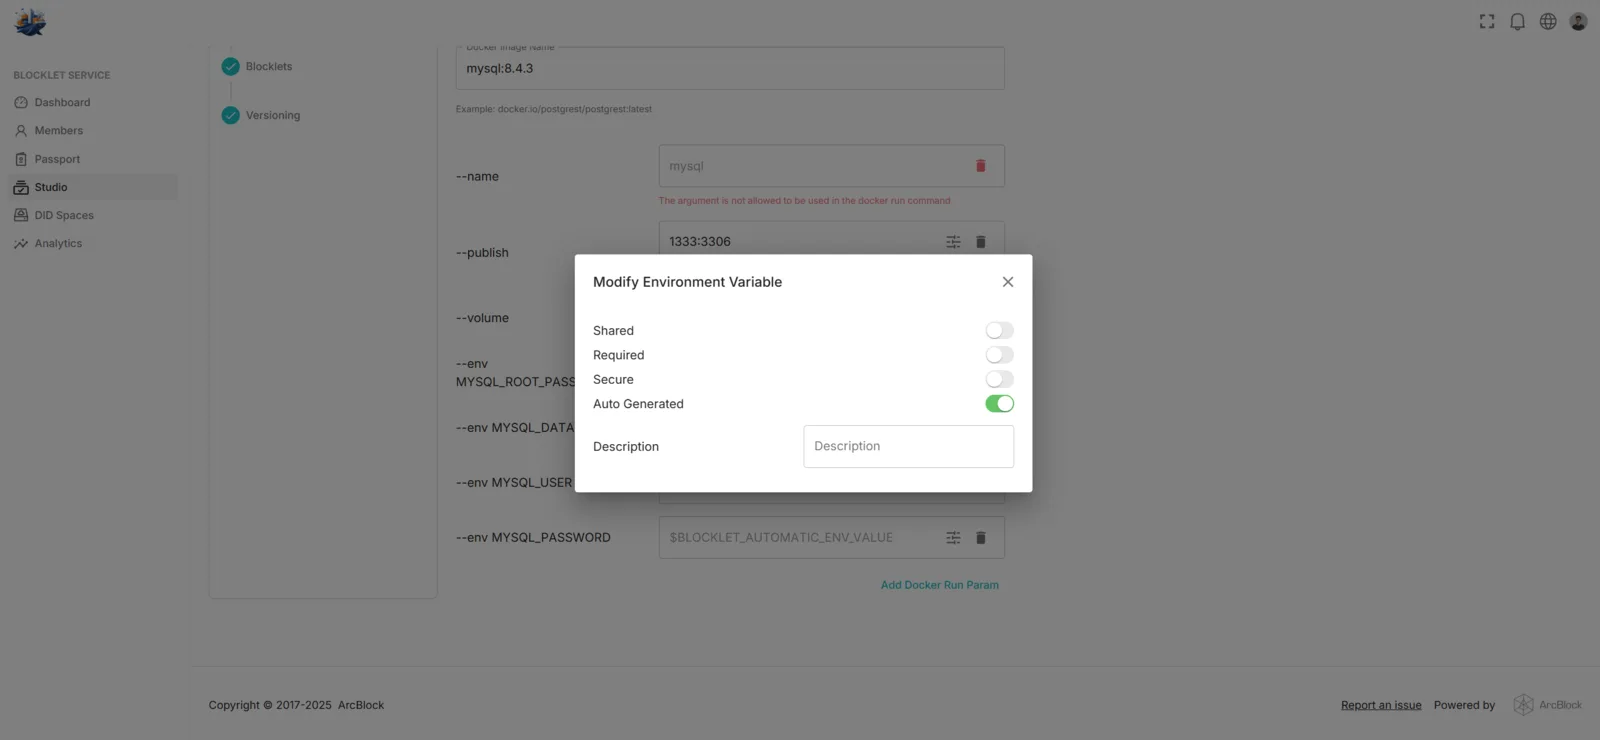
Setting 2: For --env MYSQL_ROOT_PASSWORD and --env MYSQL_PASSWORD, we have two design options: require users to set these values during initial Blocklet installation, or generate them automatically.
We've automated this process. When a user runs a Blocklet, a password is generated based on the running application's private key. This password is unique to each application and remains constant for that specific application. While there isn't currently a way to retrieve this automatically generated password, this functionality will be available in the future.
For simplified user installation, these are automatically generated.
MySQL 8's final configuration:
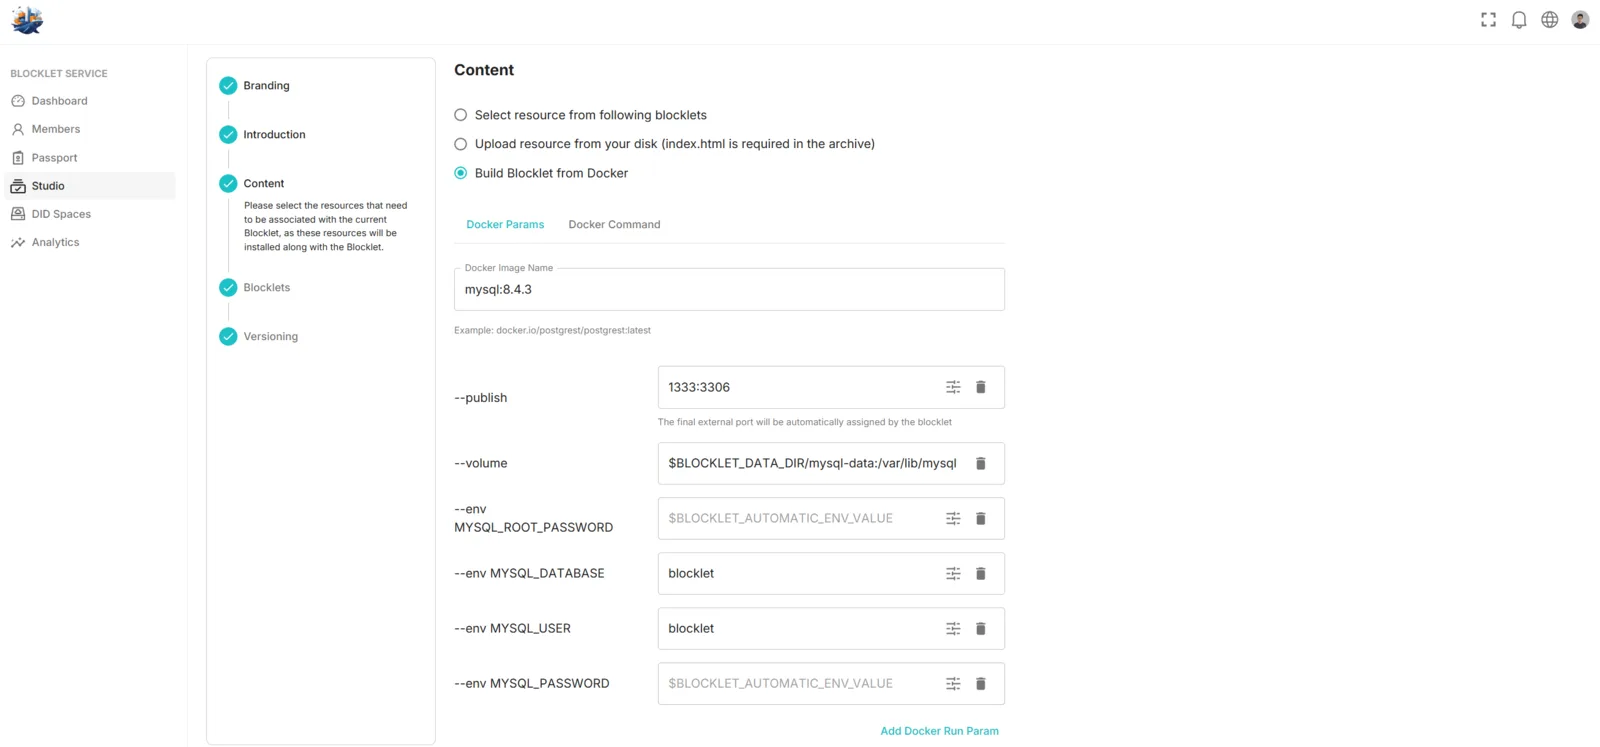
Explain the settings shown above:
- --publish 1333:3306: We've made port 3306 of the WordPress Docker container accessible to the Blocklet Server. Since this isn't a web-based Blocklet, the Blocklet Server won't assign it a mount point.
- --volume $BLOCKLET_DATA_DIR...
: Mounts any directories within the Docker container requiring persistent storage under the Blocklet data directory. The$BLOCKLET_DATA_DIR` path is automatically prepended, and these persistent directories must be subdirectories within this path. - --env MYSQL_ROOT_PASSWORD: This environment variable sets the root password for MySQL, which will be automatically generated when the Blocklet starts.
- --env MYSQL_MYSQL_UESR: Sets the default database name
- --env MYSQL_MYSQL_USER: Set the database username
- --env MYSQL_PASSWORD: Setting this password will automatically generate the MySQL database when the Blocklet starts
Creating a MySQL Blocklet is straightforward.
Next, we'll upload MySQL to the test store, publish it, and install it in this application. This will serve as a dependency for WordPress.
Building a WordPress Blocklet
Assuming you've installed the recently released MySQL Blocklet Service, let's create a WordPress Blocklet.
Likewise, we complete the basic WordPress setup:
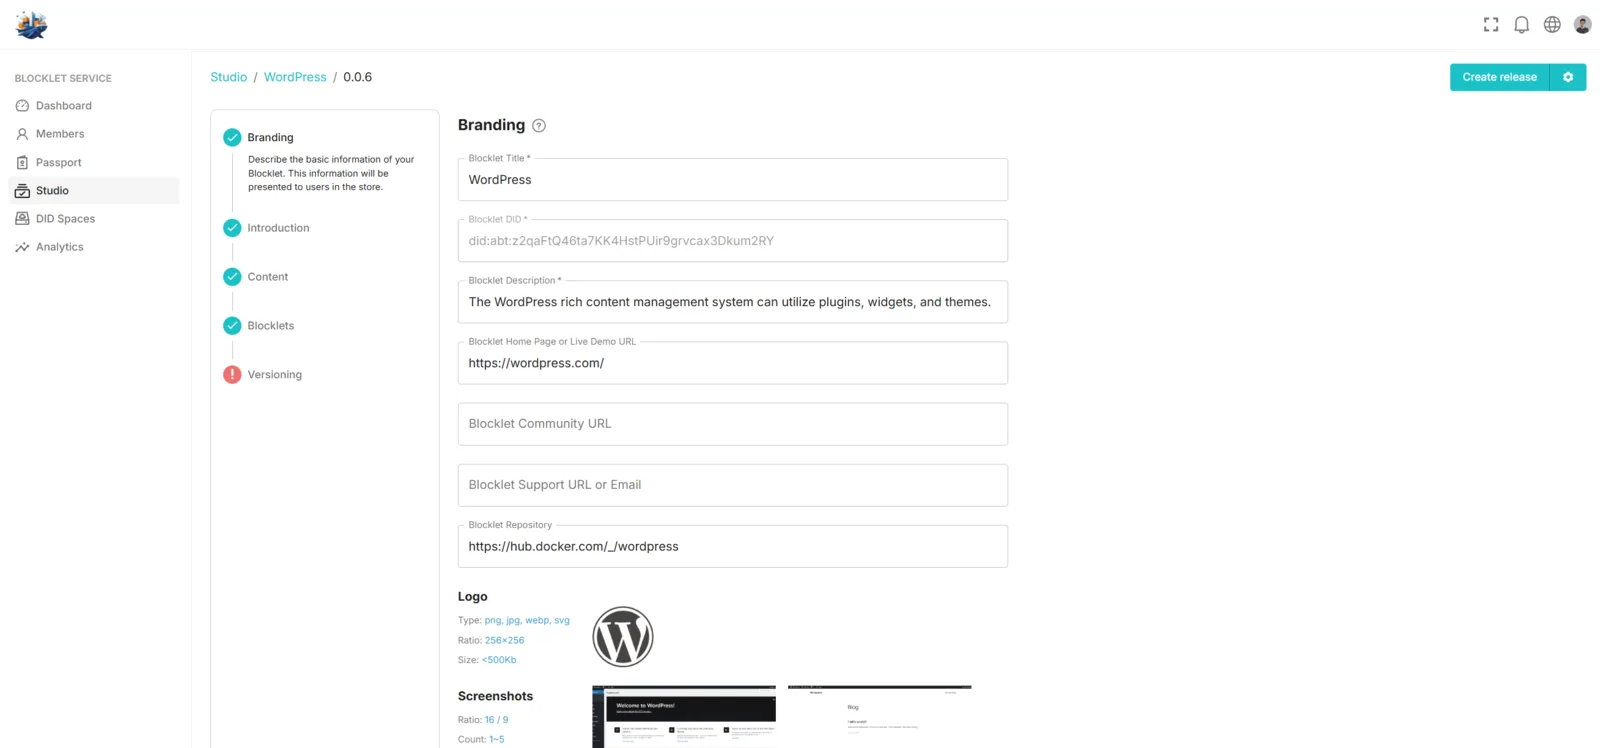
Then we open the Content tab, click Docker Command, and paste the WordPress docker run command:
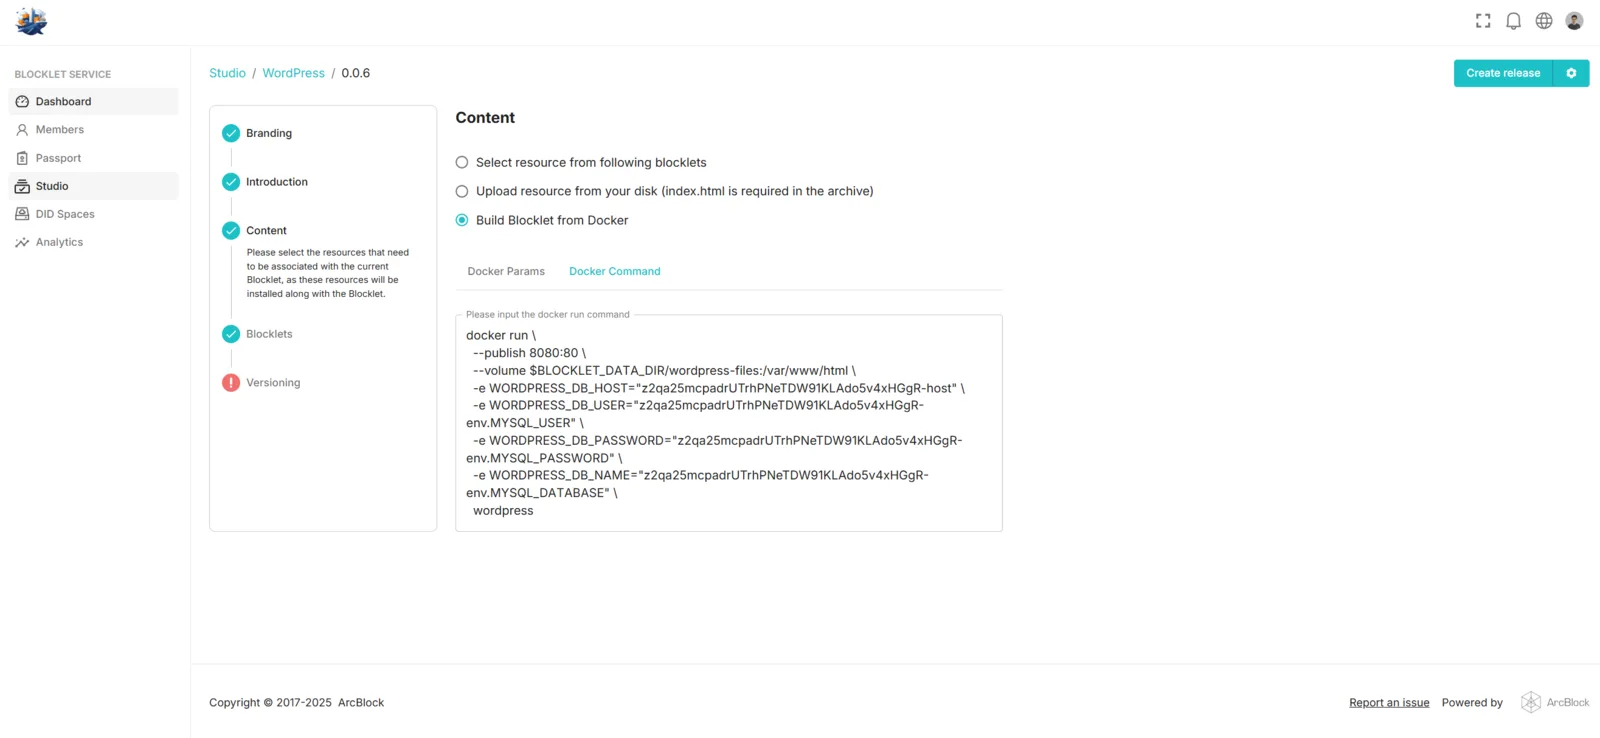
The full command shown is:
docker run \
  --publish 8080:80 \
  --volume $BLOCKLET_DATA_DIR/wordpress-files:/var/www/html \
  -e WORDPRESS_DB_HOST="z2qa25mcpadrUTrhPNeTDW91KLAdo5v4xHGgR-host" \
  -e WORDPRESS_DB_USER="z2qa25mcpadrUTrhPNeTDW91KLAdo5v4xHGgR-env.MYSQL_USER" \
  -e WORDPRESS_DB_PASSWORD="z2qa25mcpadrUTrhPNeTDW91KLAdo5v4xHGgR-env.MYSQL_PASSWORD" \
  -e WORDPRESS_DB_NAME="z2qa25mcpadrUTrhPNeTDW91KLAdo5v4xHGgR-env.MYSQL_DATABASE" \
  wordpress
This information requires a bit of explanation. It appears complex because we're configuring the future MySQL installation to serve as the WordPress database.
WordPress requires setting the DB host. Here, we enter the DID of the MySQL instance we just created, appended with -host, which indicates the host address of a running Blocklet.
-e WORDPRESS_DB_HOST="z2qa25mcpadrUTrhPNeTDW91KLAdo5v4xHGgR-host"WordPress requires you to set the DB User, DB Password, and DB Name. Here, we enter the DID of the MySQL instance we just created, followed by -env., and finally the environment variable key. This combination represents the value of a specific environment variable after a Blocklet has finished running.
-e WORDPRESS_DB_USER="z2qa25mcpadrUTrhPNeTDW91KLAdo5v4xHGgR-env.MYSQL_USER" \
-e WORDPRESS_DB_PASSWORD="z2qa25mcpadrUTrhPNeTDW91KLAdo5v4xHGgR-env.MYSQL_PASSWORD" \
-e WORDPRESS_DB_NAME="z2qa25mcpadrUTrhPNeTDW91KLAdo5v4xHGgR-env.MYSQL_DATABASE" \
These settings effectively do the following:
- DB_USER is bound to the MySQL environment variable MYSQL_USER.
- The
DB_PASSWORDenvironment variable is bound to MySQL'sMYSQL_PASSWORDenvironment variable. - DB_NAME is bound to the MYSQL_DATABASE environment variable for MySQL.
This combination process is currently based on a convention. Should the need arise to create Docker-based Blocklets more frequently, we will develop a more graphical configuration solution.
Switching back to Docker Params, we see that they have been automatically identified and configured.
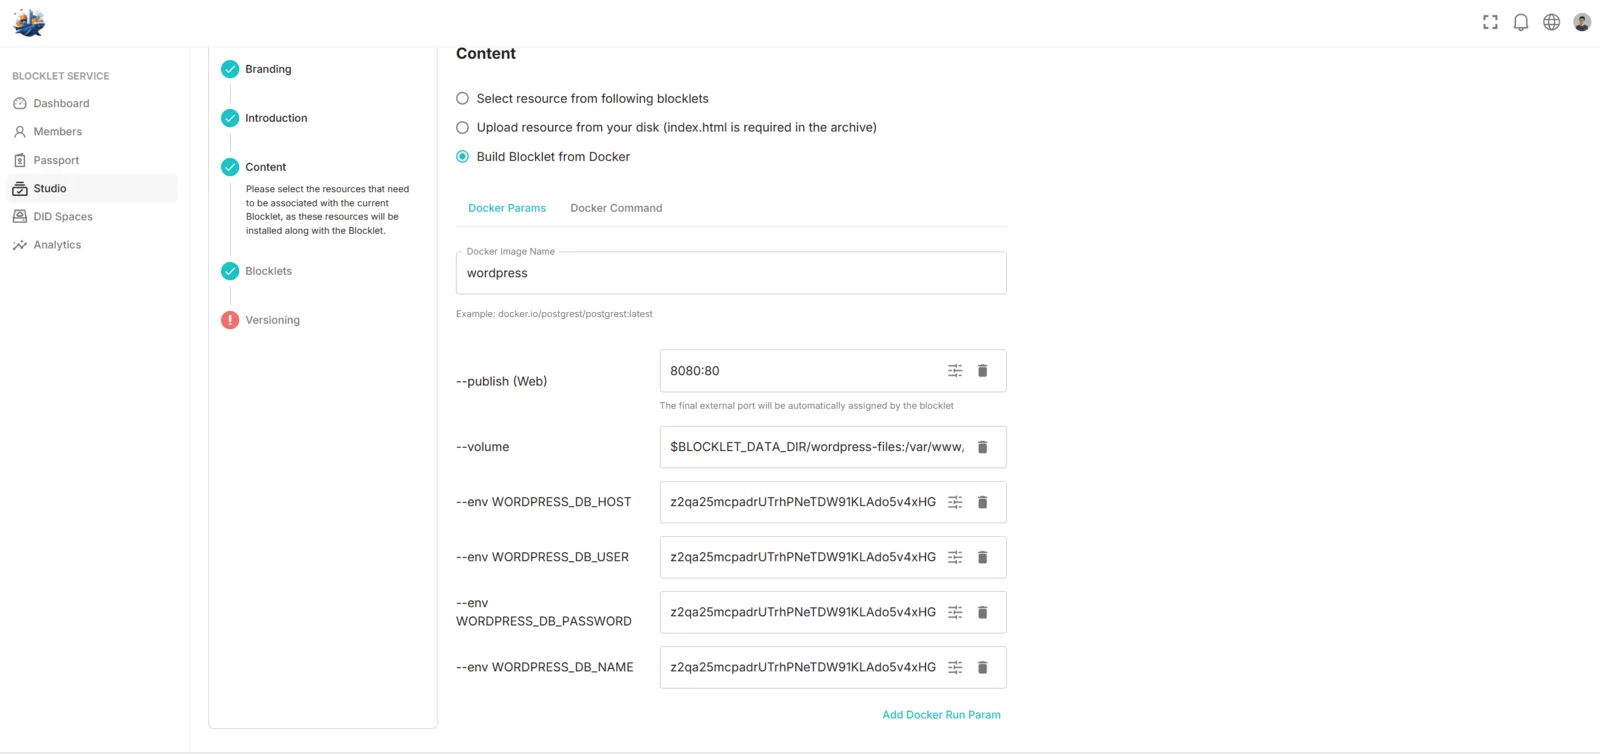
Because WordPress requires its own mount point, the --publish type is set to Web (as explained above in the MySQL --publish section).
Finally, let's explain the settings shown above:
- --publish(web) 8080 : We publish port 80 of the WordPress Docker container to the Blocklet Server on port 8080. Because it's a web Blocklet, the Blocklet Server assigns it a mount point.
- The
--volume $BLOCKLET_DATA_DIR/wordpress-files:/var/www/htmlargument mounts the directory within the Docker container requiring persistence to a subdirectory within the Blocklet data directory.$BLOCKLET_DATA_DIRis automatically prepended, and persistent storage is restricted to subdirectories of this path. - --env WORDPRESS_DB_HOST: This WordPress environment variable, used to configure the database host, is linked to an environment variable associated with the DID z2qa25mcpadrUTrhPNeTDW91KLAdo5v4xHGgR (the MySQL instance referenced earlier).
- All other
--envflags follow the same logic.
Then, in the Blocklets tab, set MySQL as a dependency of WordPress. This ensures that MySQL is installed automatically when you install WordPress.
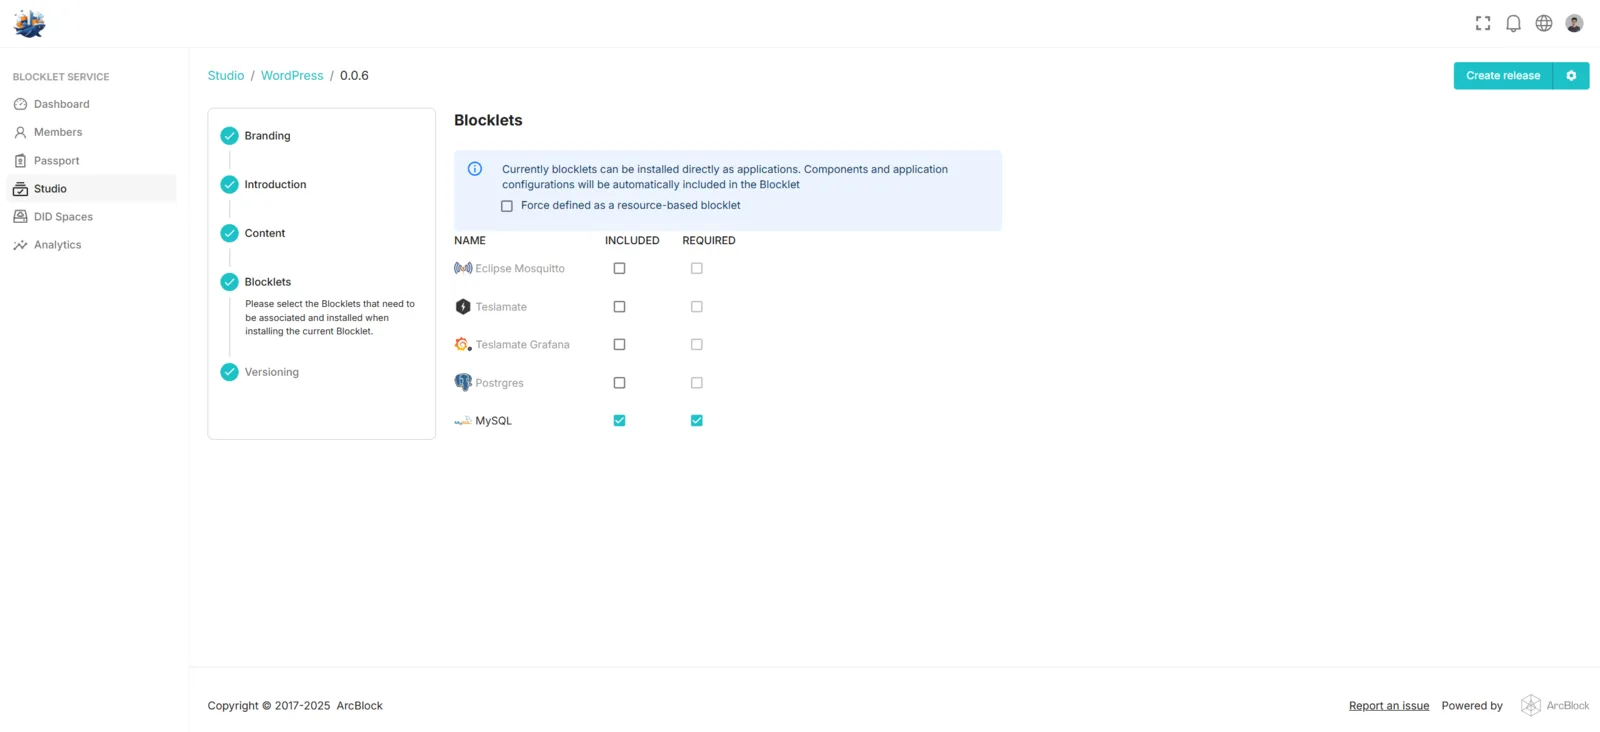
With everything configured, we can publish the WordPress Blocklet. The publishing process is identical to that of a standard Blocklet.
We also provide a WordPress test store configured as described above, which you can install and try:
Note that installing Docker-type Blocklets requires your Blocklet Server to have Docker mode and network isolation enabled.