This guide demonstrates how to build and run a sophisticated workflow that orchestrates multiple specialized AI agents. You will learn to coordinate agents like a finder, writer, and proofreader to work together on a complex task, from initial research to final report generation.
Overview
Workflow orchestration involves creating a processing pipeline where multiple agents collaborate to achieve a common goal. Each agent in the pipeline has a specific role, and a central orchestrator manages the flow of tasks and information between them. This example showcases how to use the AIGNE Framework to build such a system, supporting both single-run (one-shot) and interactive chat modes.
The following diagram illustrates the agent relationships in this example:
direction: down

User: {
  shape: c4-person
}

OrchestratorAgent: {
  label: "Orchestrator Agent"
  shape: rectangle

  finder: {
    label: "Finder Agent"
    shape: rectangle
  }

  writer: {
    label: "Writer Agent"
    shape: rectangle
  }
}

Skills: {
  label: "Skills / Tools"
  shape: rectangle
  style: {
    stroke-dash: 2
  }

  puppeteer: {
    label: "Puppeteer\n(Web Scraping)"
    shape: rectangle
  }

  filesystem: {
    label: "Filesystem\n(Read/Write)"
    shape: cylinder
  }
}

User -> OrchestratorAgent: "1. Submits research task"
OrchestratorAgent -> OrchestratorAgent.finder: "2. Delegate: Find info"
OrchestratorAgent.finder -> Skills.puppeteer: "3. Scrape web"
OrchestratorAgent.finder -> Skills.filesystem: "4. Save findings"
OrchestratorAgent -> OrchestratorAgent.writer: "5. Delegate: Compile report"
OrchestratorAgent.writer -> Skills.filesystem: "6. Write final report"
Prerequisites
Before you begin, ensure you have the following installed and configured:
- Node.js: Version 20.0 or higher.
- npm: Comes bundled with Node.js.
- OpenAI API Key: Required for the agents to interact with OpenAI models. You can obtain one from the OpenAI Platform.
Optional dependencies for running from source code:
- Bun: For running unit tests and examples.
- Pnpm: For package management.
Quick Start
You can run this example directly without any installation using npx.
Run the Example
Execute the following commands in your terminal:
Run in one-shot mode
# Run in one-shot mode (default)
npx -y @aigne/example-workflow-orchestrator
Run in interactive chat mode
# Run in interactive chat mode
npx -y @aigne/example-workflow-orchestrator --interactive
Use pipeline input
# Use pipeline input
echo "Research ArcBlock and compile a report about their products and architecture" | npx -y @aigne/example-workflow-orchestrator
Connect to an AI Model
The first time you run the example, it will prompt you to connect to an AI model service since no API keys have been configured.

You have three options:
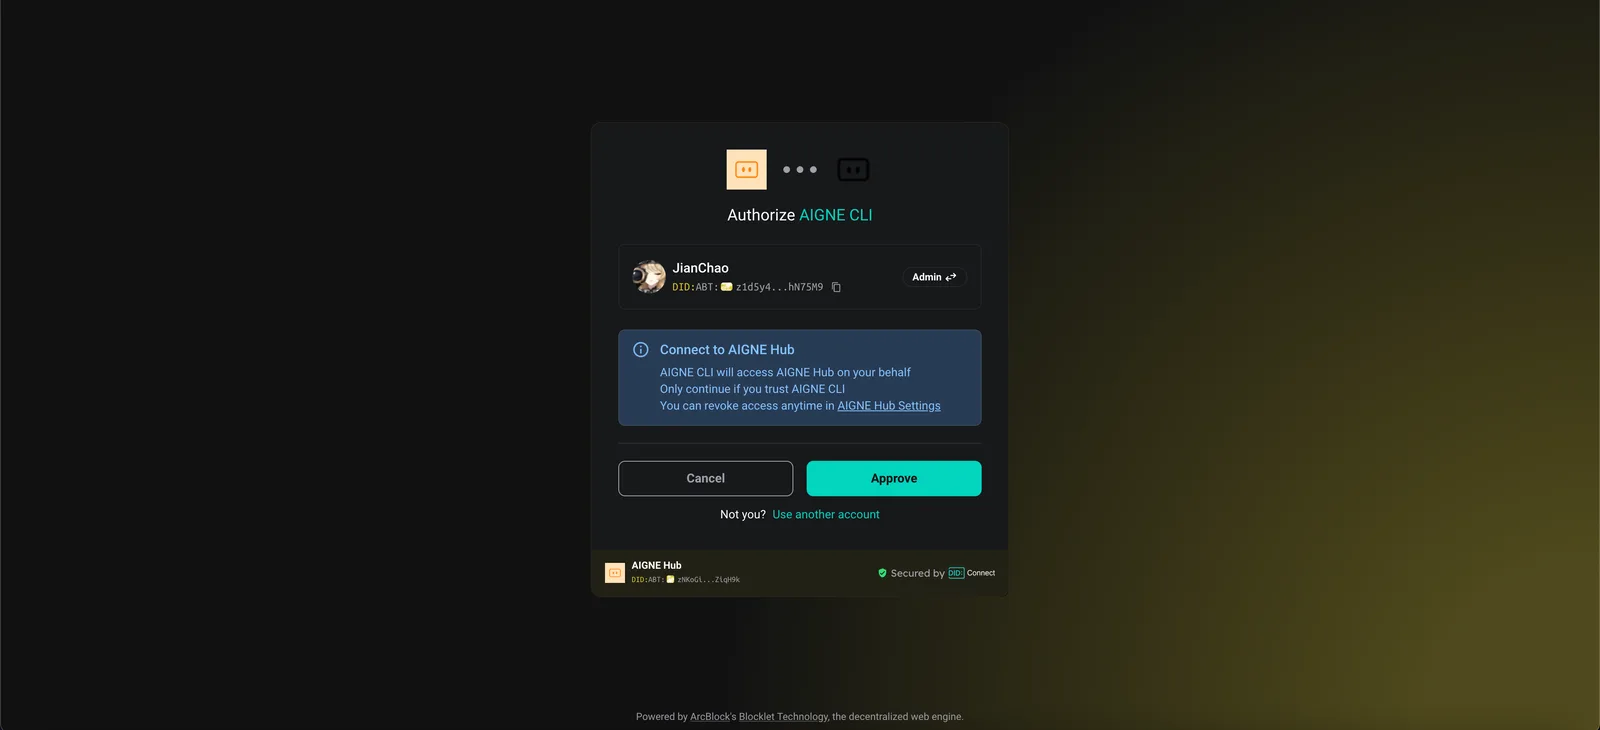
- Connect via the Official AIGNE Hub: This is the recommended option for new users. Selecting it will open your browser to an authorization page. After you approve, the CLI will be connected to the AIGNE Hub, and you'll receive complimentary tokens to get started.
- Connect via a Self-Hosted AIGNE Hub: Choose this if you have your own AIGNE Hub instance. You will be prompted to enter the URL of your hub to complete the connection. You can deploy a self-hosted AIGNE Hub from the Blocklet Store.

- Connect via a Third-Party Model Provider: You can configure an API key from a provider like OpenAI directly. Set the key as an environment variable and run the example again. Set OpenAI API Key
bash export OPENAI_API_KEY="YOUR_API_KEY_HERE"For more configuration examples, refer to the.env.local.examplefile in the repository.
Debugging with AIGNE Observe
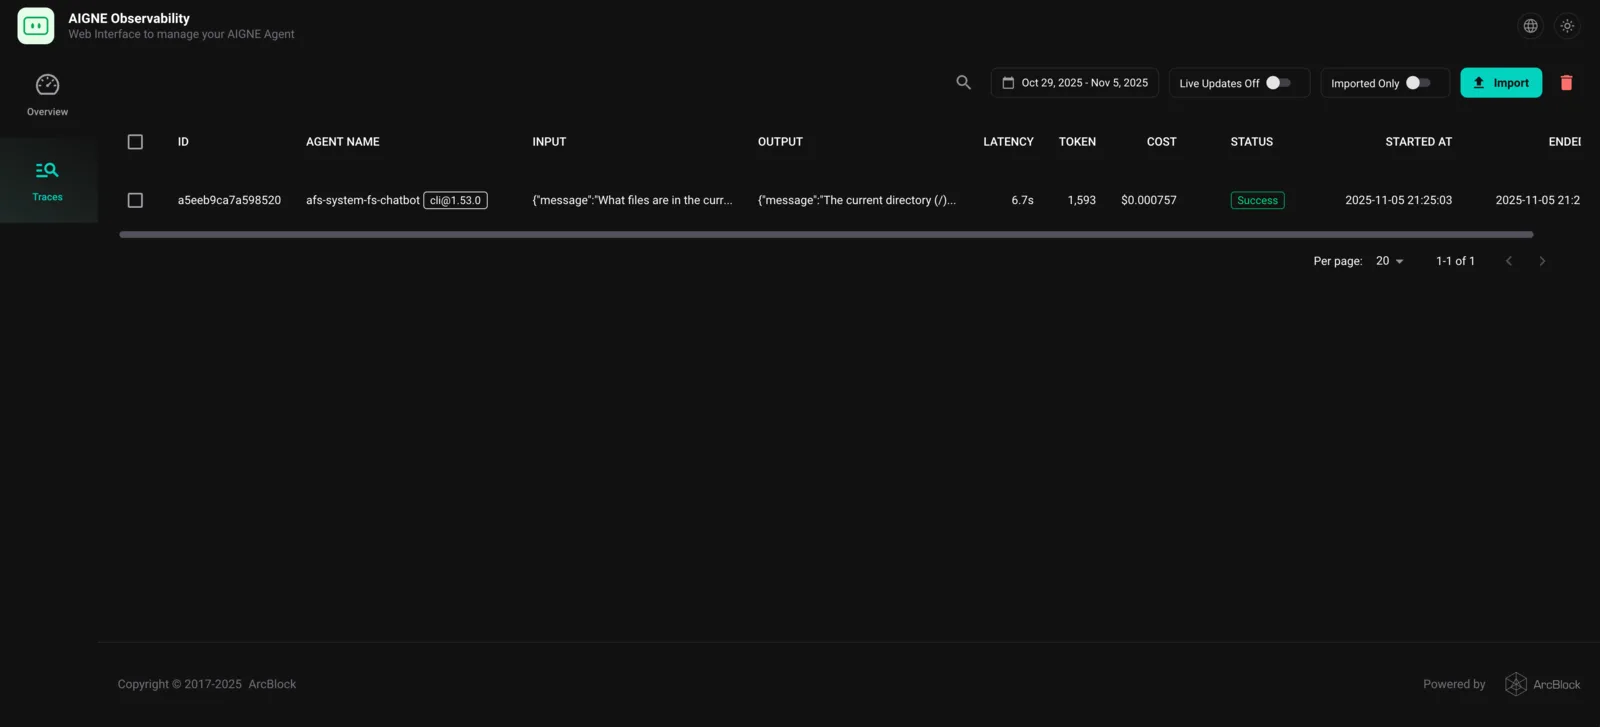
The aigne observe command launches a local web server that helps you monitor and analyze agent executions. This tool is invaluable for debugging, tuning performance, and understanding agent behavior.
First, start the observation server:
Start the observability server
aigne observe
Once the server is running, you can open the provided URL (http://localhost:7893) in your browser to view a list of recent agent traces and inspect their details.
Local Installation and Usage
For development purposes, you can clone the repository and run the example locally.
1. Clone the Repository
Clone the repository
git clone https://github.com/AIGNE-io/aigne-framework2. Install Dependencies
Navigate to the example directory and install the necessary packages using pnpm.
Install dependencies
cd aigne-framework/examples/workflow-orchestrator
pnpm install
3. Run the Example
Use the pnpm start command to execute the workflow.
Run in one-shot mode
# Run in one-shot mode (default)
pnpm start
Run in interactive chat mode
# Run in interactive chat mode
pnpm start -- --interactive
Use pipeline input
# Use pipeline input
echo "Research ArcBlock and compile a report about their products and architecture" | pnpm start
Run Options
The script accepts several command-line parameters to customize its behavior.
| Parameter | Description | Default |
|---|---|---|
--interactive | Run in interactive chat mode. | Disabled |
--model <provider[:model]> | Specify the AI model to use (e.g., openai or openai:gpt-4o-mini). | openai |
--temperature <value> | Set the temperature for model generation. | Provider default |
--top-p <value> | Set the top-p sampling value. | Provider default |
--presence-penalty <value> | Set the presence penalty value. | Provider default |
--frequency-penalty <value> | Set the frequency penalty value. | Provider default |
--log-level <level> | Set the logging level (e.g., ERROR, WARN, INFO, DEBUG). | INFO |
--input, -i <input> | Specify input directly via the command line. | None |
Examples
Run in interactive chat mode
# Run in chat mode
pnpm start -- --interactive
Set a different logging level
# Set logging level to DEBUG
pnpm start -- --log-level DEBUG
Code Example
The following TypeScript code demonstrates how to define and orchestrate multiple agents to perform in-depth research and compile a report. The OrchestratorAgent coordinates a finder and a writer, which are equipped with skills to browse the web (puppeteer) and interact with the local filesystem.
orchestrator.ts
import { OrchestratorAgent } from "@aigne/agent-library/orchestrator/index.js";
import { AIAgent, AIGNE, MCPAgent } from "@aigne/core";
import { OpenAIChatModel } from "@aigne/core/models/openai-chat-model.js";

const { OPENAI_API_KEY } = process.env;

// 1. Initialize the chat model
const model = new OpenAIChatModel({
  apiKey: OPENAI_API_KEY,
  modelOptions: {
    parallelToolCalls: false, // Puppeteer can only run one task at a time
  },
});

// 2. Set up MCP agents for web scraping and filesystem access
const puppeteer = await MCPAgent.from({
  command: "npx",
  args: ["-y", "@modelcontextprotocol/server-puppeteer"],
  env: process.env as Record<string, string>,
});

const filesystem = await MCPAgent.from({
  command: "npx",
  args: ["-y", "@modelcontextprotocol/server-filesystem", import.meta.dir],
});

// 3. Define the finder agent to research information
const finder = AIAgent.from({
  name: "finder",
  description: "Find the closest match to a user's request",
  instructions: `You are an agent that can find information on the web.
You are tasked with finding the closest match to the user's request.
You can use puppeteer to scrape the web for information.
You can also use the filesystem to save the information you find.

Rules:
- do not use screenshot of puppeteer
- use document.body.innerText to get the text content of a page
- if you want a url to some page, you should get all link and it's title of current(home) page,
then you can use the title to search the url of the page you want to visit.
  `,
  skills: [puppeteer, filesystem],
});

// 4. Define the writer agent to save the report
const writer = AIAgent.from({
  name: "writer",
  description: "Write to the filesystem",
  instructions: `You are an agent that can write to the filesystem.
  You are tasked with taking the user's input, addressing it, and
  writing the result to disk in the appropriate location.`,
  skills: [filesystem],
});

// 5. Create the orchestrator agent to manage the workflow
const agent = OrchestratorAgent.from({
  skills: [finder, writer],
  maxIterations: 3,
  tasksConcurrency: 1, // Puppeteer can only run one task at a time
});

// 6. Initialize the AIGNE instance
const aigne = new AIGNE({ model });

// 7. Invoke the workflow with a detailed prompt
const result = await aigne.invoke(
  agent,
  `\
Conduct an in-depth research on ArcBlock using only the official website\
(avoid search engines or third-party sources) and compile a detailed report saved as arcblock.md. \
The report should include comprehensive insights into the company's products \
(with detailed research findings and links), technical architecture, and future plans.`,
);
console.log(result);
When executed, this workflow produces a detailed markdown file. You can view an example of the generated output here: arcblock-deep-research.md.
Summary
This example illustrates the power of the AIGNE Framework for building complex, multi-agent workflows. By defining specialized agents and coordinating them with an orchestrator, you can automate sophisticated tasks that require multiple steps, such as research, content generation, and file manipulation.
For more examples of advanced workflow patterns, explore the following sections:
Sequential Workflows
Build pipelines where agents execute tasks in a strict, step-by-step order.
Concurrent Workflows
Process multiple tasks simultaneously to improve performance and efficiency.
Agent Handoff
Create seamless transitions where one agent passes its output to another for further processing.
Group Chat
Enable multiple agents to collaborate and communicate in a shared environment.