This guide demonstrates how to build and run a multi-agent group chat workflow using the AIGNE Framework. You will learn how to orchestrate several agents, including a manager, to collaborate on a task, simulating a team environment where they share messages and work together to achieve a common goal.
Overview
The Group Chat workflow example showcases a sophisticated multi-agent system where different agents with specialized roles collaborate to fulfill a user's request. The process is managed by a Group Manager agent that directs the conversation and task execution among other agents like a Writer, Editor, and Illustrator.
This example supports two primary modes of operation:
- One-shot mode: The workflow runs once to completion based on a single input.
- Interactive mode: The workflow engages in a continuous conversation, allowing for follow-up questions and dynamic interactions.
The core interaction model is as follows:
direction: down

User: {
  shape: c4-person
}

GroupChat: {
  label: "Group Chat Workflow"
  shape: rectangle

  Group-Manager: {
    label: "Group Manager"
    shape: rectangle
  }

  Collaborators: {
    label: "Collaborators"
    shape: rectangle
    grid-columns: 3

    Writer: {
      shape: rectangle
    }
    Editor: {
      shape: rectangle
    }
    Illustrator: {
      shape: rectangle
    }
  }
}

User -> GroupChat.Group-Manager: "1. User Request"
GroupChat.Group-Manager -> GroupChat.Collaborators.Writer: "2. Delegate Task"
GroupChat.Collaborators.Writer <-> GroupChat.Collaborators.Editor: "3. Collaborate"
GroupChat.Collaborators.Editor <-> GroupChat.Collaborators.Illustrator: "4. Collaborate"
GroupChat.Collaborators.Writer -> GroupChat.Group-Manager: "5. Send Result"
GroupChat.Group-Manager -> User: "6. Final Output"
Prerequisites
Before proceeding, ensure your development environment meets the following requirements:
- Node.js: Version 20.0 or higher.
- npm: Included with Node.js.
- OpenAI API Key: Required for the default model configuration. You can obtain one from the OpenAI Platform.
Quick Start
You can run this example directly without cloning the repository using npx.
Run the Example
Execute one of the following commands in your terminal:
To run the workflow in the default one-shot mode:
Run in one-shot mode
npx -y @aigne/example-workflow-group-chatTo start an interactive chat session:
Run in interactive mode
npx -y @aigne/example-workflow-group-chat --interactiveYou can also provide input directly via a pipeline:
Run with pipeline input
echo "Write a short story about space exploration" | npx -y @aigne/example-workflow-group-chatConnect to an AI Model
The first time you run the example, it will prompt you to connect to an AI model provider since no API keys have been configured.

You have several options to proceed:
1. Connect to the AIGNE Hub (Recommended)
This is the easiest way to get started and includes free credits for new users.
- Select the first option:
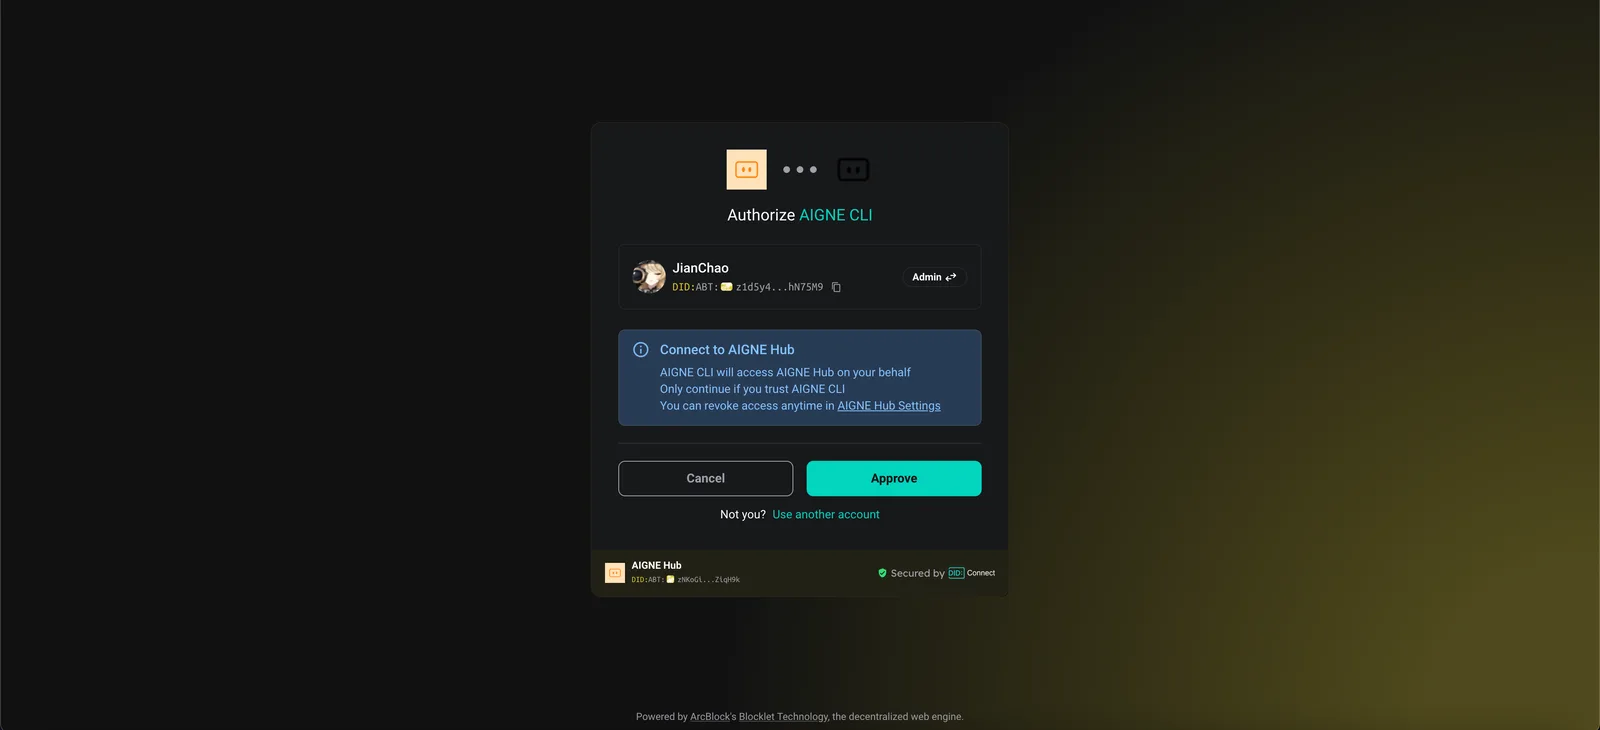
Connect to the Arcblock official AIGNE Hub. - Your web browser will open a page to authorize the AIGNE CLI.
- Click "Approve" to grant the necessary permissions. The CLI will be configured automatically.
2. Connect to a Self-Hosted AIGNE Hub
If you are running your own instance of AIGNE Hub:
- Select the second option:
Connect to your self-hosted AIGNE Hub. - Enter the URL of your AIGNE Hub instance when prompted.
- Follow the instructions in your browser to complete the connection.

3. Configure a Third-Party Model Provider
You can directly connect to a provider like OpenAI by setting an environment variable.
- Exit the interactive prompt.
- Set the
OPENAI_API_KEYenvironment variable in your terminal: Configure OpenAI API Keybash export OPENAI_API_KEY="your-openai-api-key" - Run the example command again.
For other providers like Google Gemini or DeepSeek, refer to the .env.local.example file within the project for the correct environment variable names.
Local Installation and Usage
For development purposes, you can clone the repository and run the example locally.
1. Clone the Repository
Clone the framework repository
git clone https://github.com/AIGNE-io/aigne-framework2. Install Dependencies
Navigate to the example's directory and install the required packages using pnpm.
Install dependencies
cd aigne-framework/examples/workflow-group-chat
pnpm install
3. Run the Example
Use the pnpm start command to run the workflow. Command-line arguments must be passed after --.
To run in one-shot mode:
Run in one-shot mode
pnpm startTo run in interactive chat mode:
Run in interactive mode
pnpm start -- --interactiveTo use pipeline input:
Run with pipeline input
echo "Write a short story about space exploration" | pnpm startCommand-Line Options
The example accepts several command-line arguments to customize its behavior:
| Parameter | Description | Default |
|---|---|---|
--interactive | Run in interactive chat mode | Disabled (one-shot mode) |
--model <provider[:model]> | AI model to use in format 'provider[]' where model is optional. Examples: 'openai' or 'openai' | openai |
--temperature <value> | Temperature for model generation | Provider default |
--top-p <value> | Top-p sampling value | Provider default |
--presence-penalty <value> | Presence penalty value | Provider default |
--frequency-penalty <value> | Frequency penalty value | Provider default |
--log-level <level> | Set logging level (ERROR, WARN, INFO, DEBUG, TRACE) | INFO |
--input, -i <input> | Specify input directly | None |
Examples
Set logging level
pnpm start -- --log-level DEBUGUse a specific model
pnpm start -- --model openai:gpt-4o-miniDebugging with AIGNE Observe
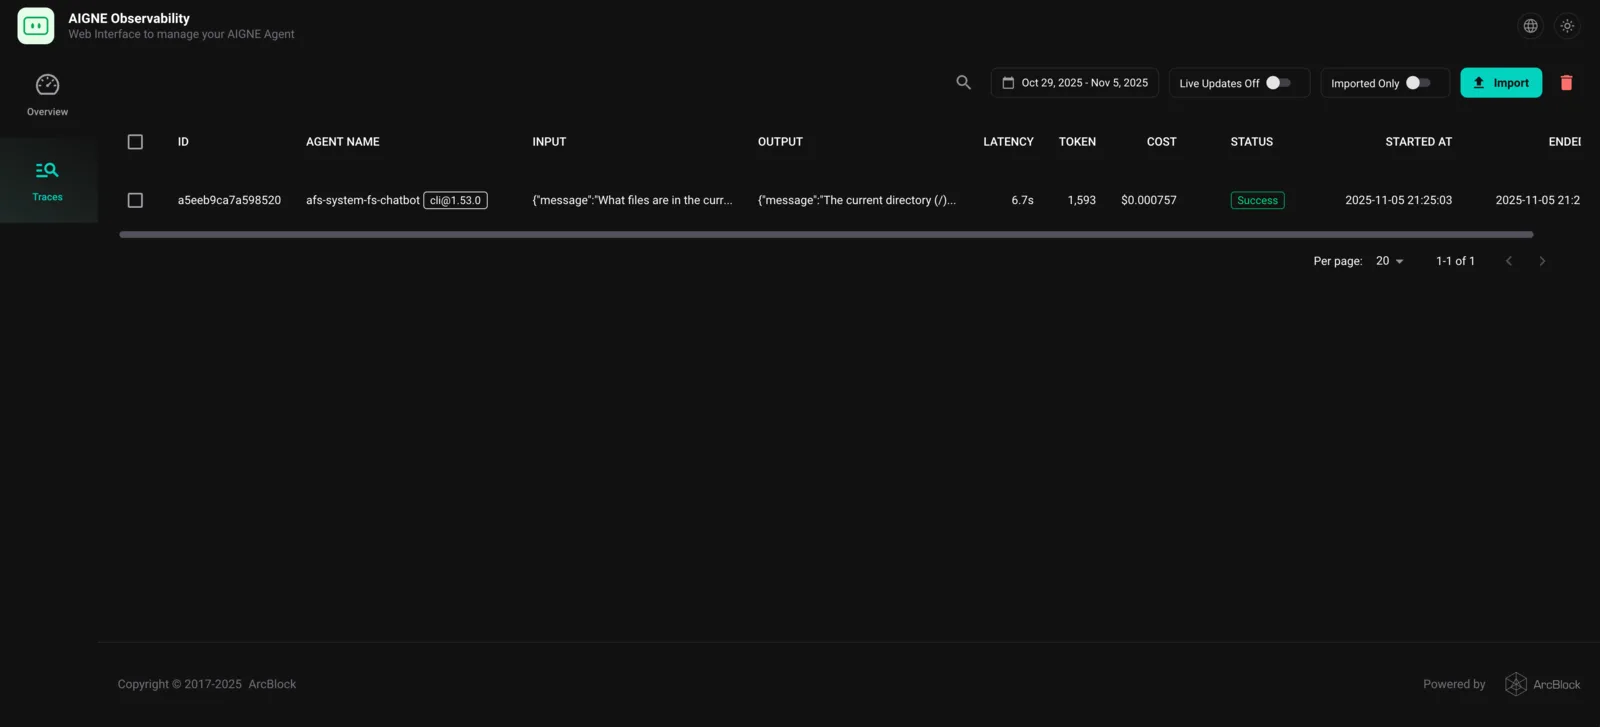
To inspect the execution flow and debug the behavior of the agents, you can use the aigne observe command. This tool launches a local web server that provides a detailed view of agent traces.
First, start the observability server in a separate terminal:
Start the observability server
aigne observe
After running the workflow example, open your browser to http://localhost:7893 to view the traces. You can inspect the inputs, outputs, and internal states of each agent throughout the execution.
Summary
This guide provided a step-by-step walkthrough for running the Workflow Group Chat example. You learned how to execute the workflow using npx, connect to various AI model providers, and install it locally for development. You also saw how to use aigne observe for debugging agent interactions.
For more complex patterns, explore other examples in the AIGNE Framework documentation.