This guide provides a comprehensive walkthrough for interacting with an SQLite database using an AI agent powered by the AIGNE Framework. By following these steps, you will learn how to set up the necessary components, run the example application, and use an agent to perform database operations like creating tables and querying data.
The core of this example involves using an MCPAgent to connect to a running SQLite MCP Server. This server exposes database functionalities as skills that an AIAgent can intelligently invoke based on user prompts.
direction: down

User: {
  shape: c4-person
}

App: {
  label: "@aigne/example-mcp-sqlite"
  shape: rectangle

  AIGNE-Framework: {
    label: "AIGNE Framework (@aigne/core)"
    shape: rectangle

    AIGNE-Instance: {
      label: "AIGNE Instance"
    }

    AIAgent: {
      label: "AIAgent"
    }

    MCPAgent: {
      label: "MCPAgent"
    }
  }

  AI-Model: {
    label: "AI Model\n(e.g., OpenAI)"
    shape: rectangle
  }
}

SQLite-MCP-Server: {
  label: "SQLite MCP Server"
  shape: rectangle
}

SQLite-DB: {
  label: "SQLite Database\n(usages.db)"
  shape: cylinder
}

User -> App: "1. Run command\n(e.g., 'create a product table')"
App.AIGNE-Framework.AIAgent -> App.AI-Model: "2. Interpret prompt"
App.AI-Model -> App.AIGNE-Framework.AIAgent: "3. Return required skill call"
App.AIGNE-Framework.AIAgent -> App.AIGNE-Framework.MCPAgent: "4. Invoke skill"
App.AIGNE-Framework.MCPAgent -> SQLite-MCP-Server: "5. Send command"
SQLite-MCP-Server -> SQLite-DB: "6. Execute SQL"
SQLite-DB -> SQLite-MCP-Server: "7. Return result"
SQLite-MCP-Server -> App.AIGNE-Framework.MCPAgent: "8. Send response"
App.AIGNE-Framework.MCPAgent -> App.AIGNE-Framework.AIAgent: "9. Forward response"
App.AIGNE-Framework.AIAgent -> App: "10. Process final output"
App -> User: "11. Display result message"
Prerequisites
Before proceeding, ensure your development environment meets the following requirements. Adherence to these prerequisites is necessary for the successful execution of the example.
- Node.js: Version 20.0 or higher.
- npm: Node.js package manager, included with Node.js.
- uv: A Python package installer. Required for running the SQLite MCP Server. Installation instructions can be found at the official
uvrepository. - AI Model API Key: An API key from a supported provider is required for the AI agent to function. This example defaults to OpenAI, but other providers are supported. You can obtain an OpenAI API key from their platform.
For developers intending to run the example from the source code, the following dependencies are also required:
- Pnpm: A fast, disk space-efficient package manager.
- Bun: A fast JavaScript all-in-one toolkit used for running tests and examples.
Quick Start
This section provides instructions to run the example directly without a manual installation, which is the most efficient method for a preliminary evaluation.
The application can be executed in a one-shot mode for single commands, in an interactive chat mode, or by piping input directly to the script.
Execute one of the following commands in your terminal:
Run in one-shot mode (default)
npx -y @aigne/example-mcp-sqliteRun in interactive chat mode
npx -y @aigne/example-mcp-sqlite --interactiveUse pipeline input
echo "create a product table with columns name description and createdAt" | npx -y @aigne/example-mcp-sqliteConnecting to an AI Model
The AI agent requires a connection to a Large Language Model (LLM) to process instructions. If you run the example without a pre-configured model, you will be prompted to select a connection method.

There are three primary methods for establishing this connection:
1. Connect to the Official AIGNE Hub
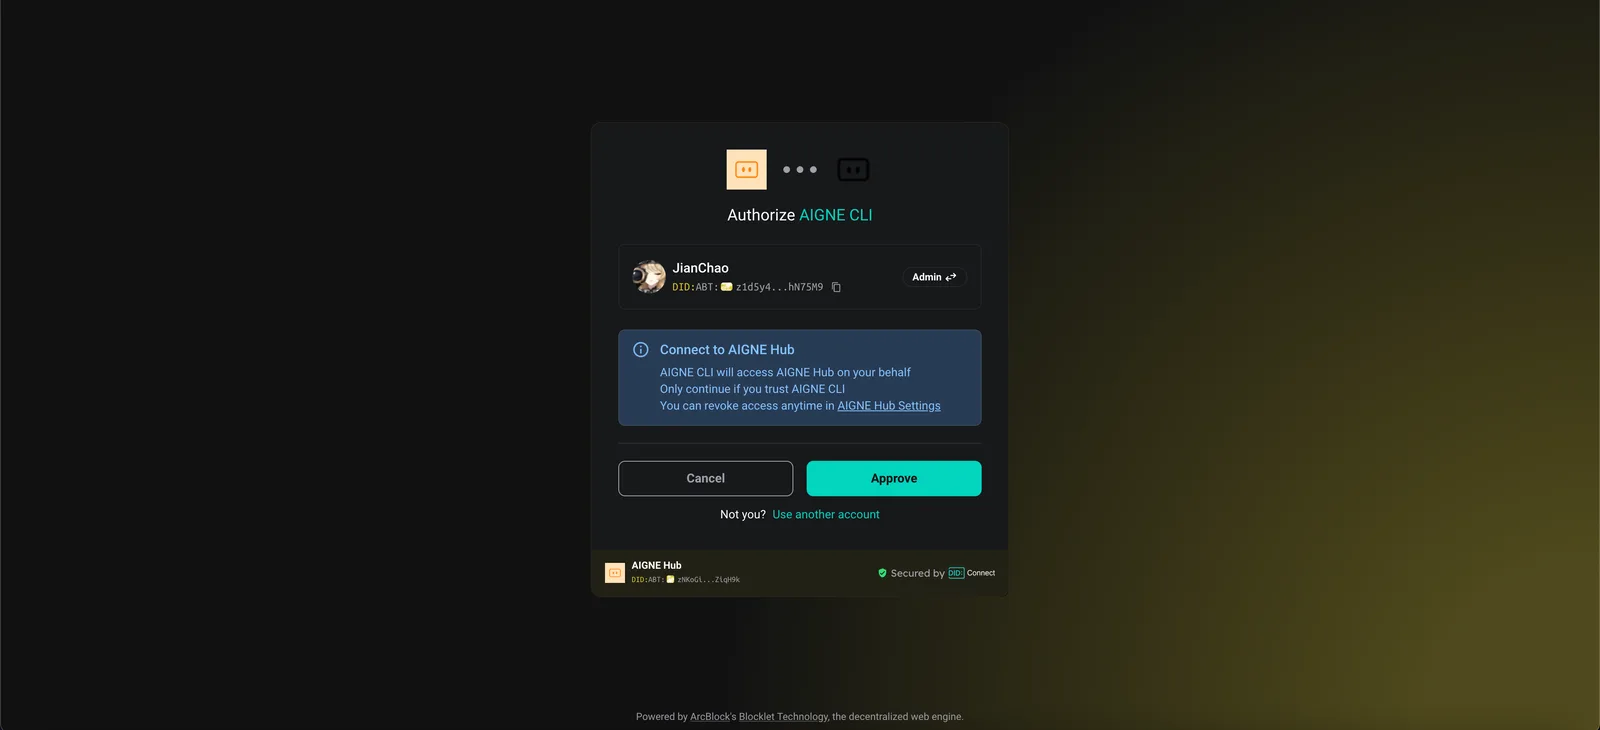
This is the recommended method for new users. It provides a streamlined, browser-based authentication process. New users receive complimentary credits to test the platform.
- Select the first option:
Connect to the Arcblock official AIGNE Hub. - Your default web browser will open to an authorization page.
- Follow the on-screen instructions to approve the connection.
2. Connect to a Self-Hosted AIGNE Hub
If your organization operates a private instance of AIGNE Hub, select the second option and provide the URL of your hub to complete the connection.

3. Connect via a Third-Party Model Provider
You can connect directly to a supported third-party model provider, such as OpenAI, by configuring the appropriate API key as an environment variable.
For example, to connect to OpenAI, set the OPENAI_API_KEY variable:
Set OpenAI API key
export OPENAI_API_KEY="your-openai-api-key-here"After setting the environment variable, re-run the npx command. For a comprehensive list of supported providers and their required environment variables, refer to the example .env.local.example file in the repository.
Installation from Source
For developers who wish to inspect or modify the source code, follow these steps to clone the repository and run the example locally.
1. Clone the Repository
Clone the official AIGNE Framework repository to your local machine.
Clone the repository
git clone https://github.com/AIGNE-io/aigne-framework2. Install Dependencies
Navigate to the example directory and install the required dependencies using pnpm.
Install dependencies
cd aigne-framework/examples/mcp-sqlite
pnpm install
3. Run the Example
Execute the application using the pnpm start command.
Run in one-shot mode (default)
pnpm startTo run in interactive mode or use pipeline input, append the desired flags after a -- separator.
Run in interactive chat mode
pnpm start -- --interactiveUse pipeline input
echo "create a product table with columns name description and createdAt" | pnpm startCommand-Line Options
The application supports several command-line arguments to customize its behavior.
| Parameter | Description | Default |
|---|---|---|
--interactive | Enables interactive chat mode. | Disabled (one-shot) |
--model <provider[:model]> | Specifies the AI model. Format: 'provider[:model]'. | openai |
--temperature <value> | Sets the model's temperature for generation. | Provider default |
--top-p <value> | Sets the model's top-p sampling value. | Provider default |
--presence-penalty <value> | Sets the model's presence penalty. | Provider default |
--frequency-penalty <value> | Sets the model's frequency penalty. | Provider default |
--log-level <level> | Sets the logging verbosity (ERROR, WARN, INFO, DEBUG, TRACE). | INFO |
--input, -i <input> | Provides input directly as an argument. | None |
Code Example
The following TypeScript code demonstrates the core logic for setting up and invoking the AI agent to interact with the SQLite database.
The script initializes an OpenAIChatModel, starts an MCPAgent connected to the SQLite server, and configures an AIGNE instance with the model and the agent's skills. Finally, it invokes an AIAgent with specific instructions to perform database tasks.
index.ts
import { join } from "node:path";
import { AIAgent, AIGNE, MCPAgent } from "@aigne/core";
import { OpenAIChatModel } from "@aigne/core/models/openai-chat-model.js";

const { OPENAI_API_KEY } = process.env;

// 1. Initialize the chat model
const model = new OpenAIChatModel({
  apiKey: OPENAI_API_KEY,
});

// 2. Start the SQLite MCP server as a managed subprocess
const sqlite = await MCPAgent.from({
  command: "uvx",
  args: [
    "-q",
    "mcp-server-sqlite",
    "--db-path",
    join(process.cwd(), "usages.db"),
  ],
});

// 3. Configure the AIGNE instance with the model and MCP skills
const aigne = new AIGNE({
  model,
  skills: [sqlite],
});

// 4. Define the AI agent with specific instructions
const agent = AIAgent.from({
  instructions: "You are a database administrator",
});

// 5. Invoke the agent to create a table
console.log(
  await aigne.invoke(
    agent,
    "create a product table with columns name description and createdAt",
  ),
);
// Expected output:
// {
//   $message: "The product table has been created successfully with the columns: `name`, `description`, and `createdAt`.",
// }

// 6. Invoke the agent to insert data
console.log(await aigne.invoke(agent, "create 10 products for test"));
// Expected output:
// {
//   $message: "I have successfully created 10 test products in the database...",
// }

// 7. Invoke the agent to query data
console.log(await aigne.invoke(agent, "how many products?"));
// Expected output:
// {
//   $message: "There are 10 products in the database.",
// }

// 8. Shut down the AIGNE instance and the MCP server
await aigne.shutdown();
Debugging
To monitor and analyze the agent's execution flow, you can use the aigne observe command. This tool launches a local web server that provides a detailed view of traces, tool calls, and model interactions, which is invaluable for debugging and performance analysis.
- Start the Observation Server: Start the observability server
bash aigne observe
- View Traces: Open the provided URL (e.g.,
http://localhost:7893) in your web browser to access the observability interface. The "Traces" page lists recent agent executions.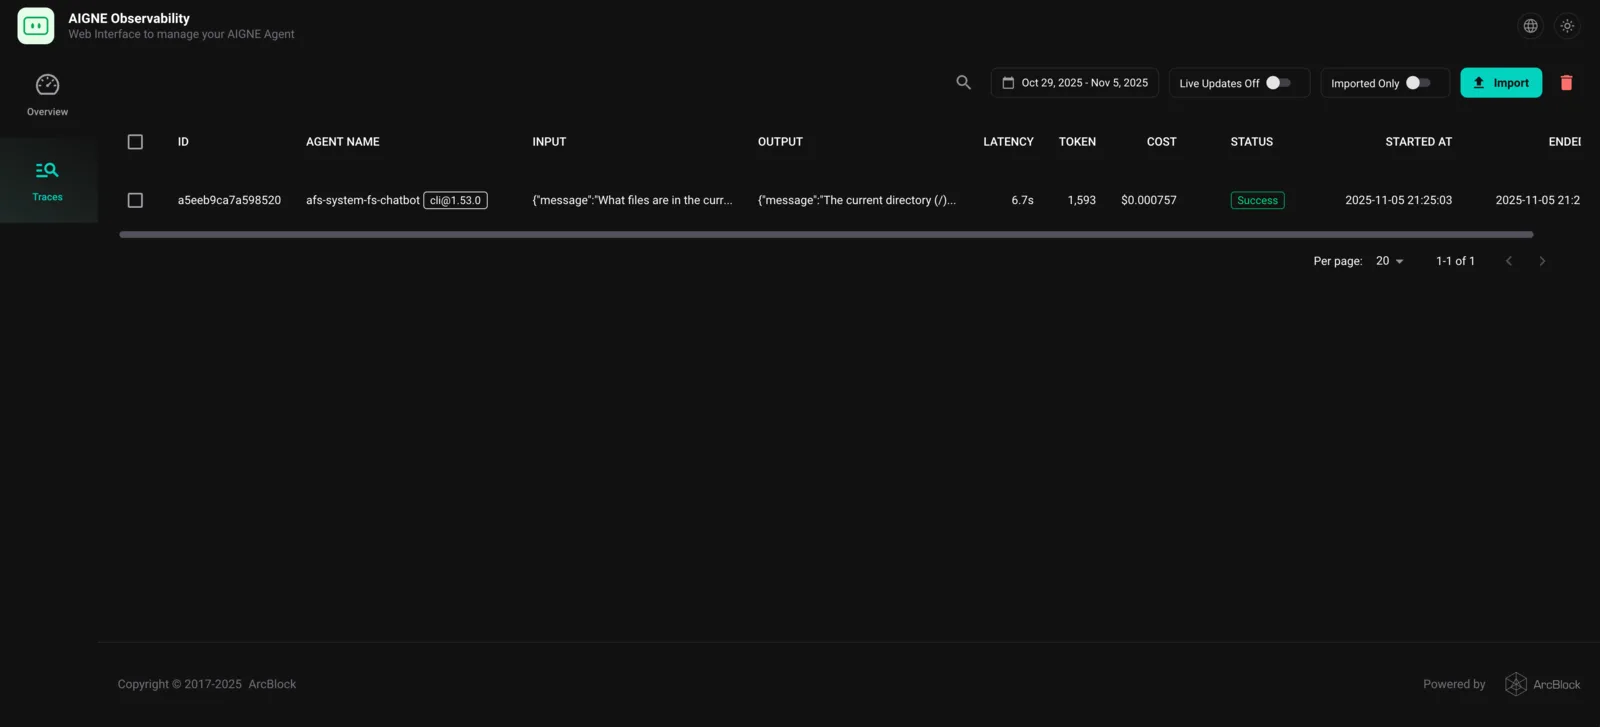 From here, you can select an individual trace to inspect the complete sequence of operations, including prompts sent to the model, skills invoked by the agent, and the final output.