Overview
If you want your application to store all data in a specific DID Space (typically the owner's DID Space) upon installation and startup, this tutorial will guide you through the process.
A prime example of this DID Spaces connection method is NFT Maker. NFT Maker connects to DID Spaces during its installation and startup process, obtaining the endpoint of the owner's DID Space. All NFTs subsequently generated on the NFT Maker platform are stored in this DID Space.
Prerequisites
- Ensure you have a DID Space available for testing. If you don't, you can get one.
- Your application's blocklet.yml configuration file sets
capabilities.didSpacetorequiredOnSetup, meaning the application requires a connection to the DID Spaces service during installation.
Procedure
Owner Links DID Space
During the initial setup process, the system will prompt you to connect to a DID Space. Please select the DID Space to connect to:
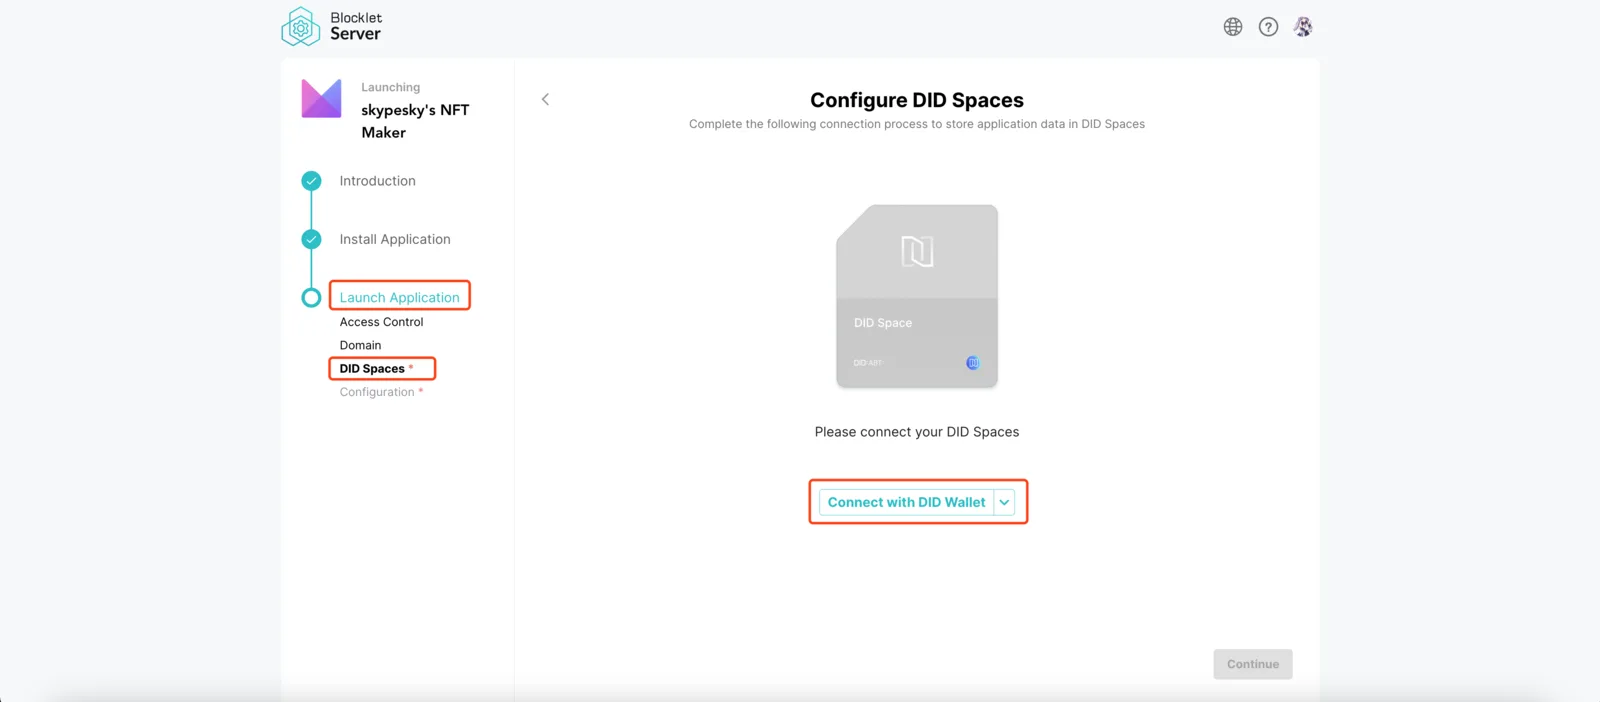
After the connection is successful, click Continue. The installation is complete.
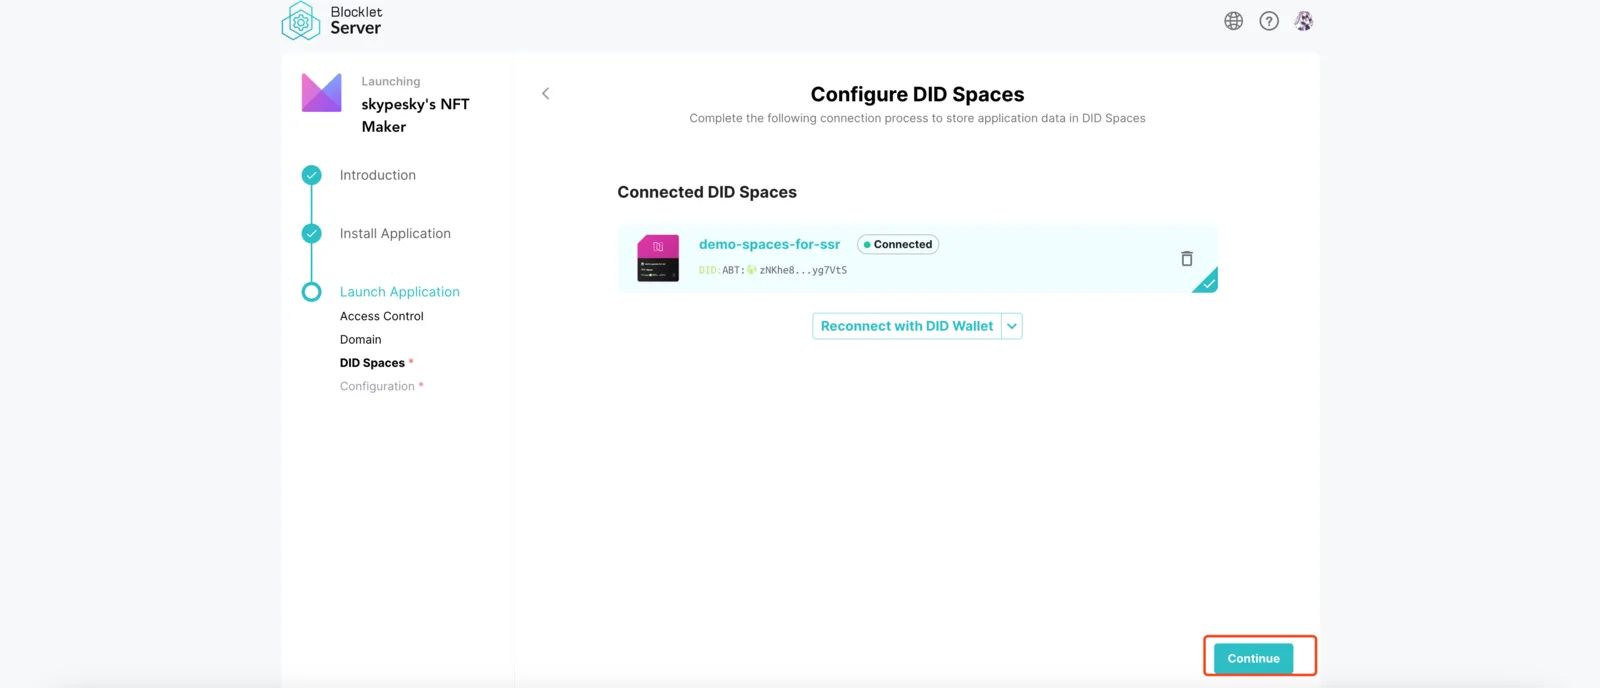
Application accesses user's DID Space endpoint
Your running application can now access the DID Space endpoint via the BLOCKLET_APP_SPACE_ENDPOINT environment variable. This variable will have the following format:
console.log(process.env.BLOCKLET_APP_SPACE_ENDPOINT);
// 输出形如: https://space.team.arcblock.io/app/api/space/zNKhe8jwgNZX2z7ZUfwNddNECxSe3wyg7VtS/app/zNKfEK9actwBeLhfVvc9U1p1CqVWxtivVxo6/object/
After obtaining the DID Space endpoint, your application can read and write data to this DID Space. See: Using @blocklet/did-space-js to read and write DID Space.