If you need to change the owner of a Blocklet, you need to transfer the Blocklet to achieve this. This article will introduce how to transfer a Blocklet.
Necessary condition
Only the owner of the Blocklet has the permission to transfer.
Effects on the application after transferring Blocklet ownership
- Access permission: The original owner will lose owner permission, but there may be other access permissions depending on the actual permission settings.
- Application Data: User data will be owned entirely by the new owner.
- Need to reconnect DID Spaces: Because the original owner no longer owns the data; which also means the original data cannot be recovered.
- On-chain asset ownership: After the transfer, a migration will be made to the on-chain account, so the on-chain assets will also be completely transferred to the new owner.
1. Generate transfer links
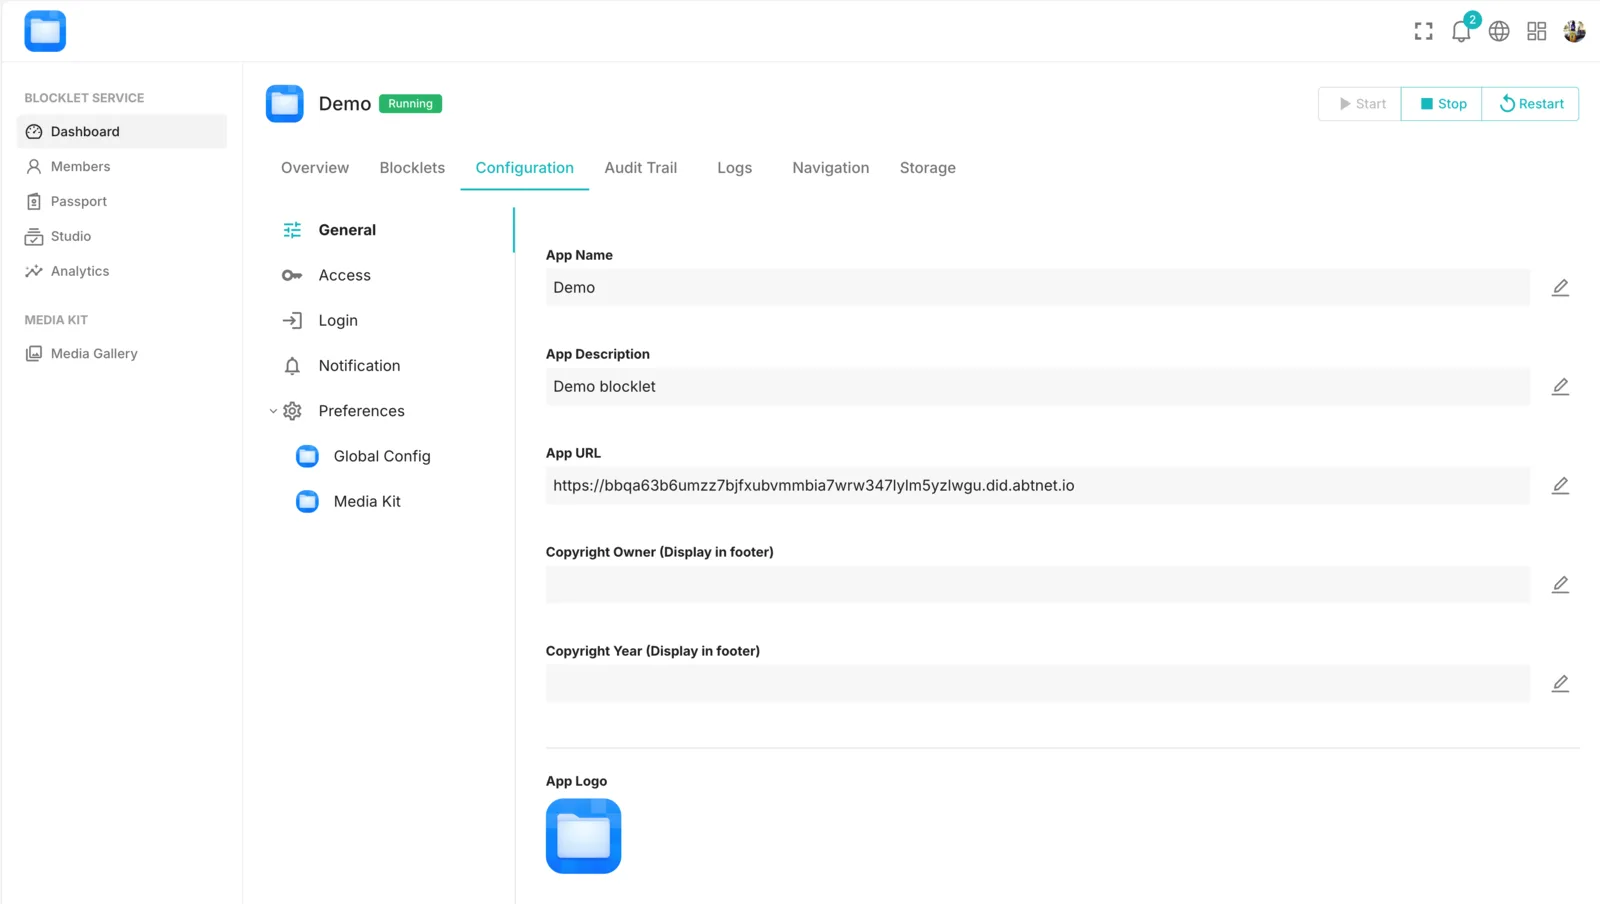
- Log in to Blocklet Dashboard.
- Open the "Dashboard->Configuratin" page.
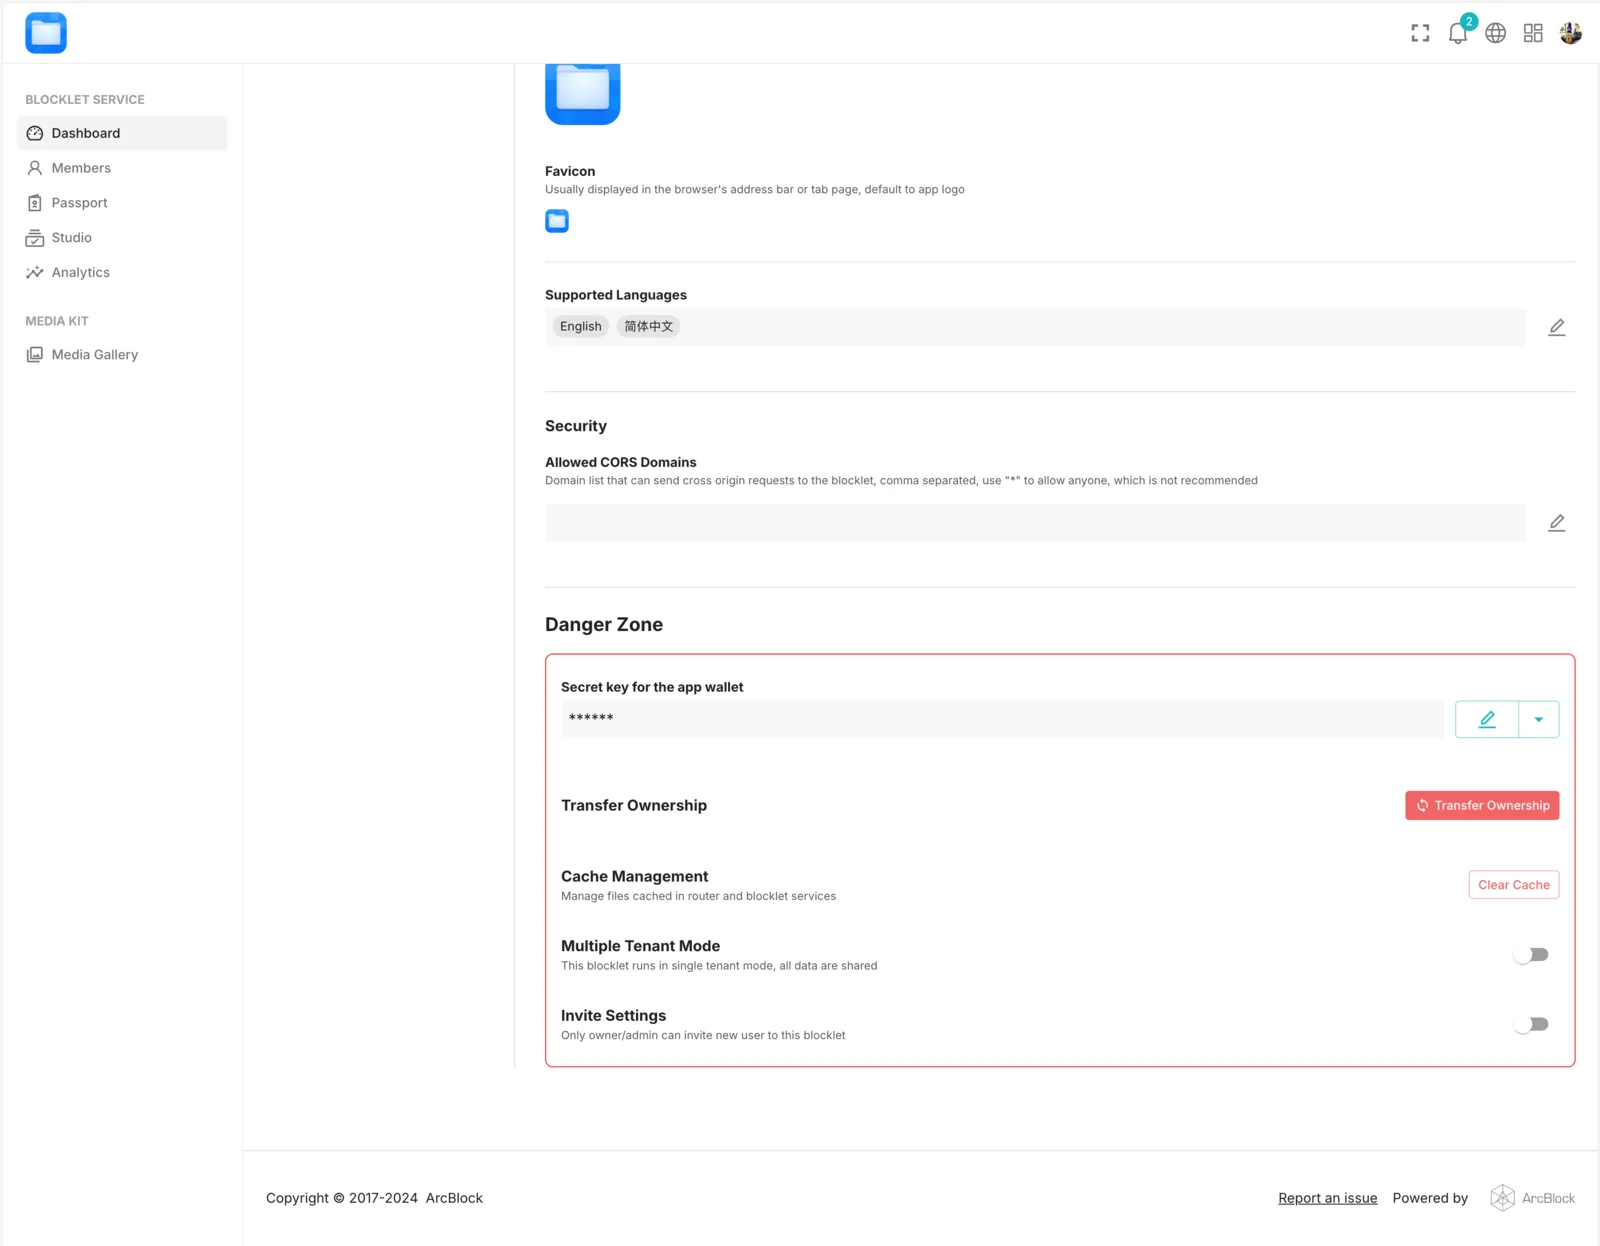
- Click the "Transfer ownership" button in the "Danger Zone" area.
- Verify the ownership of the Blocklet using the DID wallet.
2. Send the link to the new owner
- The expiration time of the transfer link is 24 hours.
- Any user can receive applications through the DID wallet, so be careful not to leak the transfer link to others
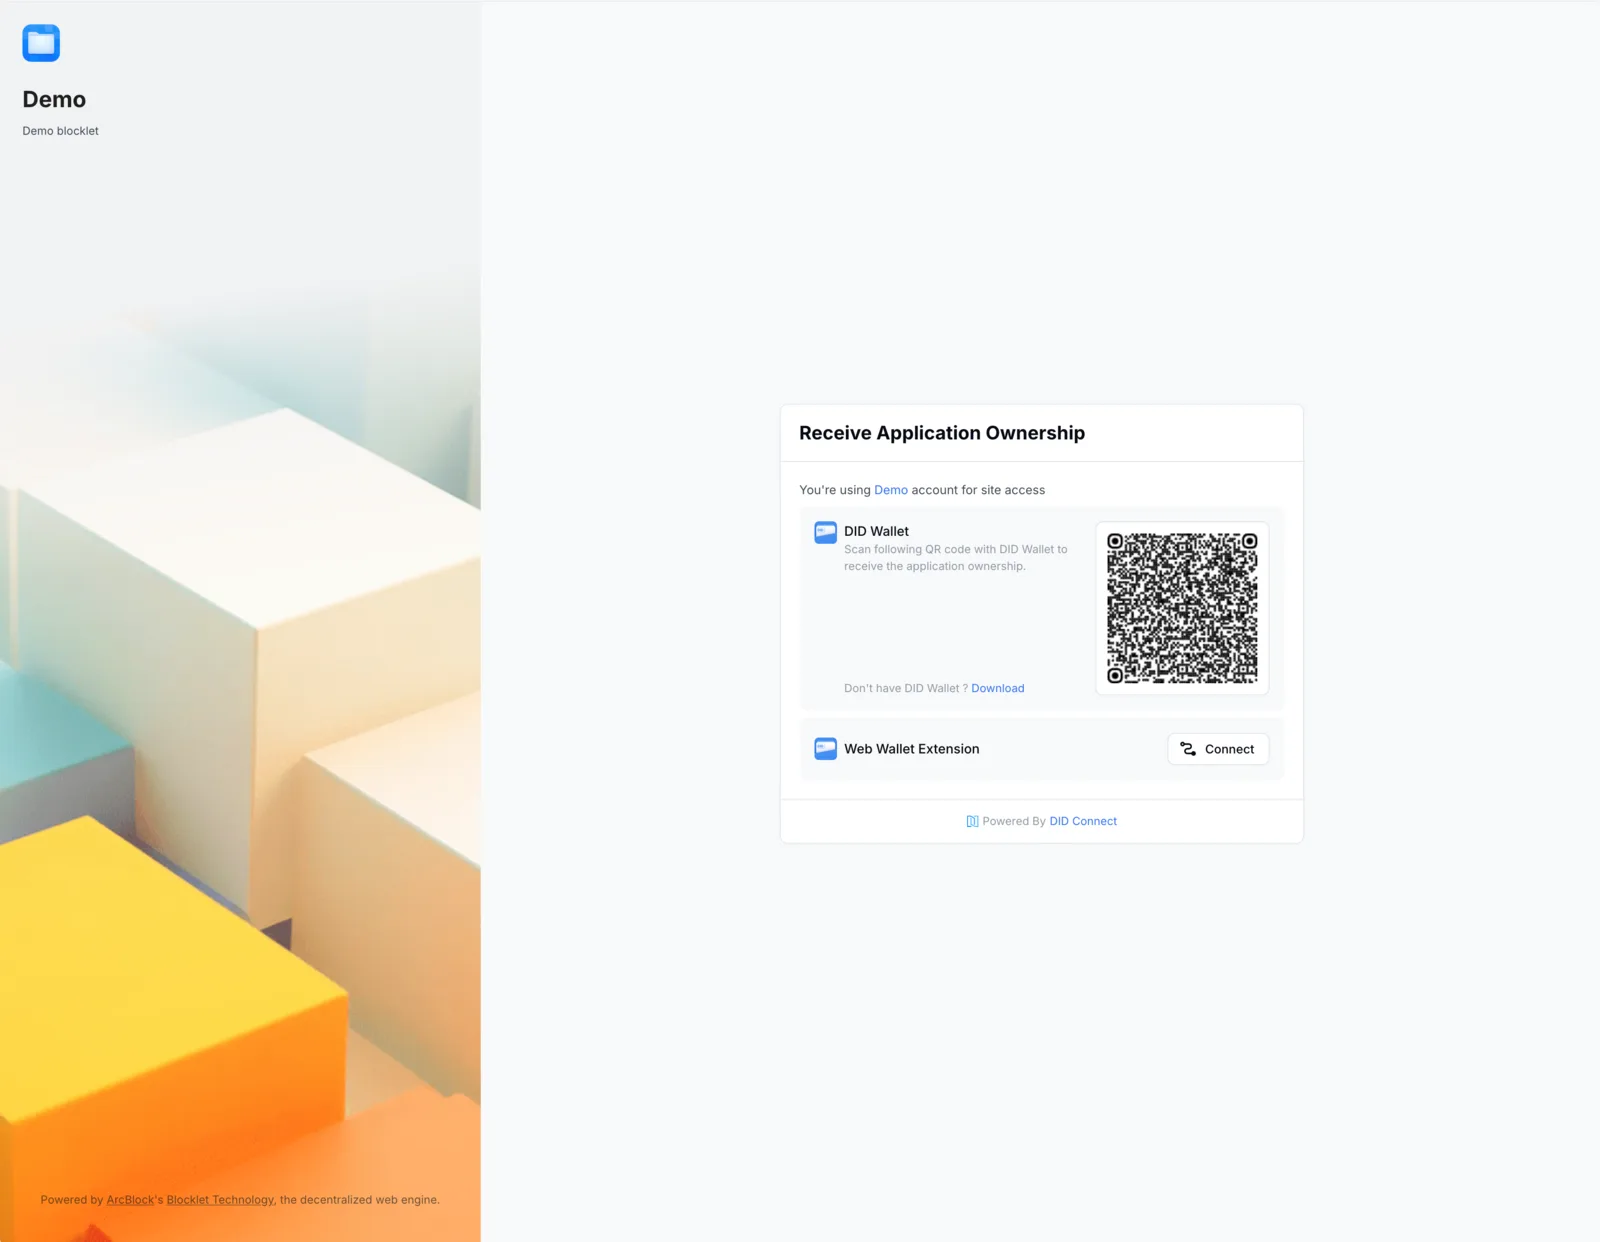
3. The recipient becomes the owner using the DID wallet
- The recipient needs to use the DID wallet to accept the transfer.
- The application will automatically restart once the transfer is successful.
4. Transfer Subscription [Optional]
If the transferred Blocklet runs in an on-demand space, the subscription transfer is also required. For more details, refer to: Transfer application's subscription