Skip to main content
Configure OAuth Server using Grafana.
Requirements
Requirements
- Have access to the OAuth Server Blocklet
- Have administrative privileges for any third-party applications that require integration (e.g., Grafana).
- Understand the basic OAuth 2.0 flow
Register an OAuth App
- Log in to your OAuth server's management console (Blocklet Service).
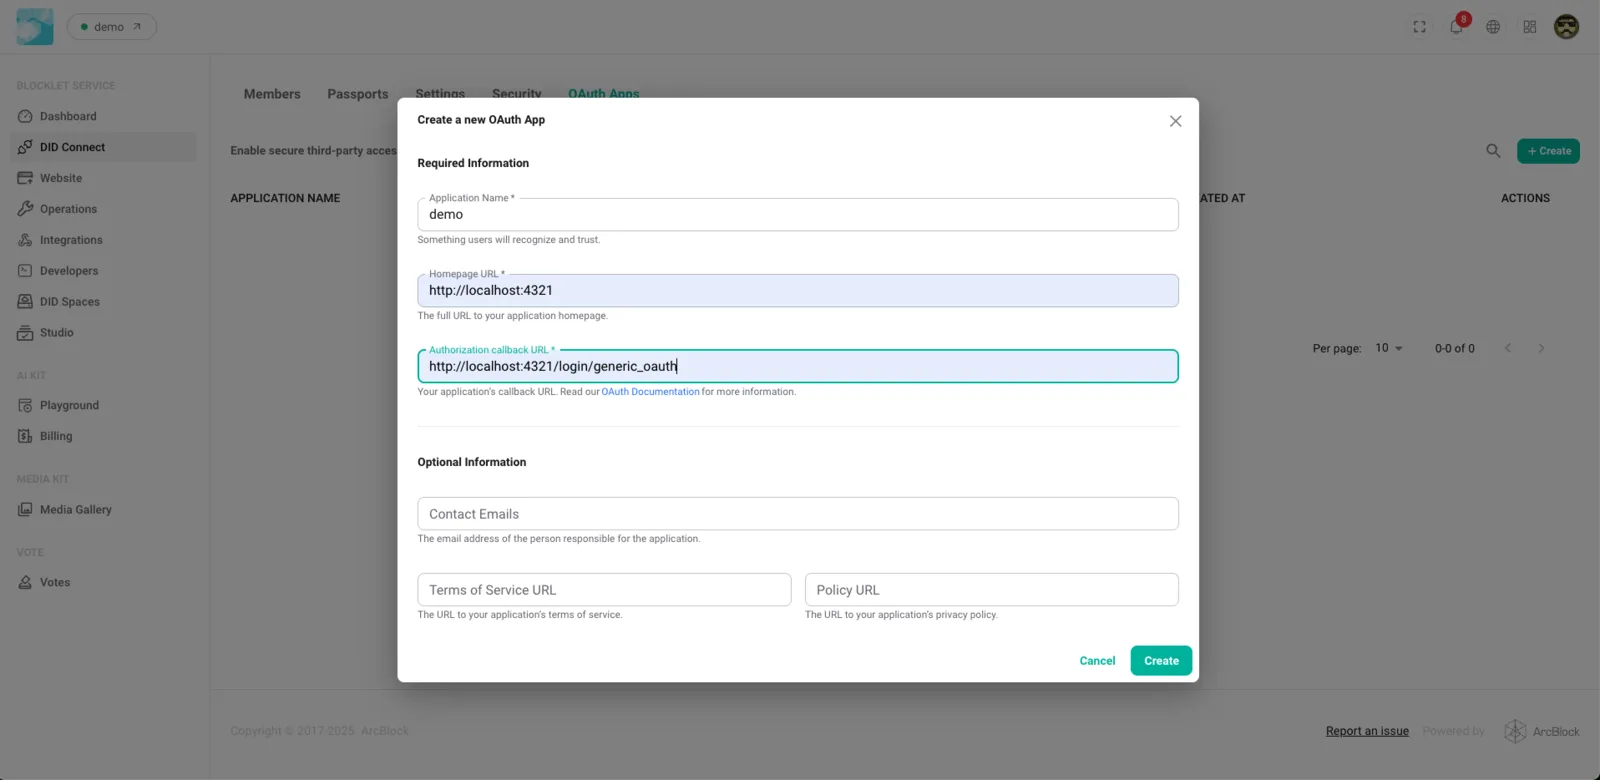
- Create a new OAuth App (DID Connect => OAuth Apps)
- Fill in the required information, including the application name and callback URL (redirect_uri).
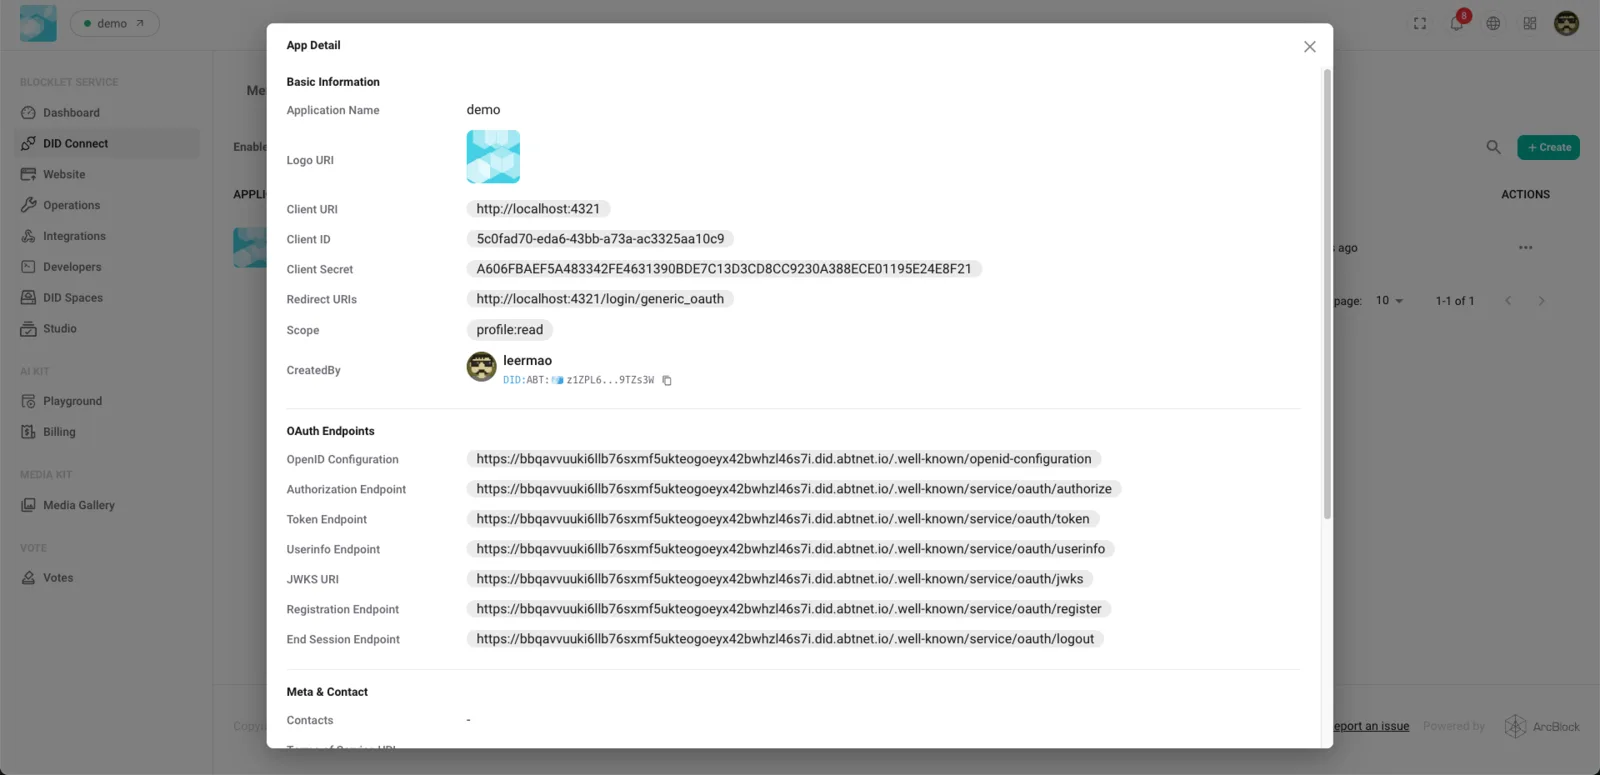
- Save to obtain the Client ID and Client Secret
- Keep your Client Secret secure and confidential.
Configure an OAuth Client (Grafana)
1. Basic Setup
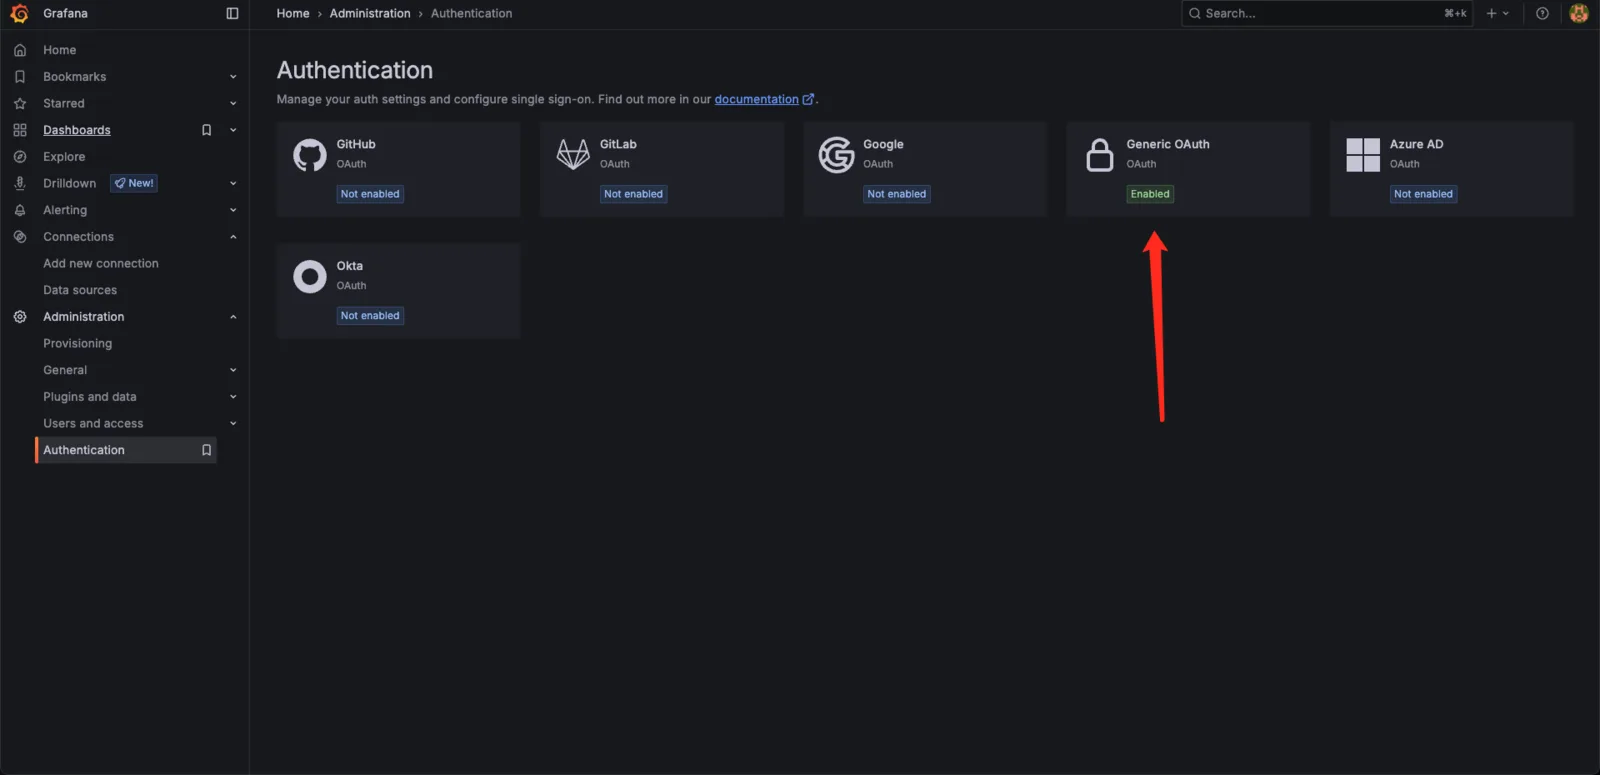
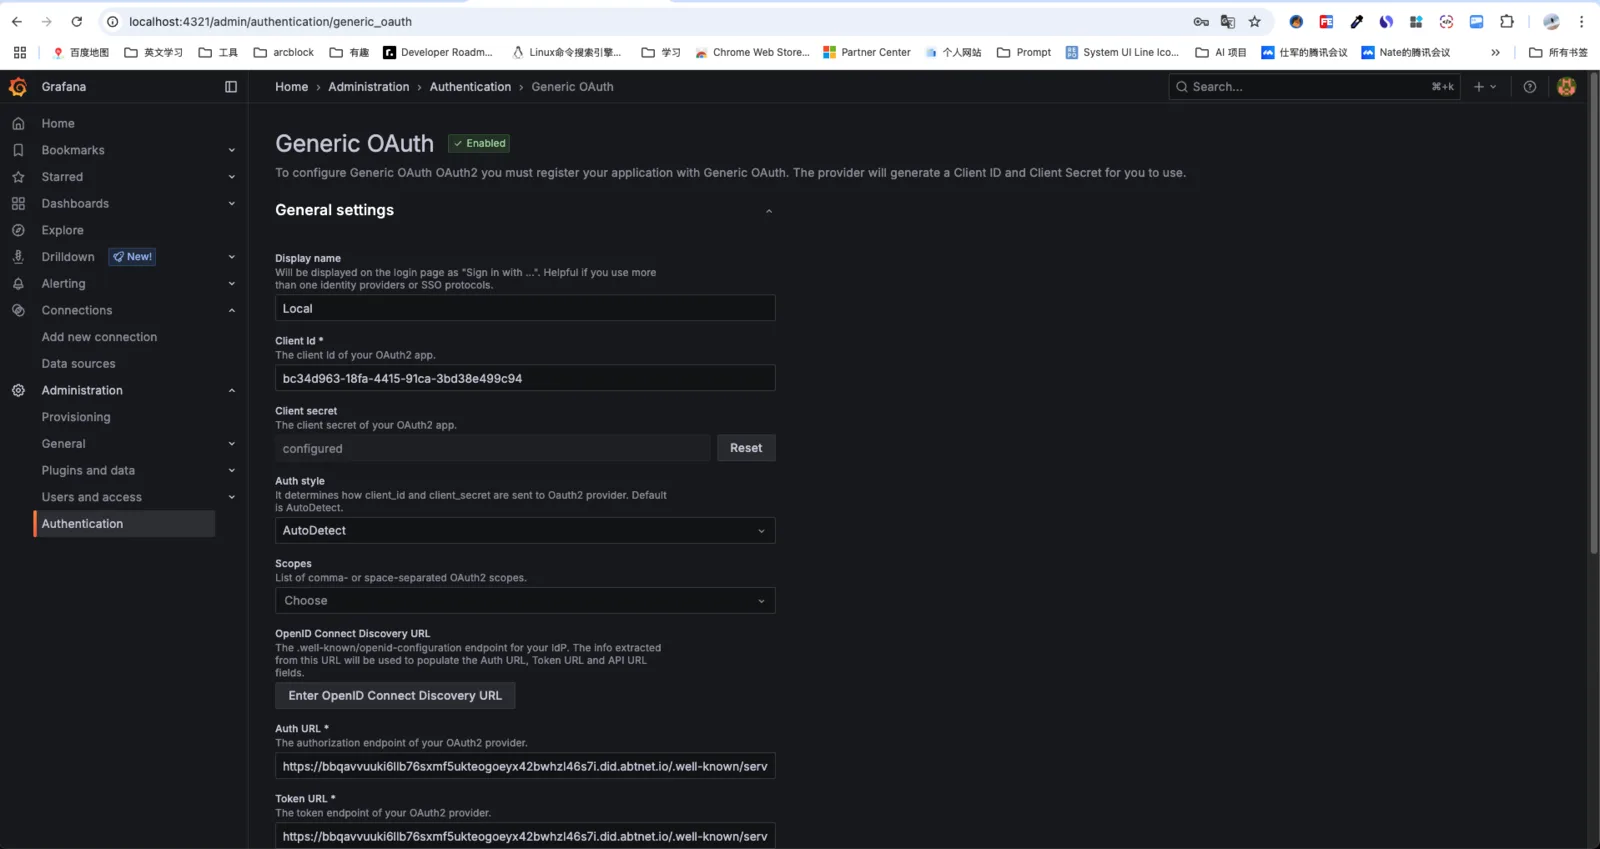
- Open the Grafana administration backend and navigate to Authentication > Generic OAuth.
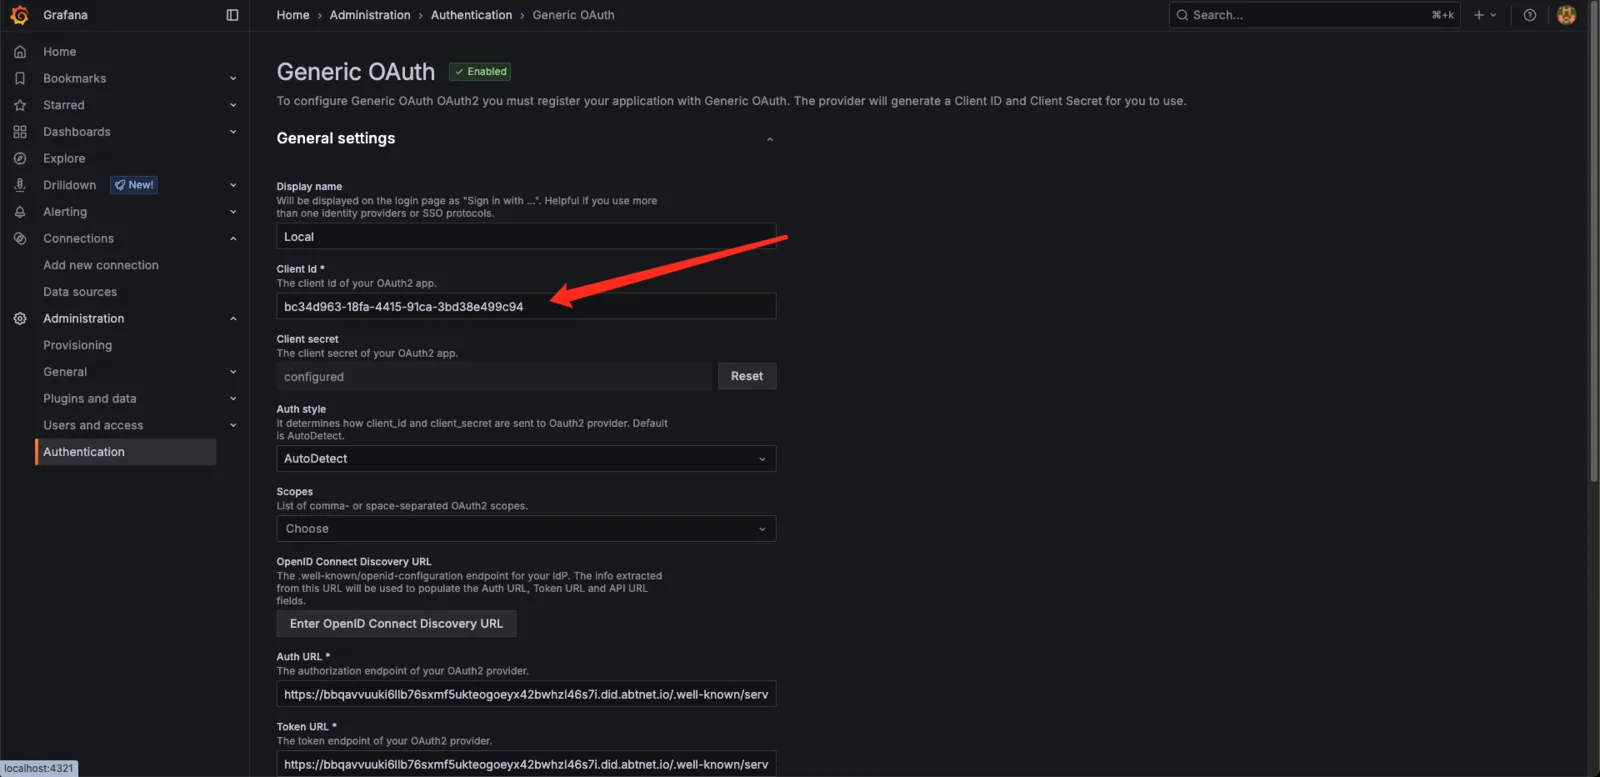
- Enter Display name, Client ID, and Client Secret
2. OpenID Connect Discovery
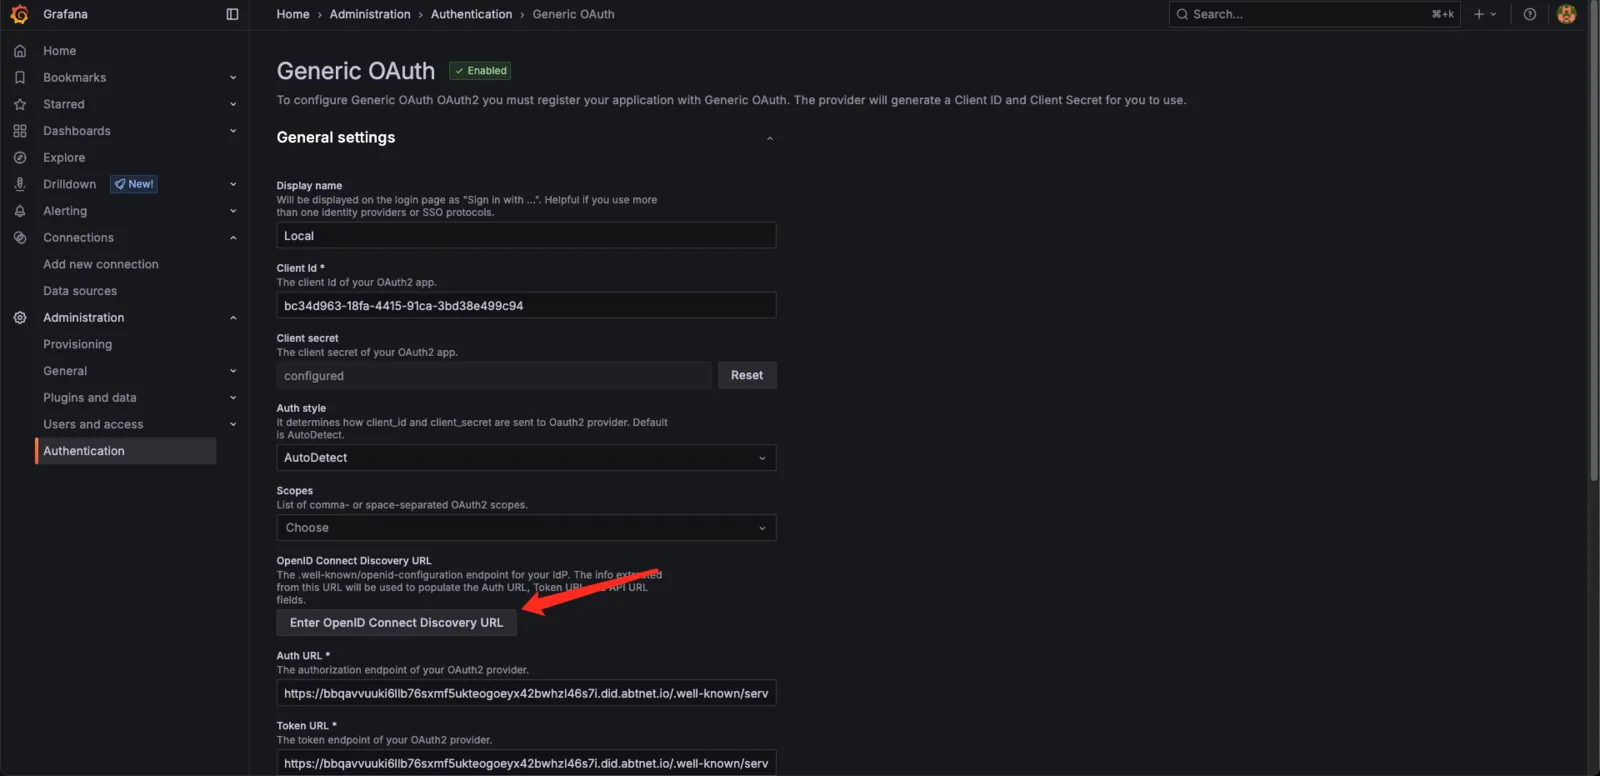
- Enter the OpenID Connect Discovery URL (typically
https://your-oauth-server/.well-known/openid-configuration).
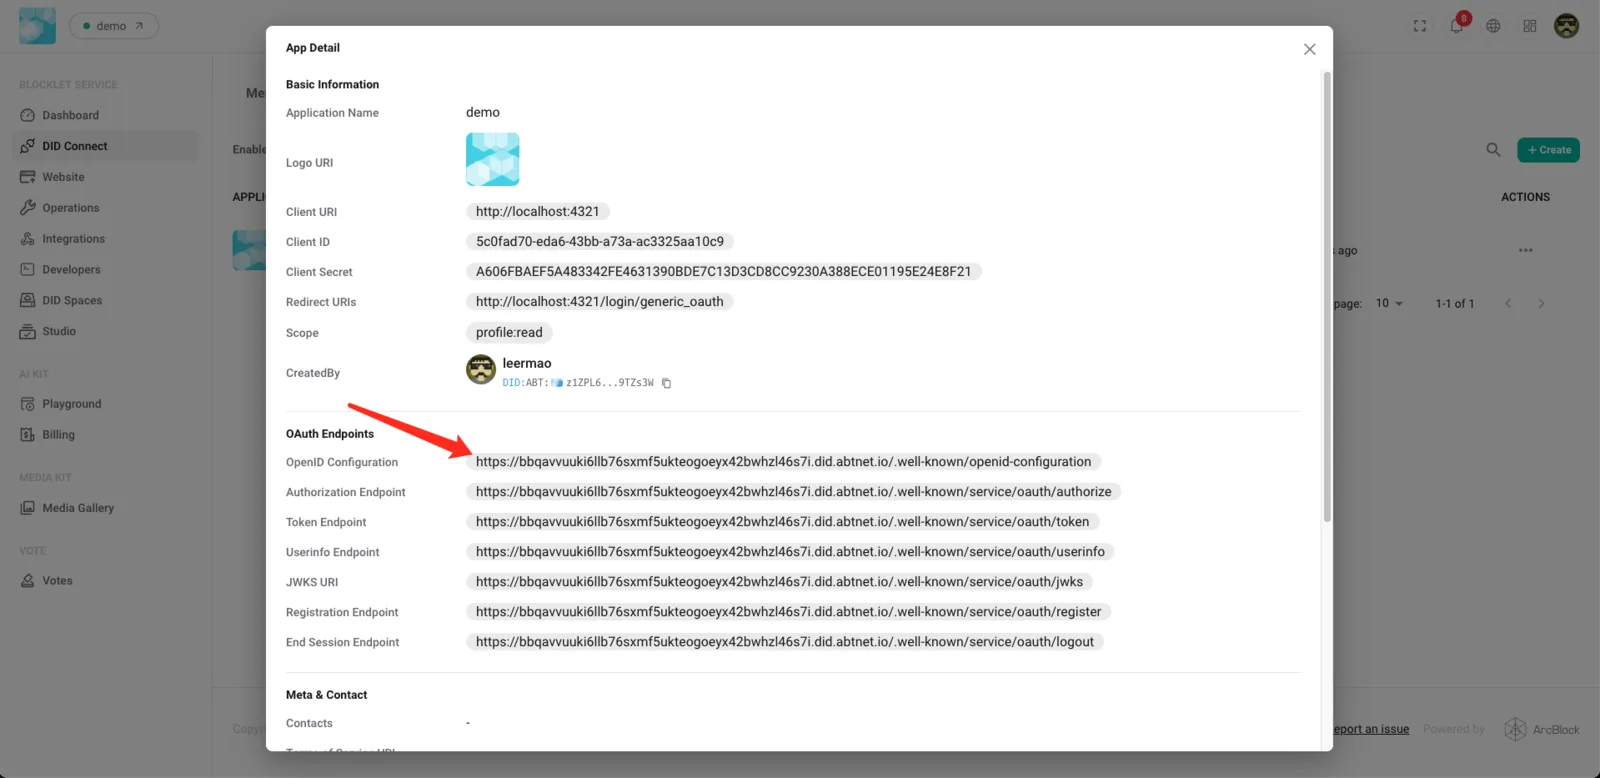
- Or manually enter the Auth URL, Token URL, and API URL
3. Authorization and Token Configuration
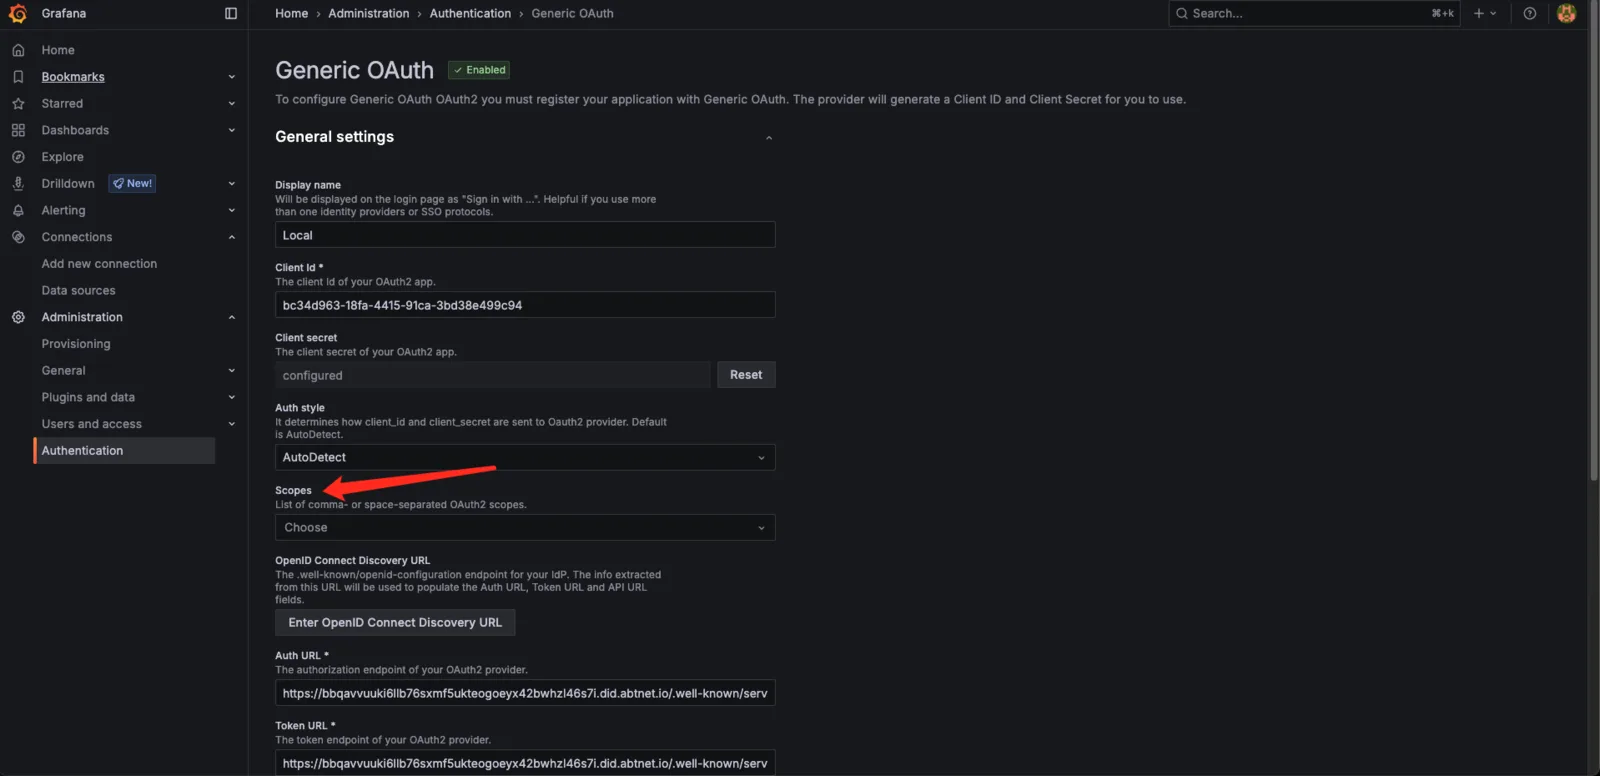
- Configure Scopes (currently, only
profile:read is required)
- Enable
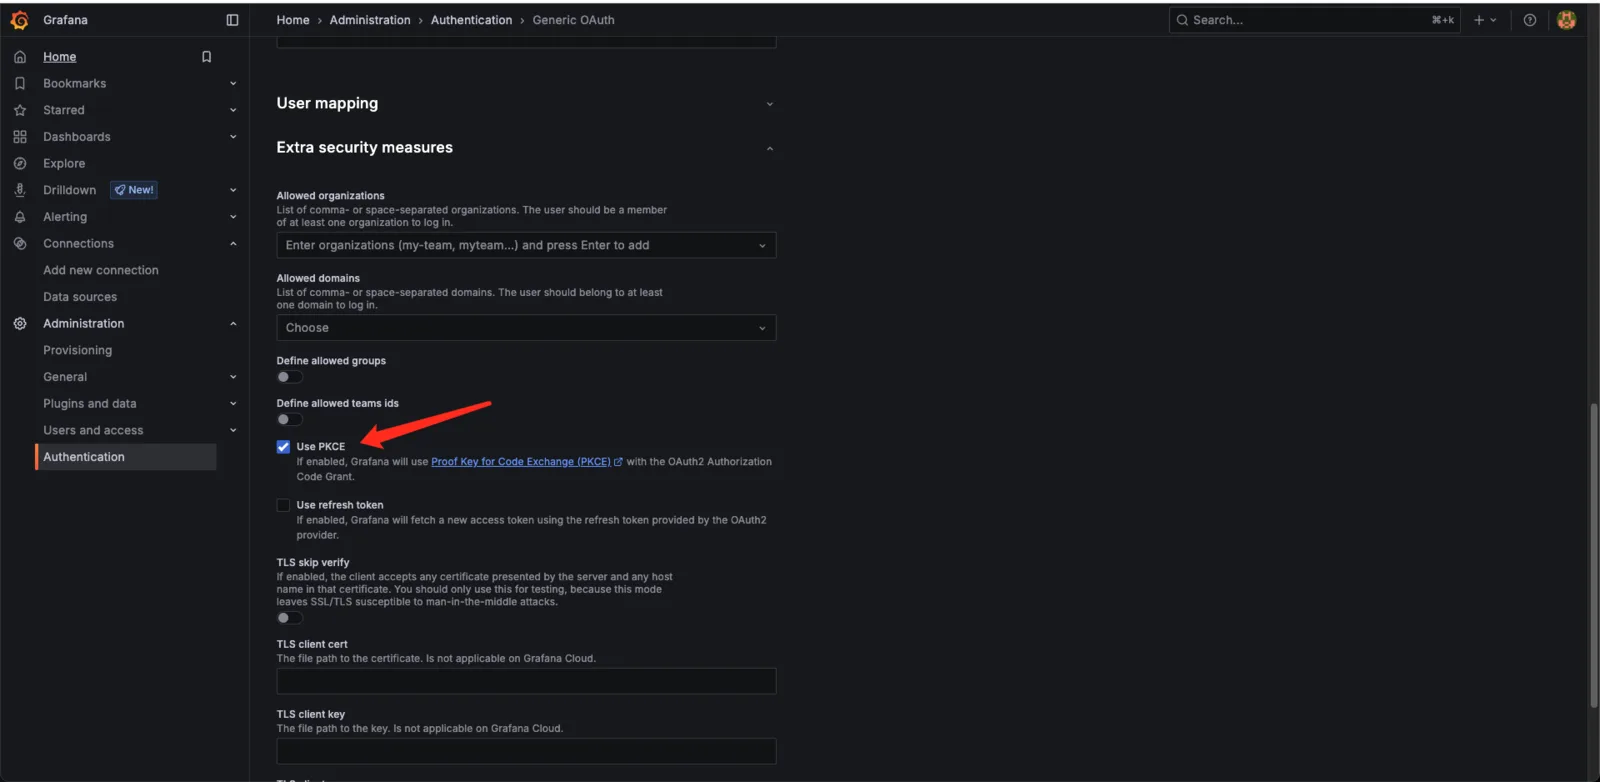
Extra security measures and select the Use PKCE option.
- Save
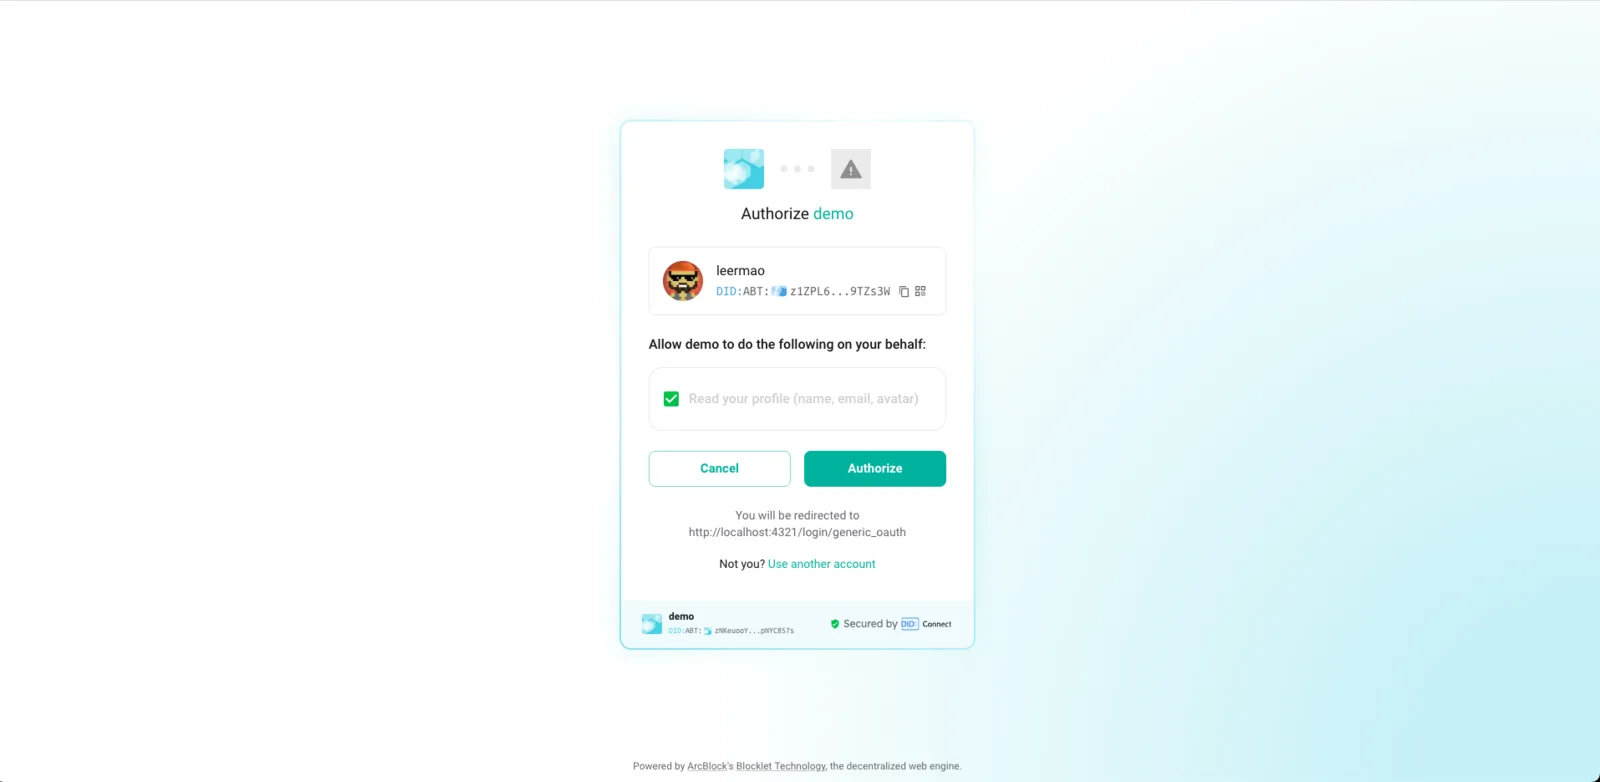
4. After signing out, you can sign in using the OAuth Server.
5. Frequently Asked Questions and Troubleshooting
- An incorrect callback address resulted in a 400/401 error.
- Incorrect Scope configuration prevents user information retrieval.
- Responding to a Client Secret Leak
6. Appendix: Example Configuration
- Provide a complete Grafana configuration screenshot