Create Website
Use this guide to turn your source material into a live-ready site with a single command. You will inspect the available aigne web generate flags, approve the AI-generated sitemap, and understand where the finished pages land on disk.
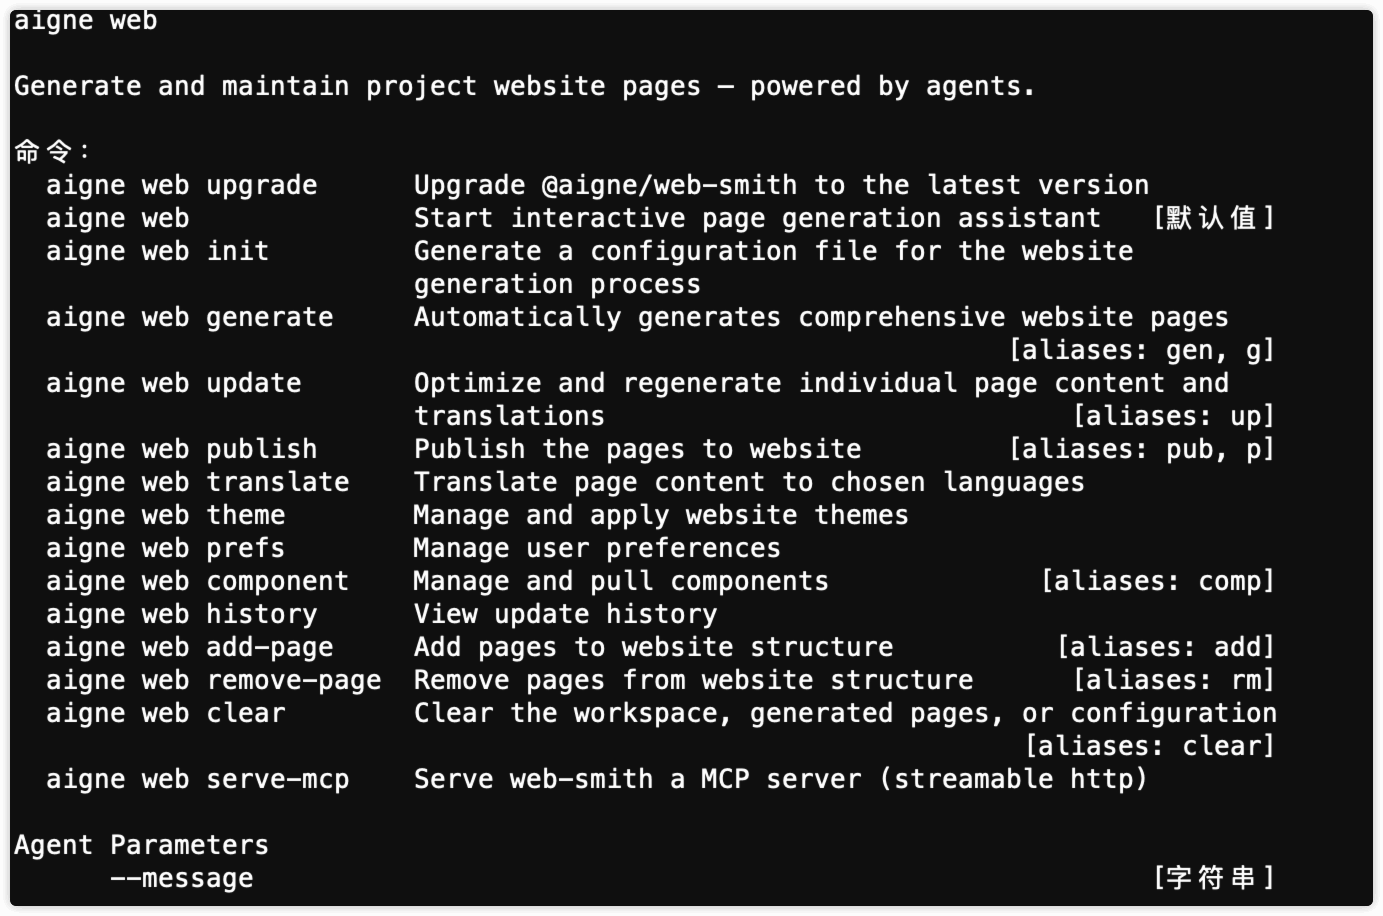
If you need a quick reference to every flag and alias, run aigne web -h; the sample output below is what you should see.
Creation Workflow#
The aigne web generate command initiates the entire website creation process. It reads your configuration, analyzes your source materials, plans the website's structure, generates content for each page, and assembles the final files.
Usage#
To run the generation process, execute the following command in your terminal:
Create Website
aigne web generateYou can also use the aliases gen or g:
Create Website
aigne web genWhat Happens During Generate#
When you run the generate command, WebSmith performs the following sequence of operations:
- Load Configuration: It first looks for and loads the
config.yamlfile to understand your high-level requirements. If this file doesn't exist, it will automatically initiate a guided setup to create one. - Analyze Sources: The AI scans the documents, markdown files, and other materials specified in the
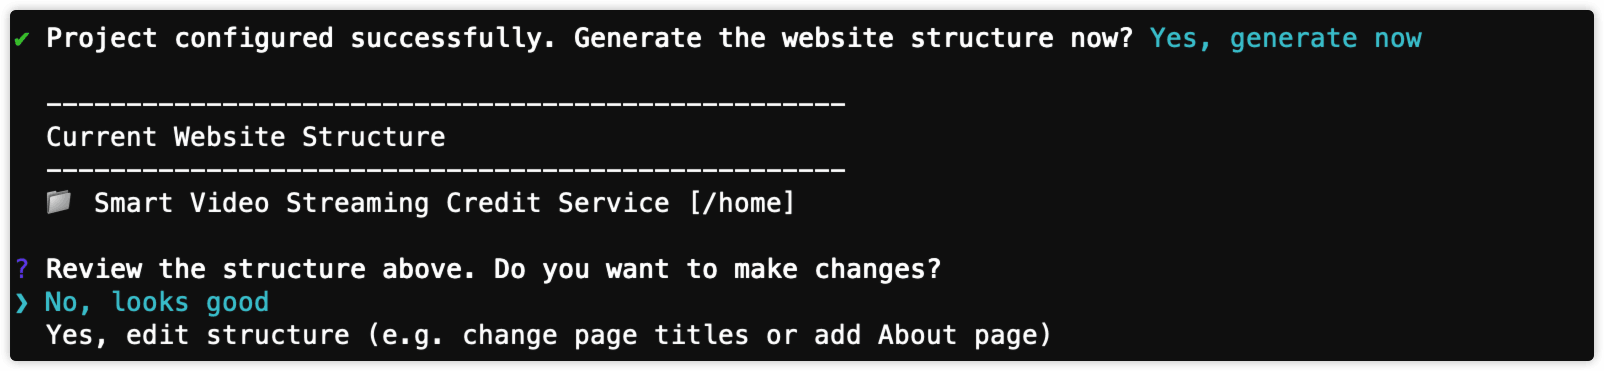
sourcesPathof your configuration to understand the subject matter. - Plan Website Structure: Based on the purpose, audience, and source content, the AI proposes a logical sitemap for your website, outlining all the pages and their hierarchy. You will be prompted to review and approve this structure before content generation begins.
- Generate Page Content: For each page in the approved structure, the AI generates detailed content, including titles, descriptions, and sections composed of professional components like hero banners, feature lists, and FAQs.
- Save Website Files: The final, structured content for each page is saved as YAML files in the directory specified by
pagesDirin your configuration. These files are now ready for publishing.

Parameters#
The generate command accepts several optional parameters to customize its behavior.
Specifies the path to a glossary file (e.g., @glossary.md). This ensures that project-specific terms are used consistently throughout the generated content.
If set to true, the command will regenerate all pages from scratch, overwriting any previously generated files. This is useful after making significant changes to the config.yaml file or your source documents.
Example with parameters:
Regenerate Website
# Regenerate the entire website using a glossary file
aigne web generate --forceRegenerate --glossary "@glossary.md"
The Configuration File (config.yaml)#
The config.yaml file is the blueprint for your website. It provides the AI with the necessary context and constraints to build a site that meets your specific needs. This file defines the project, the site's purpose and audience, language settings, and file locations.
Below is a detailed breakdown of the key properties within the config.yaml file.
Configuration Options#
The name of your project or website. This is used for metadata and publishing.
A brief description of your project.
A URL or local path to your project's logo.
An array of strings defining the website's primary goals. Examples: landingPage, ecommerce, portfolio, corporate, blog, saas, nonprofit, education, mixedPurpose.
An array of strings identifying the primary audience. Examples: customers, businessOwners, marketers, designers, developers, investors, jobSeekers, students, generalPublic.
Defines the desired size and complexity of the website. Options include singlePage, minimal, standard, comprehensive, and aiDecide.
A field for any custom rules or specific instructions for the AI to follow during generation, such as tone of voice, content to exclude, or specific points to emphasize.
The primary language for the website content, specified by a language code (e.g., en, zh, es).
A list of language codes to translate the website into. For example, ['zh', 'fr'].
The local directory path where the generated website page files will be saved.
An array of file paths or glob patterns that point to your source content. The AI will analyze these files to generate the website.
Example config.yaml#
Here is an example of a complete config.yaml file with comments explaining each section.
config.yaml
# Project information for page publishing
projectName: AIGNE WebSmith
projectDesc: AI-driven website generation tool
projectLogo: https://www.aigne.io/image-bin/uploads/bc5afab4e6d282cc7f4aa444e9b9f7f4.svg
projectId: aigne-websmith-docs
projectSlug: aigne-websmith

# =============================================================================
# Website Configuration
# =============================================================================

# Purpose: What's the main outcome you want readers to achieve?
# Available options (uncomment and modify as needed):
#   landingPage     - Landing page / Homepage: Convert visitors into users or customers
#   ecommerce       - E-commerce / Online store: Sell products or services online
#   portfolio       - Portfolio / Showcase: Display creative work, projects, or achievements
#   corporate       - Corporate / Business: Professional business website with company information
#   blog            - Blog / Content site: Share articles, news, and regular content updates
#   saas            - SaaS / Software product: Promote and onboard users to software services
#   nonprofit       - Non-profit / Community: Promote causes, accept donations, engage volunteers
#   education       - Educational / Learning: Provide courses, tutorials, or educational content
#   mixedPurpose    - Multi-purpose website: Comprehensive website covering multiple needs
pagePurpose:
  - saas
See all 43 lines
Summary#
By combining the generate command with a well-defined config.yaml file, you can efficiently produce a complete website tailored to your exact specifications. This process automates the heavy lifting of site structure and content creation, allowing you to focus on providing high-quality source material.
After generating your website, the next step is to make it available online.
Further reading: