To Existing Website
This guide shows you how to publish to an ArcBlock-powered website you already operate. Publishing to your own infrastructure gives you complete control over hosting, integration, and deployment. Before proceeding, ensure your website is compatible and properly configured.
Prerequisites#
To successfully publish to your own website, the following conditions must be met:
- A Generated Website: You must have already generated your website pages using the
aigne web generatecommand. The generated content should be present in your project's output directory. - A Blocklet Server-Powered Website: Your target website must be a running Blocklet application. AIGNE WebSmith integrates directly with the Blocklet Server environment.
- Required Component: The Pages Kit component must be installed and running on your target website. This component provides the necessary APIs for AIGNE WebSmith to upload and manage your content.
If your website is not yet set up, you can acquire the necessary components from the Blocklet Store:
Publishing Process#
The publishing process involves running a command, selecting the appropriate option, providing your website's URL, and authorizing the AIGNE WebSmith CLI to connect to your site.
Step 1: Initiate the Publish Command#
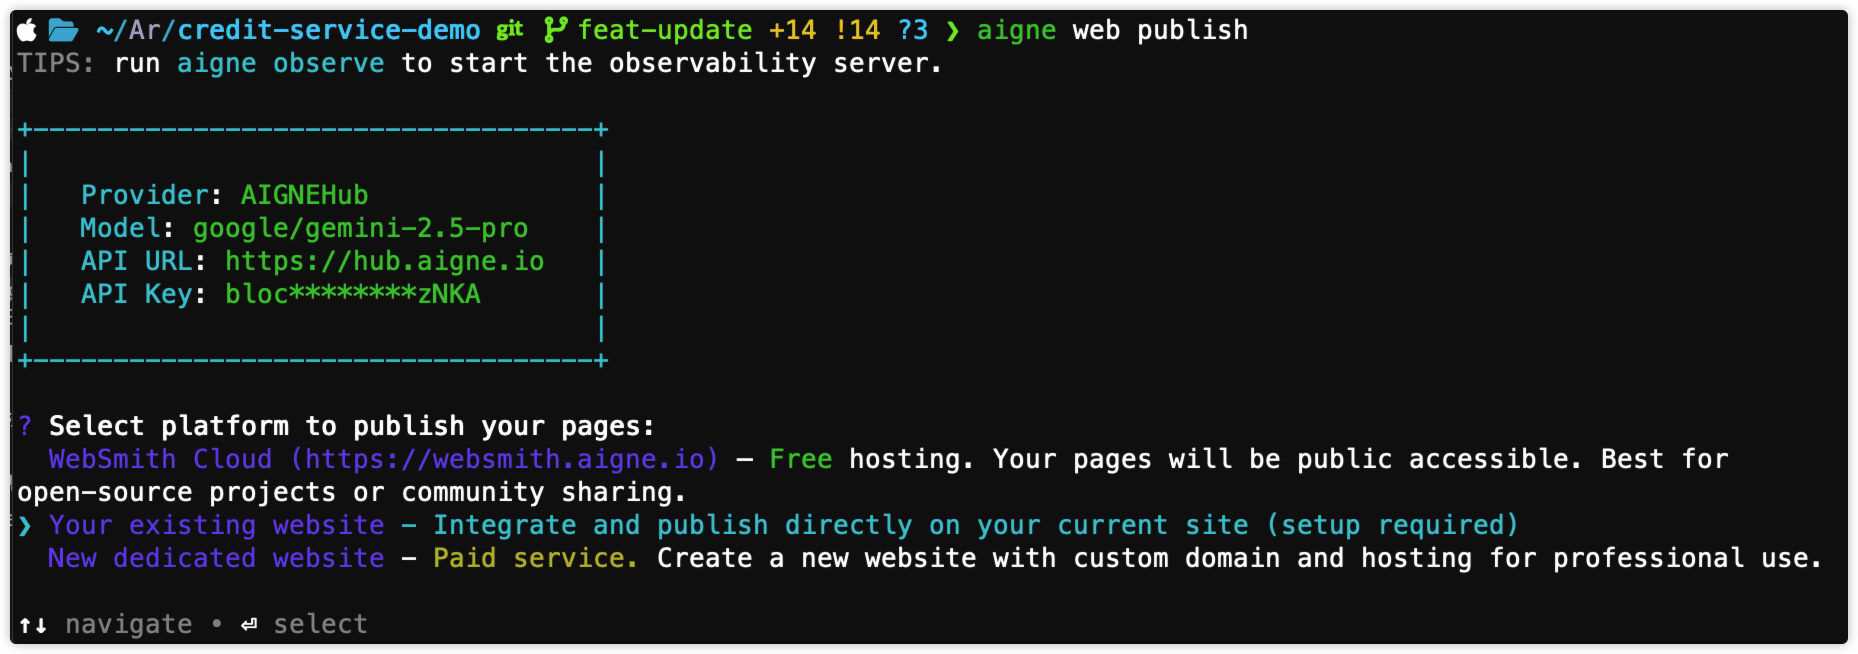
Begin the process by running the publish command in your terminal from your project directory.
Publish Website
aigne web publishStep 2: Select Publishing Option#
When prompted for a destination, choose Your existing website.
Step 3: Provide Your Website URL#
Provide the full URL of the site that already runs Pages Kit when the terminal prompt asks for it.

Step 4: Authorize the Publish Command#
For the first connection to a new website, the terminal command requires your authorization to publish content. This is a one-time setup process for each website.
- Browser Authentication: Your default web browser automatically opens a page so you can grant the publish command access.
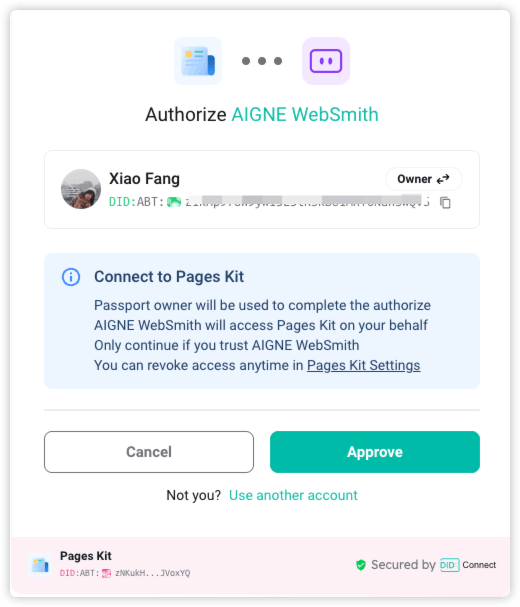
- Log In: You will be prompted to log in to your website using your DID Wallet.
- Approve Connection: After logging in, you must approve the request from "AIGNE WebSmith" to access your site. The request will ask for permissions to manage pages.
Once approved, a secure access token is generated and stored locally in your home directory (~/.aigne/web-smith-connected.yaml). This token will be used for all subsequent publish operations to this specific URL, so you will not need to repeat the authorization step.
Step 5: Await Confirmation#
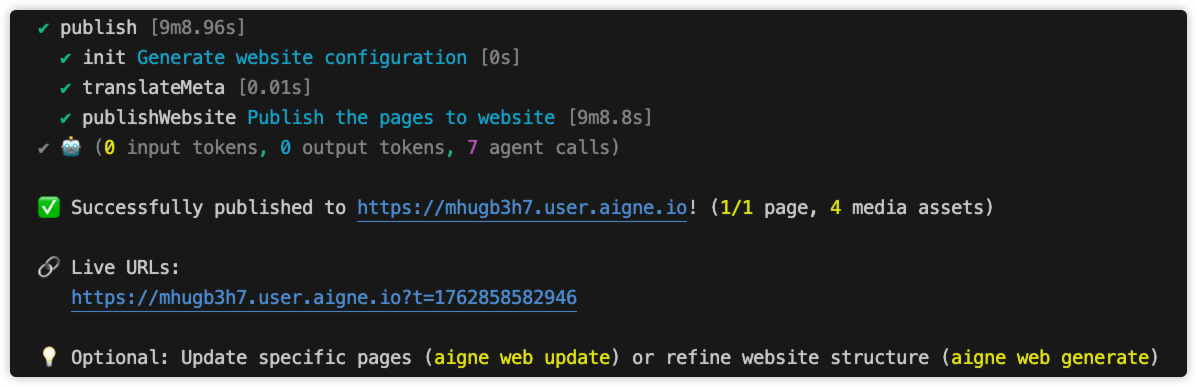
After authorization, the terminal command proceeds to:
- Bundle your generated page files and assets.
- Upload all referenced media files.
- Publish the page content to your website.
Upon successful completion, a confirmation message will be displayed in the terminal, including the live URLs for your newly published pages.
Troubleshooting#
If you encounter an error during the publishing process, refer to the common issues below.
- Error: "The provided URL is not a valid website on ArcBlock platform"
- Cause: The URL you entered does not point to a valid Blocklet application.
- Solution: Verify that the URL is correct and that the website is running. Ensure you have included the correct protocol (e.g.,
https://).
- Error: "This website does not have required components for publishing"
- Cause: The target website is a valid Blocklet but is missing the required "Pages Kit" component.
- Solution: Install the Pages Kit component on your website. You can install here.
- Error: "Unable to connect" or "Failed to obtain access token"
- Cause: This typically indicates a network issue, or the target server is unavailable. It can also occur if you reject the authorization request in your browser.
- Solution: Check your internet connection, ensure the website URL is correct and accessible, and re-run the
aigne web publishcommand, making sure to approve the authorization request.
After successfully publishing, you can manage your content further. To make changes to existing pages, see Update Website.