NFT Gated Access
This example demonstrates how to restrict access to specific content or features in your application to users who own a particular Non-Fungible Token (NFT) or on-chain asset. This is a common Web3 pattern used for exclusive memberships, event tickets, or special digital items.
DID Connect simplifies this process by allowing your application to request proof of asset ownership directly from the user's wallet using an asset claim. For a detailed reference on this claim type, please see the Asset Claim documentation.
How It Works#
The flow for NFT-gated access involves the application requesting that the user present a specific asset from their wallet. The application defines the criteria for the required asset, such as its issuer, parent collection, or unique address. If the user's wallet holds a matching asset and they approve the request, the application verifies the response and grants access.
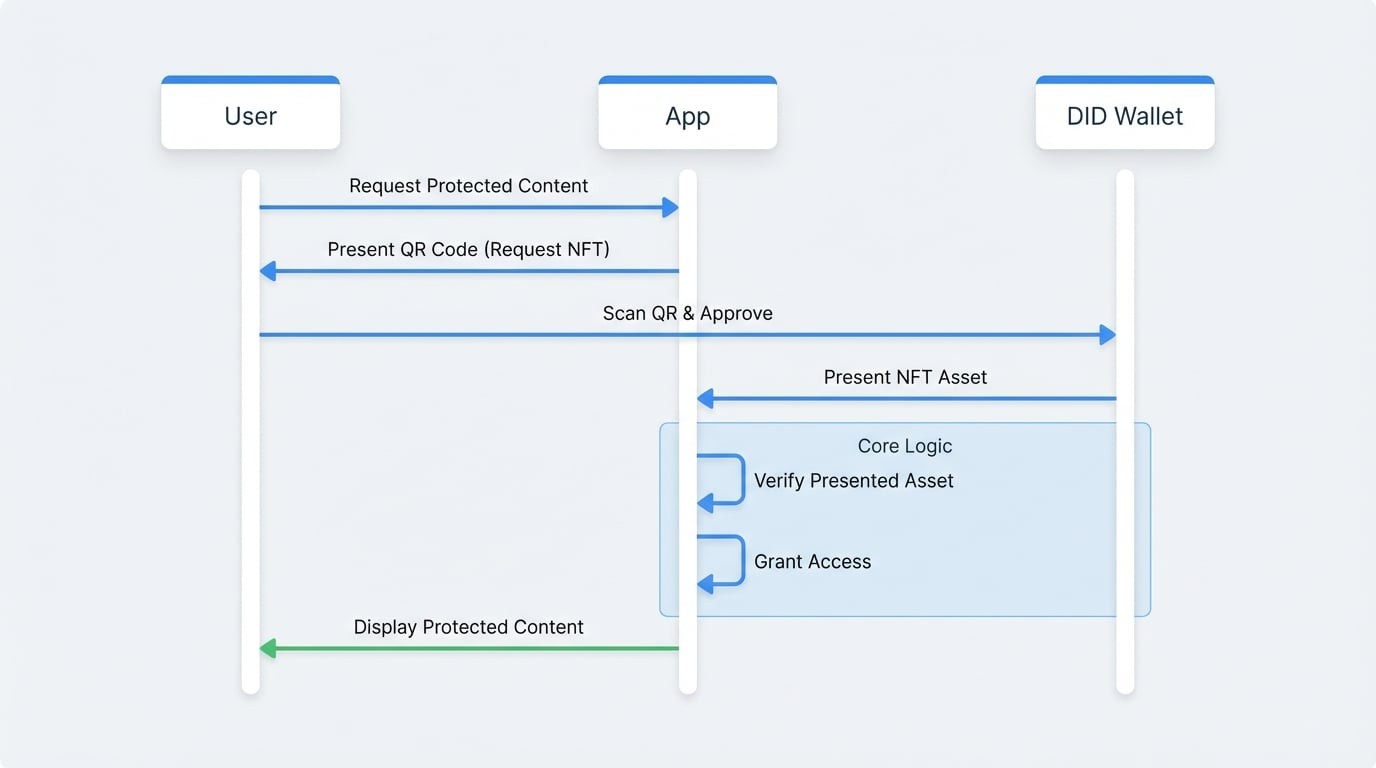
Implementation Steps#
Here’s how to implement NFT-gated access using did-connect handlers. We will configure a session that requires the user to present an NFT from a trusted issuer.
1. Configure the Wallet Handlers#
First, set up your WalletHandlers. In the onConnect callback, we will dynamically add an asset claim to the list of requested claims.
This claim will instruct the wallet to find an asset that matches the criteria defined in the filters array. In this case, we're asking for any asset created by a specific trustedIssuers DID.
Wallet Handler Setup
const { WalletHandlers } = require('@arcblock/did-connect');

const handlers = new WalletHandlers({
  authenticator: auth, // Your WalletAuthenticator instance
  // ... other configurations

  onConnect: async ({ claims }) => {
    // Add the asset claim to the request
    claims.push({
      type: 'asset',
      description: 'Please present your VIP Membership NFT to access this content.',
      optional: false, // Setting optional to false makes it a requirement
      filters: [
        {
          // Replace with the DID of the authority that issued your NFTs
          trustedIssuers: ['zNKjDm4Xsoaffb19UE6QxVeevuaTaLCS1n1S'],
        },
      ],
    });
  },

  // ... other handlers like onAuth
});
2. Verify the Presented Asset#
In the onAuth callback, which runs after the user has successfully responded to the request, you need to verify that the required asset was presented.
The claims array in the onAuth payload will contain the data returned from the wallet. We find the asset claim result and check if it contains the asset address. If it does, the user has proven ownership, and we can grant them access.
Verifying the Wallet Response
const handlers = new WalletHandlers({
  authenticator: auth,
  // ... other configurations

  onConnect: (req) => { /* ... as above ... */ },

  onAuth: async ({ claims, userDid }) => {
    // Find the result of our asset claim request
    const presentedAssetClaim = claims.find(c => c.type === 'asset');

    // The `asset` property will contain the address of the presented NFT
    if (presentedAssetClaim && presentedAssetClaim.asset) {
      console.log(`Access granted to ${userDid}.`);
      console.log(`Presented Asset Address: ${presentedAssetClaim.asset}`);

      // Here you would typically:
      // 1. Create a session for the user.
      // 2. Redirect them to the protected content.
      return {
        status: 'ok',
        message: 'Access Granted',
      };
    }

    console.log(`Access denied for ${userDid}. Required NFT not presented.`);
See all 4 lines
Asset Claim Filtering#
The filters property is highly flexible. You can require assets based on various criteria:
address: The specific address of the NFT.trustedIssuers: The DID of the entity that created the NFT.trustedParents: The address of a parent collection NFT.
By combining these filters, you can create sophisticated access rules for your application, such as requiring a specific ticket NFT from a specific event organizer.
This example provides a solid foundation for building powerful, decentralized access control systems in your applications. To explore another common use case, check out the Transaction Payment example.