How to Configure Additional Payment Methods
This guide explains how to configure additional payment options for EVM-compatible chains.
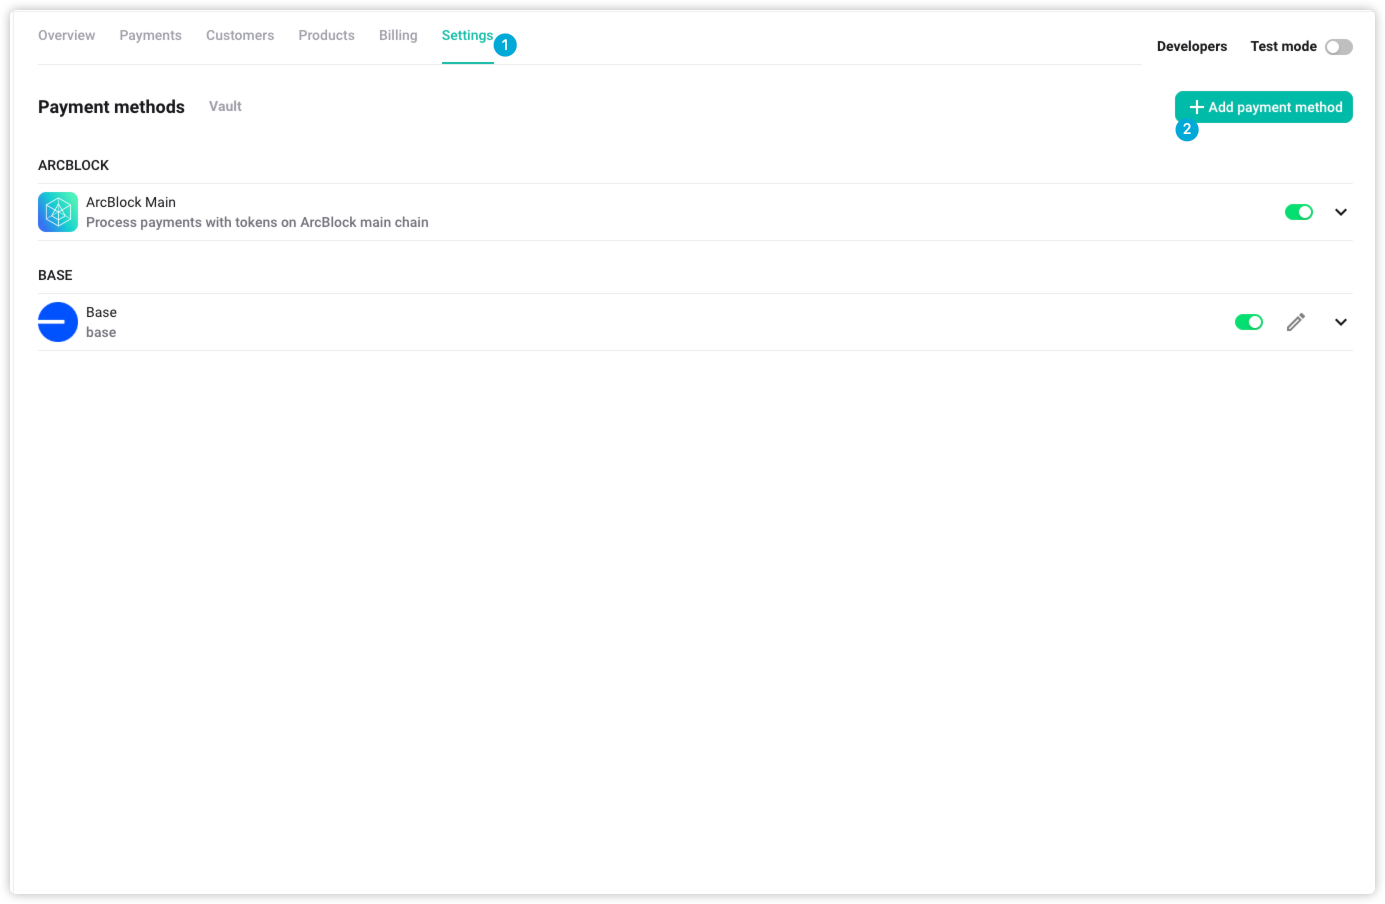
1. Add a Payment Method (EVM Chain)#
Navigate toayments → Settings → Payment Methods → Add Payment Method
Then, enter the following:
- Name: The name of the chain, e.g., “Ethereum” or “Base”
- Description: A short description of the network (e.g., "Polygon is a scalable Ethereum Layer 2 chain")
- RPC Endpoint: A valid node RPC URL, e.g.,
- 👉 Where to get RPC endpoints?
- Example:
- Explorer Host: The blockchain explorer for viewing transaction history, e.g.,
- Example:
- Ethereum:
https://etherscan.io/ - Base:
https://basescan.org/
- Ethereum:
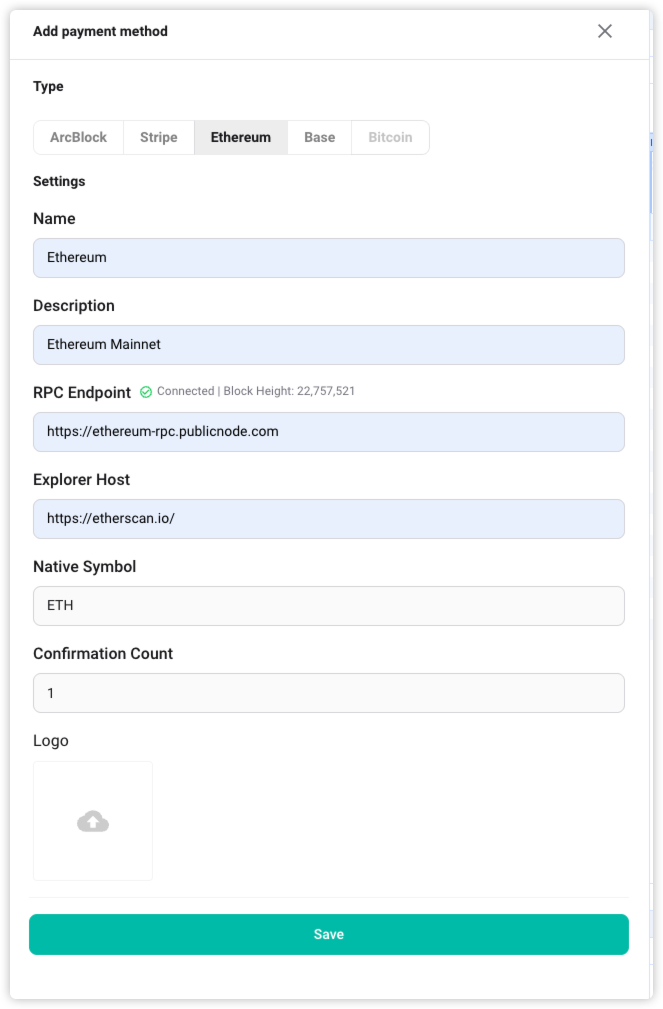
Once saved, the chain will be initialized and ready for use.
2. Add Currencies#
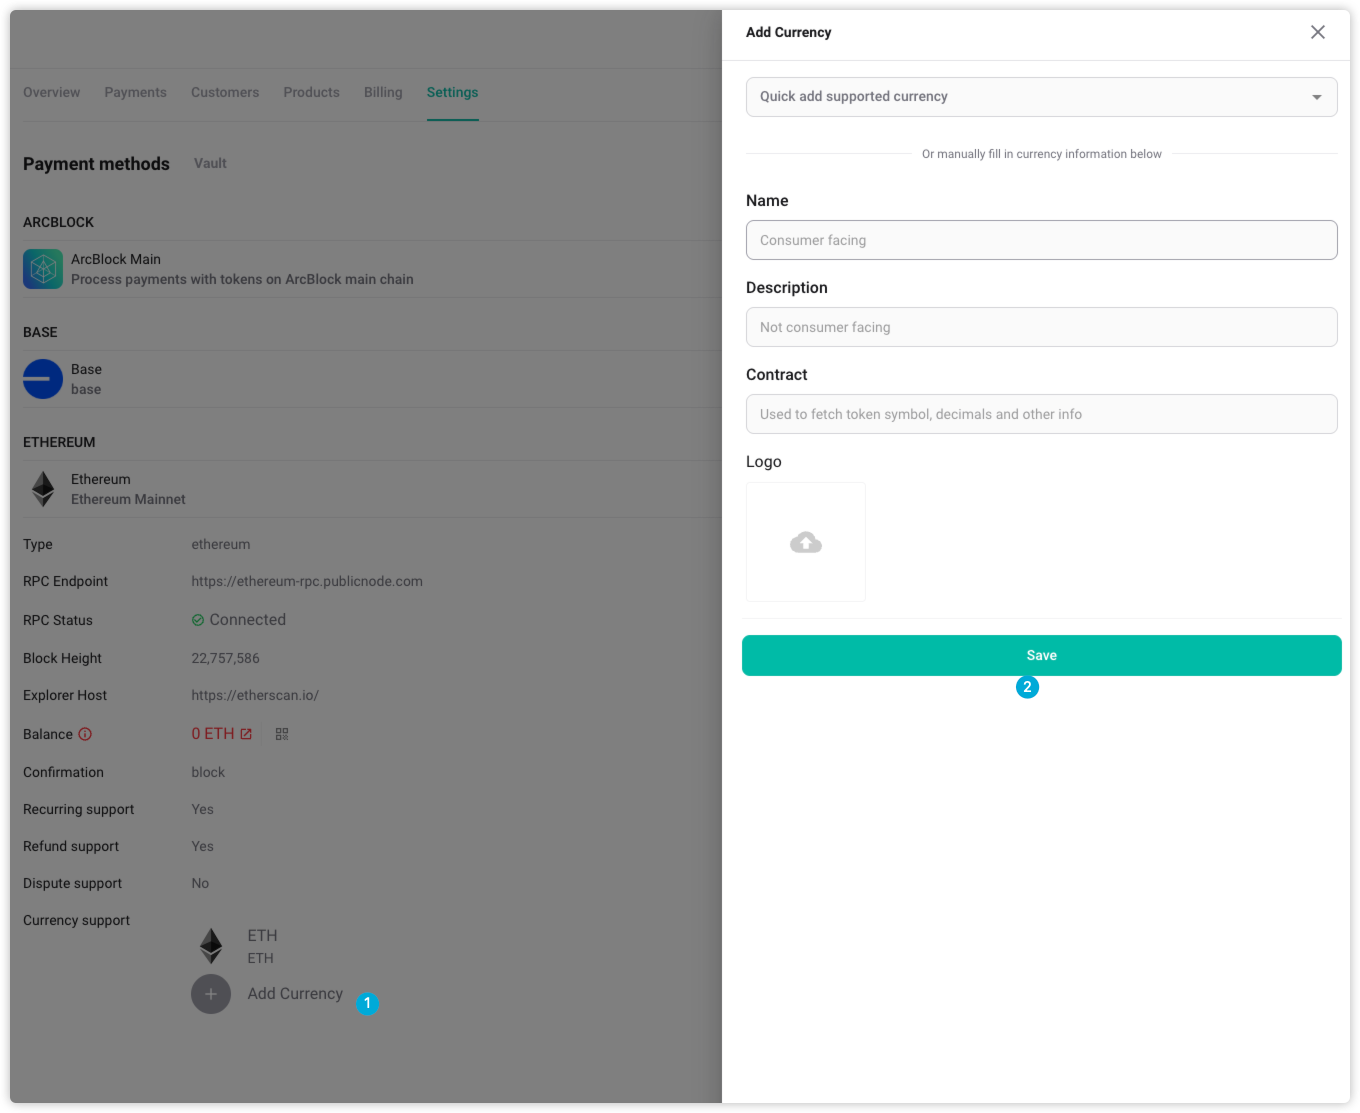
To enable tokens on the newly added chain:
Payments → Settings → [Your Method] → Add Currency
You have two options:
- Quick Add: Select a predefined currency from the list. All token info (contract, symbol, logo) will be prefilled.
- Manual Entry: Enter token info manually:
- Token Name: e.g., "USDC"
- Description: e.g., “Stablecoin for payments”
- Contract Address: Must match the on-chain deployed token
- Logo URL (optional): Used in UI; default logo is used if not set
After saving, the currency will become available in checkouts and billing.
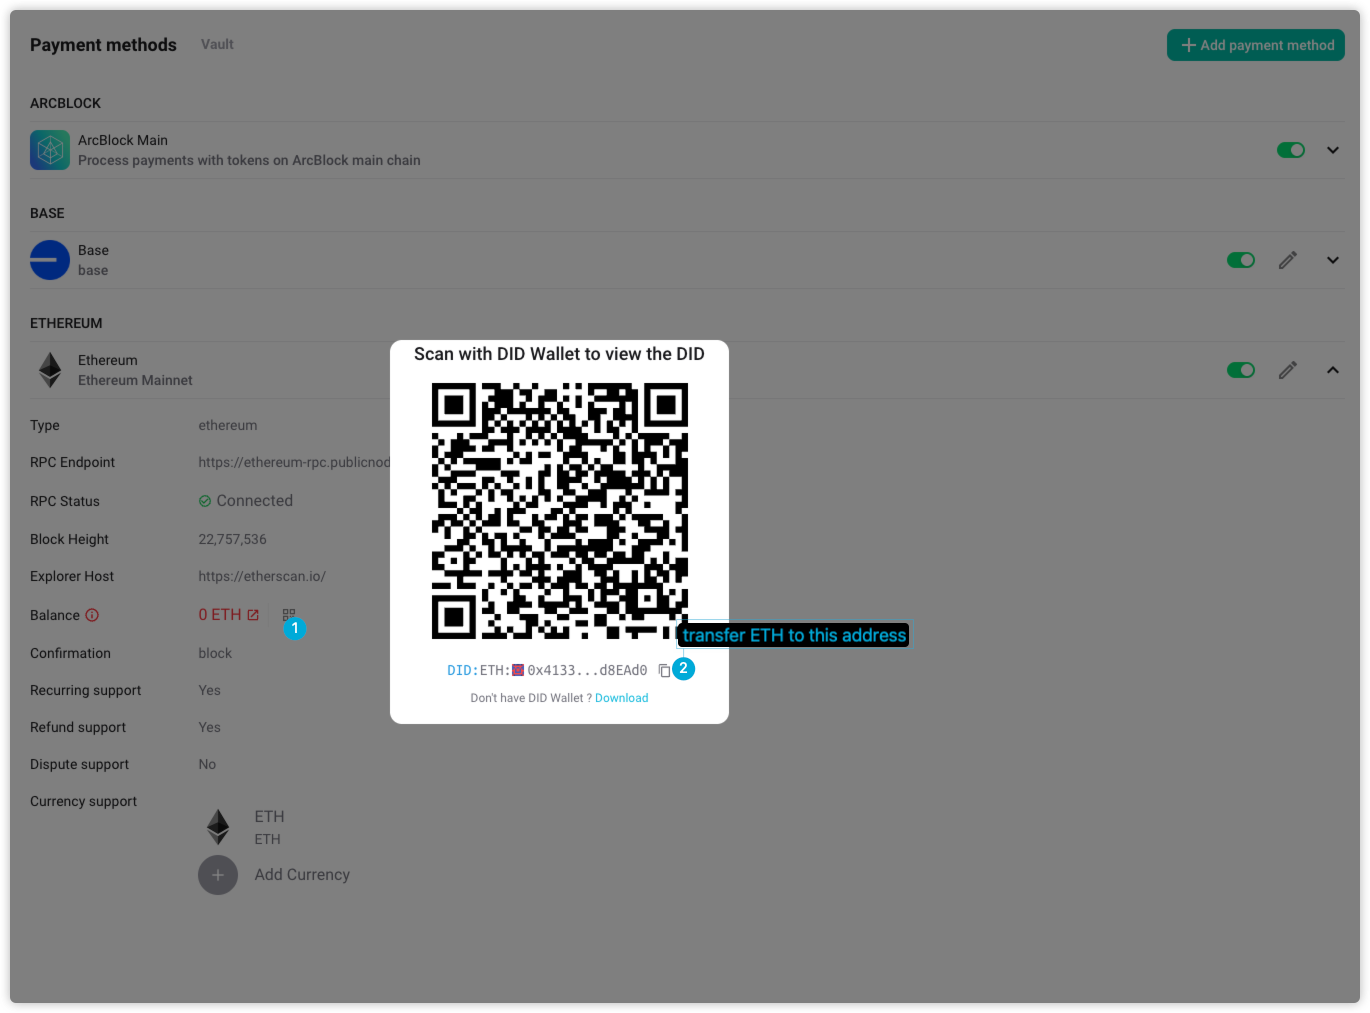
3. Deposit for Gas Fees#
To perform transactions on a chain, your application wallet must have the chain's native token (e.g., ETH).
Steps:
- Go to Payments → Settings → [Your Method]
- Locate your application wallet address under the Deposit section
- Use an external wallet to send the required gas token:
- ETH for Ethereum/Base
- After the deposit, your wallet balance will appear in Overview and Settings
Ready to Use in Pricing#
After completing the above steps, you can select the new payment method and its currencies when configuring product pricing.