In the latest version of the DID Name Service (also commonly referred to as DID Domain), we now support the ability to manage external domain names, including second-level domains (such as exmaple.com), subdomains (such as shop.example.com), which will greatly facilitate user usage, and expand the applicable scenarios of DID Domain.
What is DID Domain?#
DID Domain is a new domain management foundation proposed by ArcBlock. It leverages DID (Decentralized Identifier)/VC (Verifiable Credentials) and NFT to simplify domain management and authorization. Users can automatically resolve, configure, and manage domains by collaborating with the DID Domain system after authenticating and authorizing through NFT. In the past, internet users who used their own domains often had to create various domain records themselves at the domain provider's DNS service provider, pointing to different services, which often confused users without technical backgrounds. DID Domain automates all of this, allowing users to be hands-off and even unaware of its existence. During processes such as system migration, compliance, temporary redirects, identity verification, and obtaining and updating security certificates, DID Domain will also be able to automatically and seamlessly complete these operations.
Any application running on the Blocklet platform, whether managed by the user themselves or by the Blocklet platform, can attach any number of DID domains.
If you want to know more about the DID Domain, you can visit the dedicated website of the DID Domain.
Terminology#
Concepts of "top-level domain", "second-level domain", and "subdomain" appearing in this article are consistent.
Due to the inconsistent understanding of many people towards the concepts of top-level domains, second-level domains, and subdomains, this article will provide a unified explanation of these concepts:
- Top-level domain (TLD), such as: .com, .io, and so on
- Second-level domain (SLD), such as example.com, example.io
- Subdomain is a subdomain of a second-level domain, such as shop.example.com, shop.example.io.
This explanation applies only to the documents in this article and the Blocklet platform.
New Features#
- Manage external domains
- Manage subdomains
- Manage subdomains
- UI: Optimize personal domain list
- UI: Add domain details page
Manage external domains#
Once users support domain management, they can use the domain name on the Blocklet platform through NFT, which is consistent with directly purchasing a domain name on the DID Domain.
We support domain names purchased from many registrars, including but not limited to:
Currently supports managing second-level domains and subdomains, the steps are as follows:
- Add the domain name to be managed
- Verify domain ownership
- Change the name server for managing domain names
- Pay and complete the subscription.
1. Add the domain names to be managed#
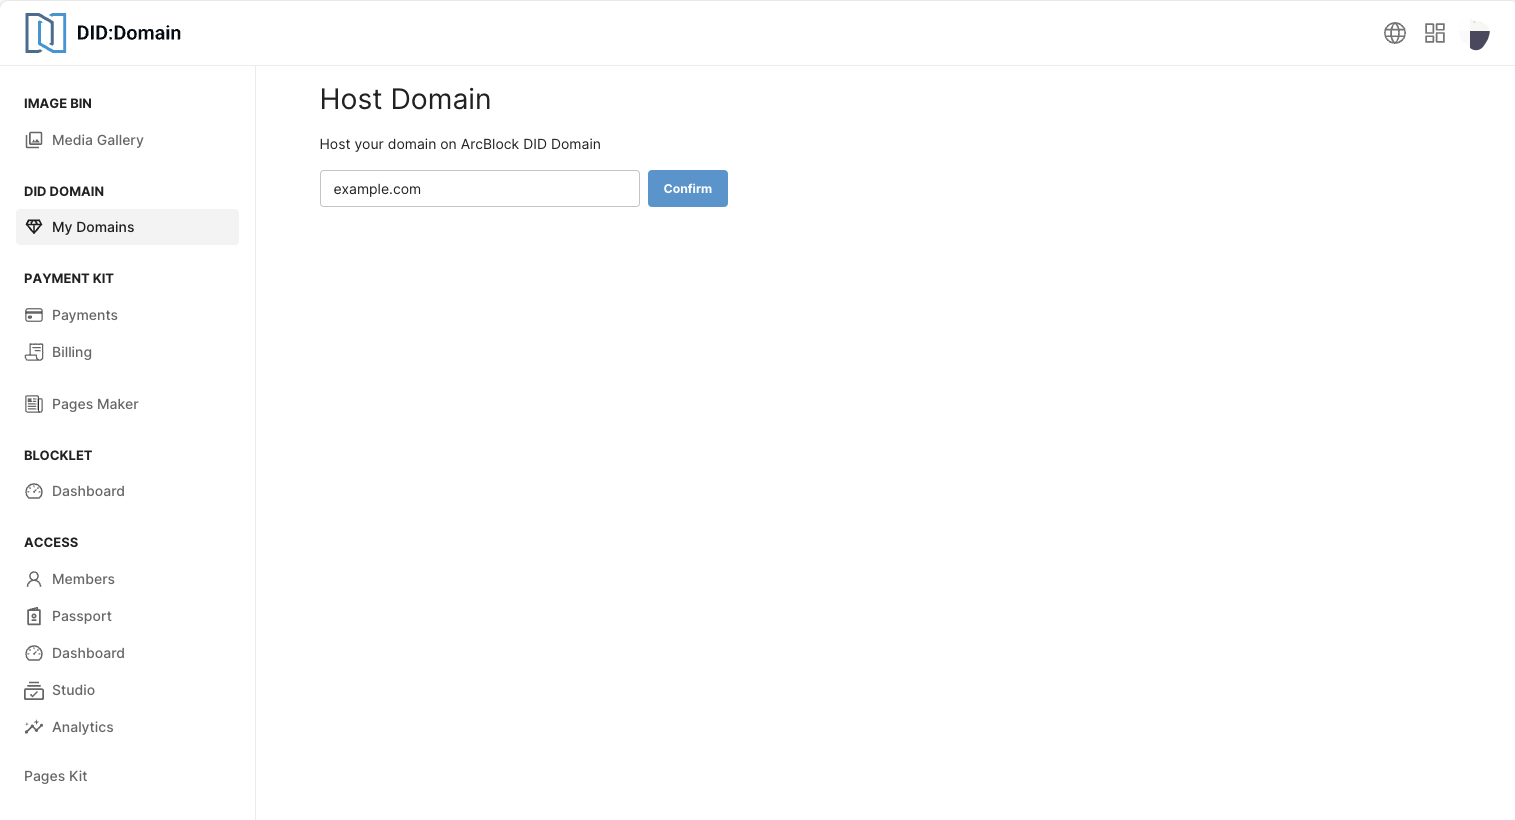
- Access the domain management page: https://domain.didlabs.org/app/user/domains/host
- Enter the domain name to be managed.
2. Verify domain ownership#
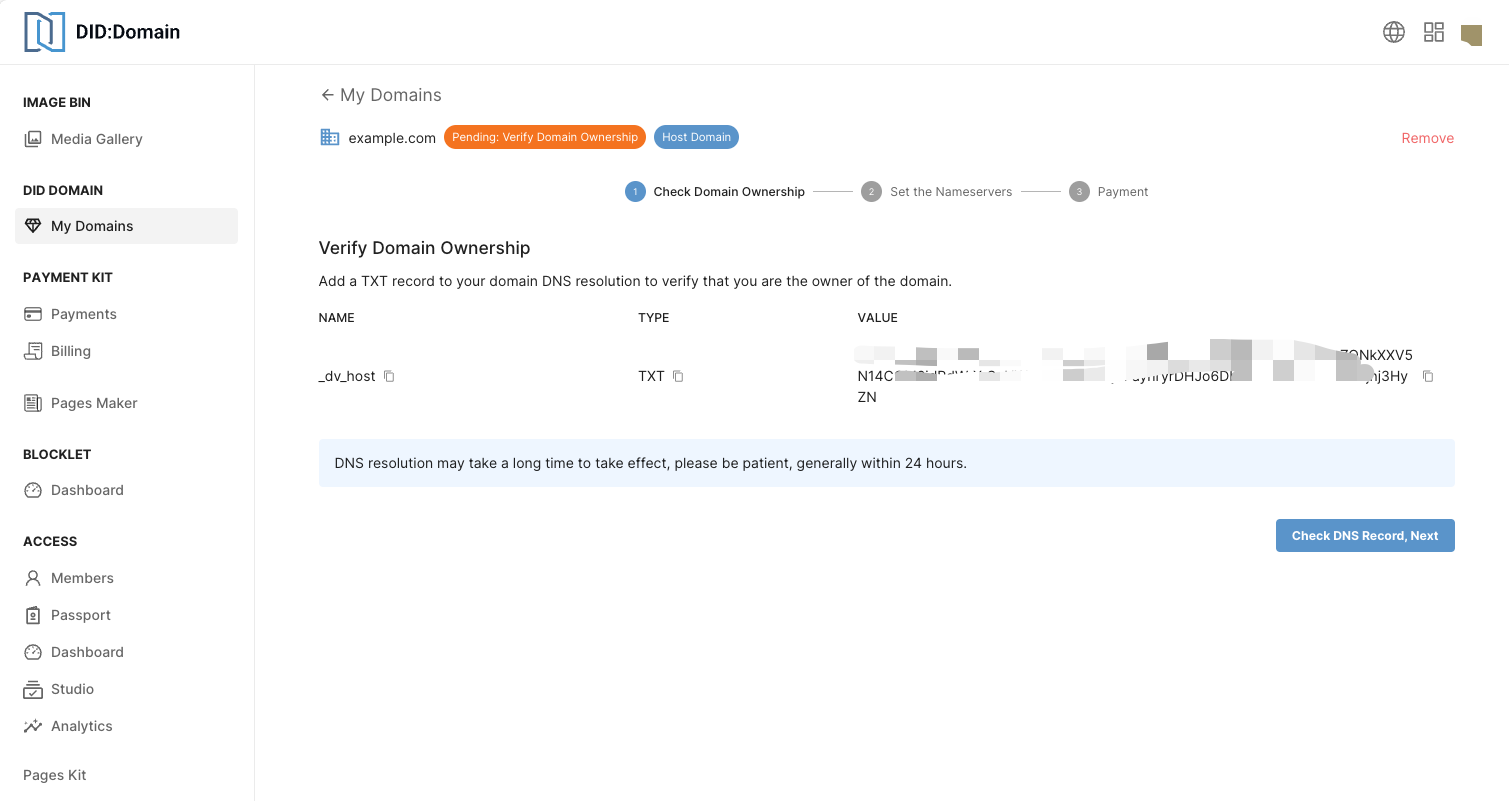
After adding the domain, you will enter the configuration stage. First, it is necessary to verify the user's ownership of the domain.
- According to the page prompts, add a TXT record for the domain name example.com:
- Record Name:
_did_dns_verify - Record type:
TXT - Record Value: The record value specified on the page
- Record Name:
- Please wait for the record to take effect. Due to DNS propagation, it usually does not take effect immediately:
- You can click the button on the page to check if it has taken effect.
- DID Domain will also automatically detects whether it is effective. If it is effective, it will send emails and wallet notifications to users, and users can continue the following processes according to the notification content.
※ Note:
- The specific effective time of DNS cannot be determined, but it generally does not exceed 48 hours.
- Since this record is used for verification and does not affect the efficiency of subsequent parsing, the caching time can be set to the shortest.
3. Modify the name servers of the domain#
If domain ownership verification is successful, the next step is to set up name servers.
The way of setting up secondary domain names and subdomains is slightly different.
3.1 Managing Subdomains
3.1.1 Log in to your domain registrar
Log in to your domain registrar, find the domain management page, and locate the nameservers settings page. You can search for your domain registrar at ICANN.
3.1.2 Remove other name servers
Set the name servers provided by DID Domain to be the unique server.
Our documentation provides guidance on how to change name servers at some registrars, and we will continue to add more Guidances.
3.1.3 Set the name servers to the servers specified by the DID domain
Set the name servers to the server address specified on the page, and wait for the records to take effect.
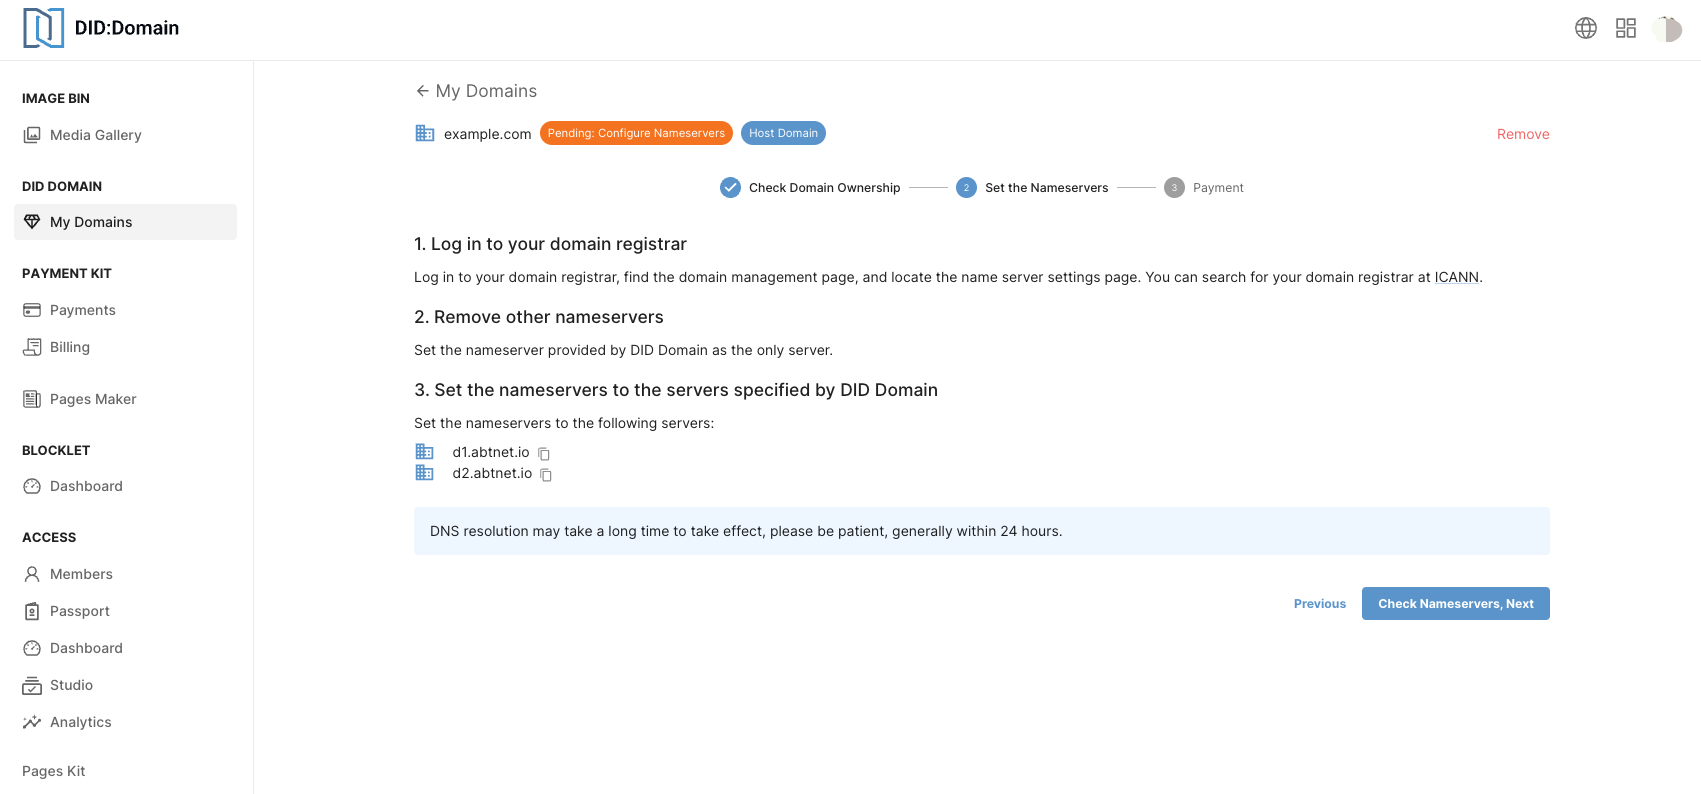
The modification methods may vary among different registrars, but most provide a relatively friendly interactive approach. If you encounter difficulties, you can seek help from the community.
3.2 Manage Subdomains
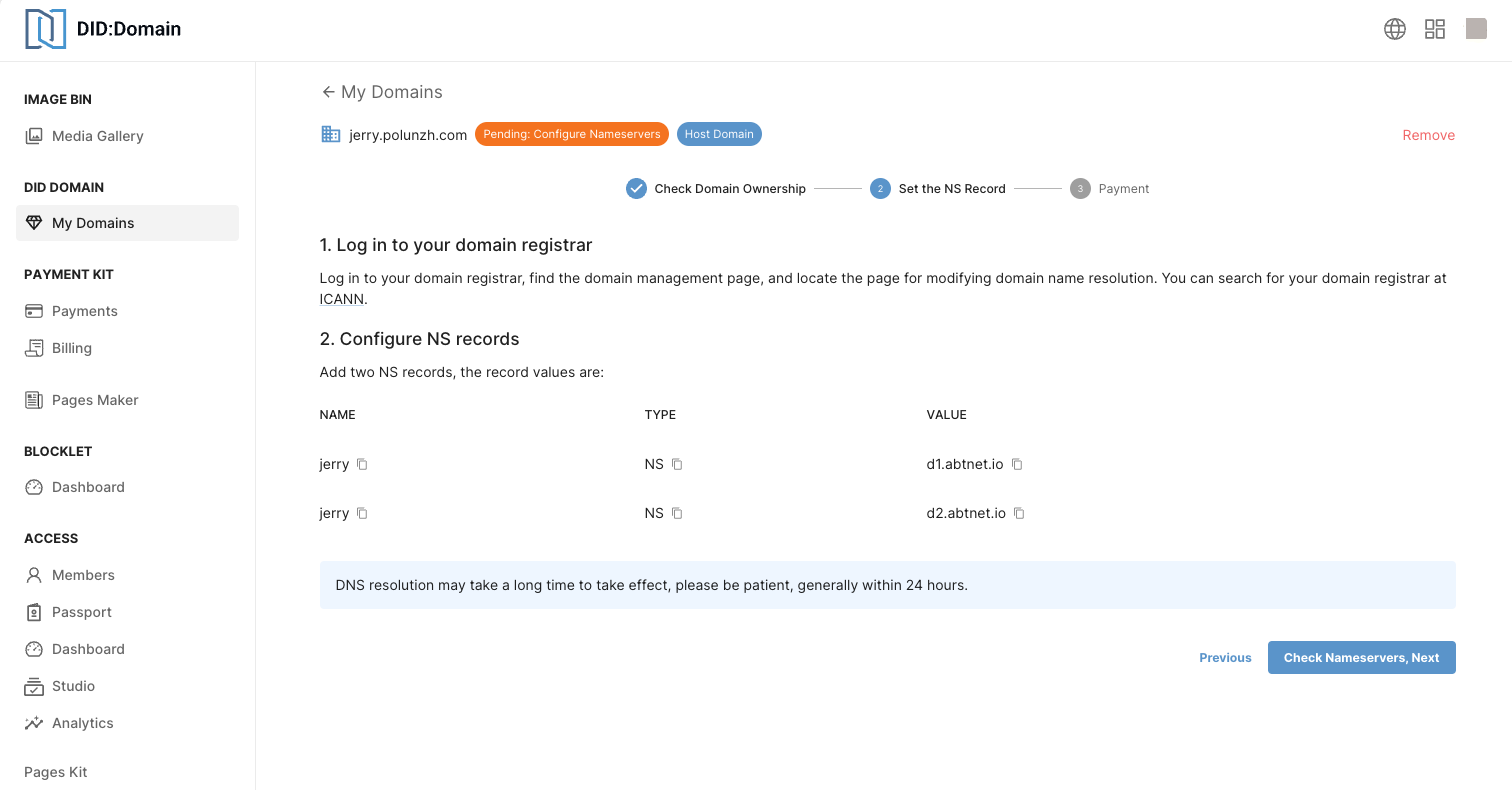
Subdomains need to modify their NS records, and the configuration page provides detailed guidance:
3.2.1 Log in to your domain registrar
Log in to your domain registrar, find the domain management page, and locate the domain resolution modification page. You can search for your domain registrar at ICANN.
3.2.2 Configure NS Records
Add two NS records, with record values specified by the configuration page domain names.
Our documentation guides modifying NS records with certain registrars, and we will continue to add more Guidanceand .
Set NS record in DID Domain:
4. Pay and complete subscription#
At last, you need to pay to complete the subscription. After successful payment, an NFT domain name will be sent to your wallet, and then you can use the domain name on the Blocklet platform through NFT. For details, refer to:
※ The price is subject to the actual payment made.
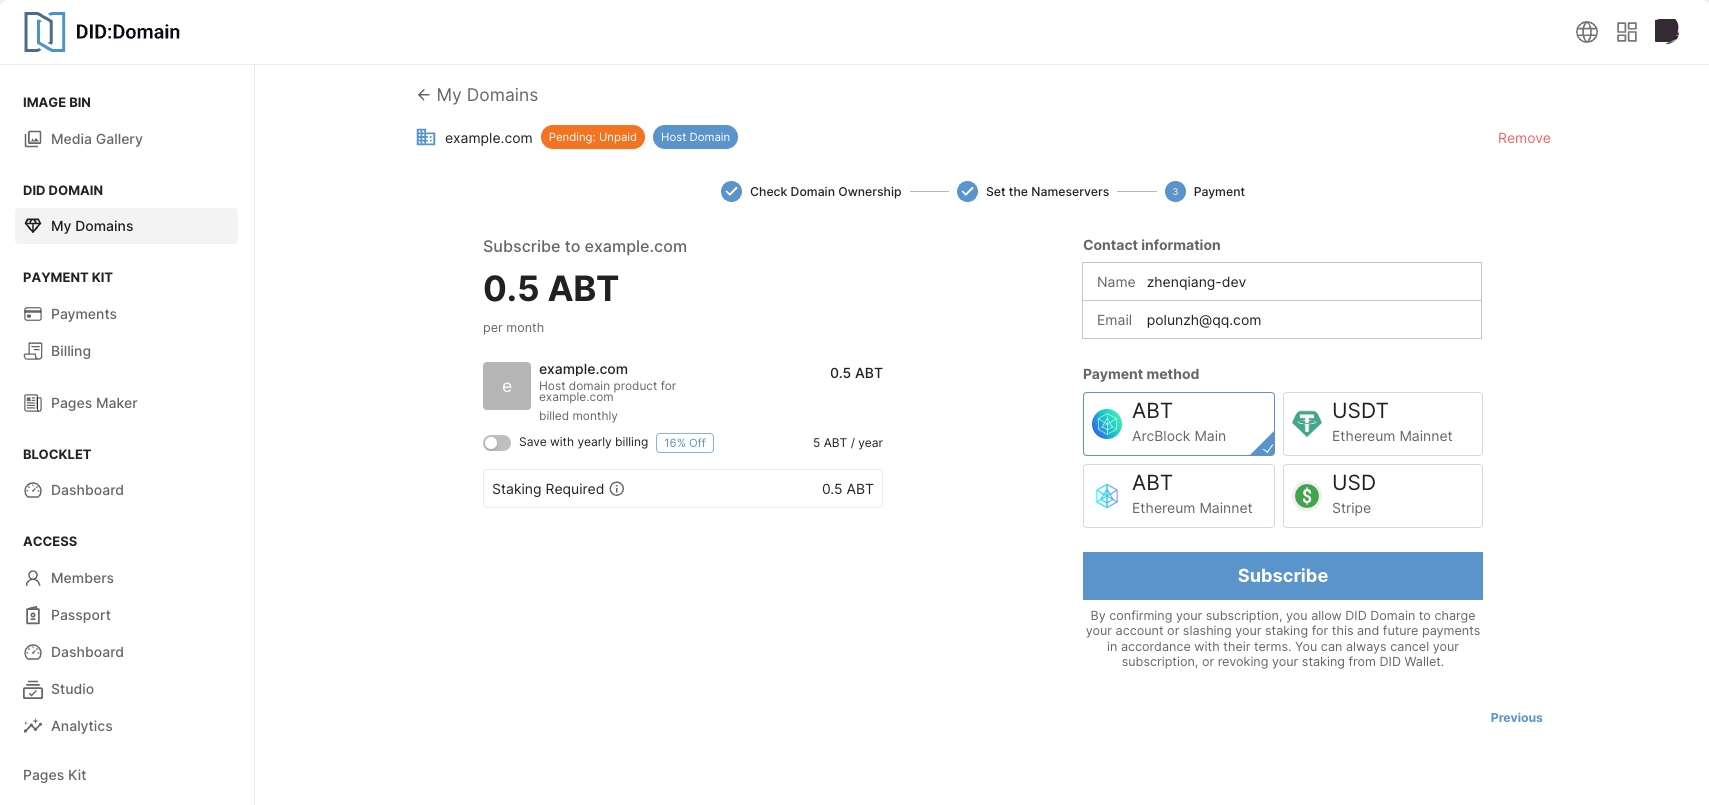
For more detailed tutorials, see the documentation:
Manage DNS Records#
In addition, the hosted domain name also supports the addition and editing of records, with simple and convenient operations:
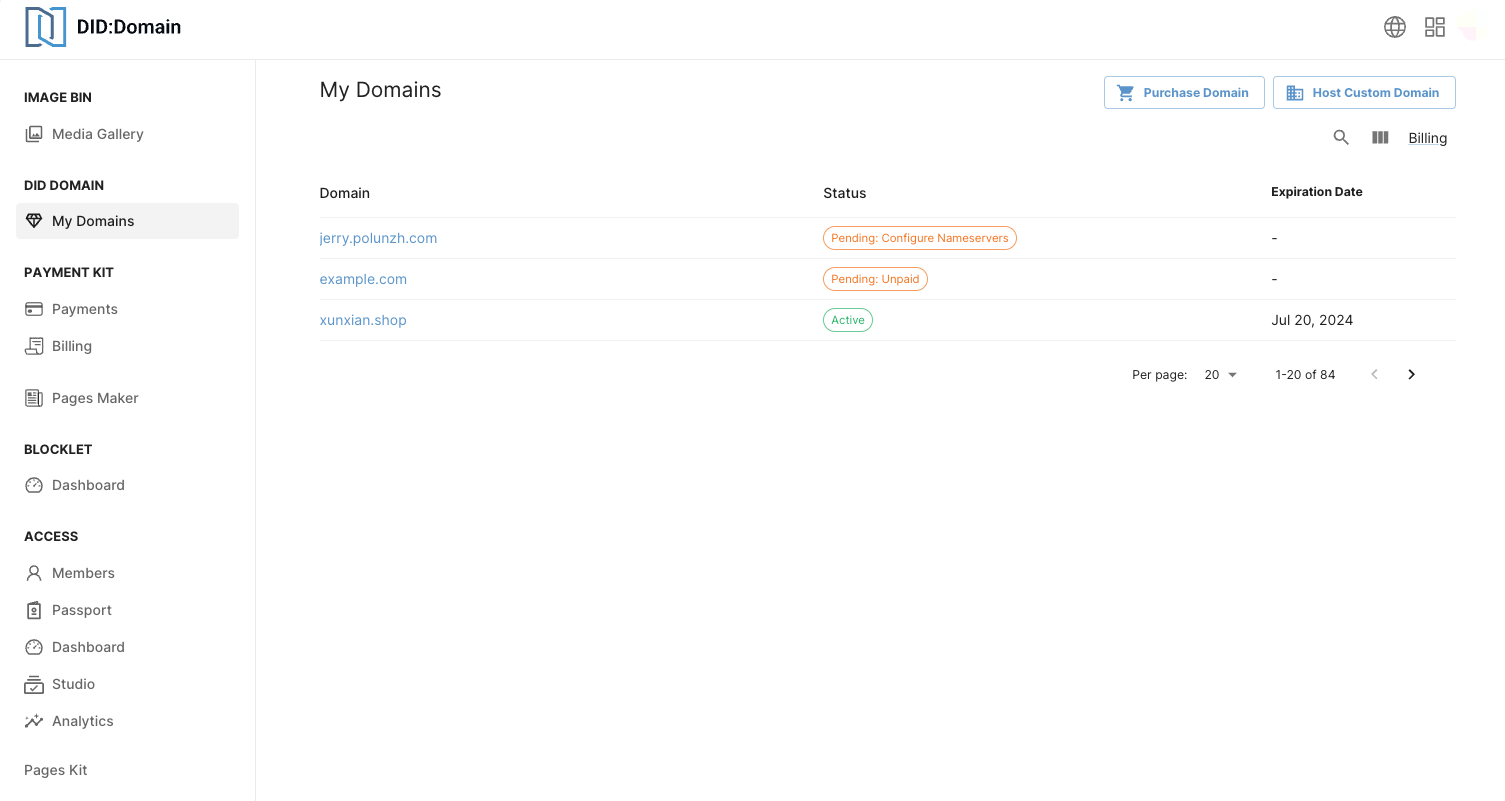
UI: Optimize personal domain list#
- Better display the current domain status, especially when there are multiple processes for managing domains, you can see the current status in the list
- Reduce some redundant information and put some information into the details page
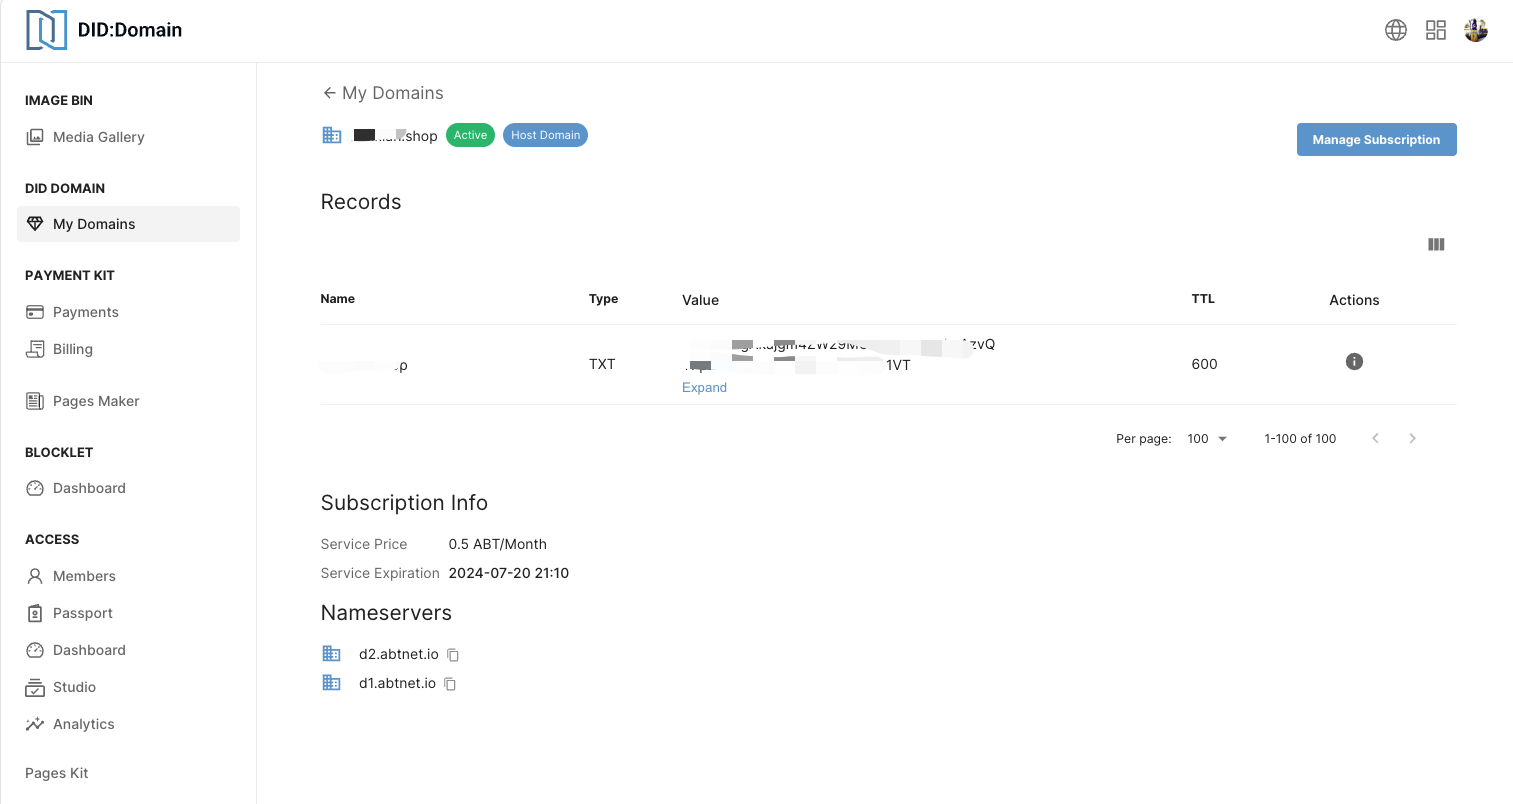
UI: Add domain details page#
Show more information:
- Current status and domain types, domain types include purchasing domains and hosting domains.
- Current DNS record
- Subscription information
- Nameservers (only available in hosted domain names)
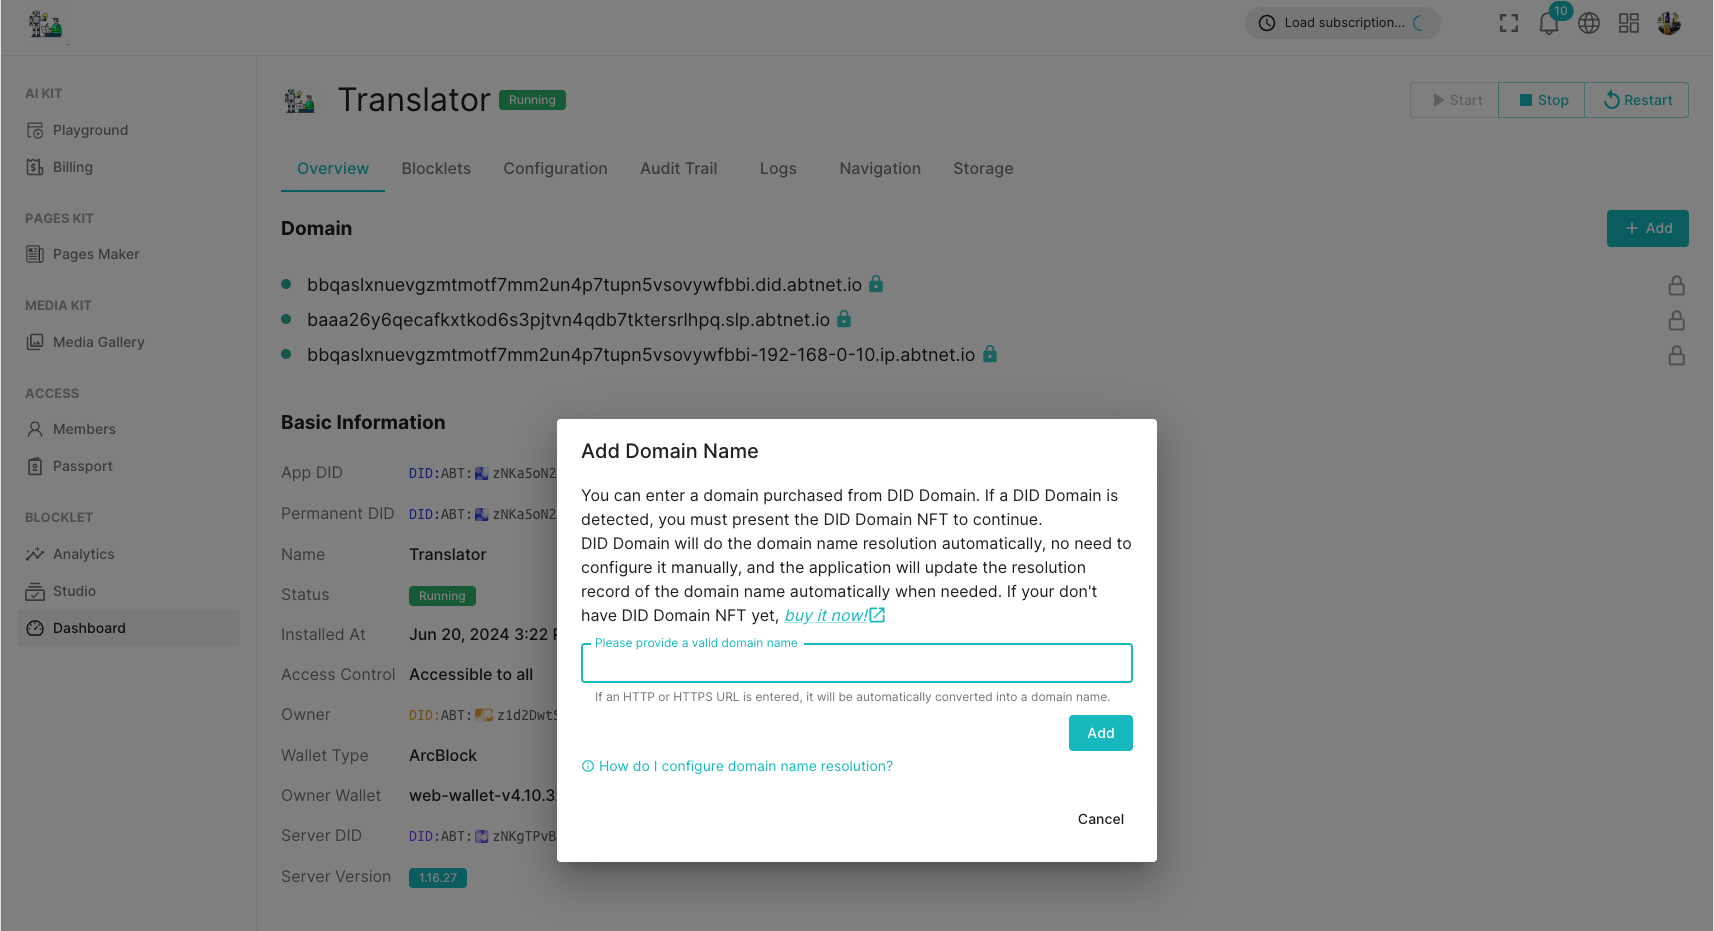
Improve the interaction of adding domain names in Blocklet#
After supporting the management of external domain names, we have improved the way domain names are added in the Blocklet Server: users do not need to determine whether it is an NFT domain name themselves. After entering the domain name, the system will automatically identify the domain name type. If it is an NFT domain name, users will be required to present the NFT for that domain name.
Advantages:
- When you have multiple NFT domains, it's easier to find the specific NFT.
- You don't need to determine the type of domain name to add; just enter the domain name you wish to add.
Help us improve together#
If you have any needs, suggestions, or issues during your usage, you are welcome to visit the ArcBlock Community to provide feedback. We will do our utmost to assist you. Additionally, if your feedback is selected for our Bug Bounty Program, you will receive an ABT reward.
